This flow is for an existing application with a connected repository and a preconfigured cloud provider. If cloud access is not configured, connect a provider before launching the deployment.
1
Request a Preview deployment
When the application is ready to test outside the chat sandbox, click View Preview. If GitHub is not connected, connect it through the GitHub repository integration before continuing. If the repository does not have deployment configuration yet, select Generate 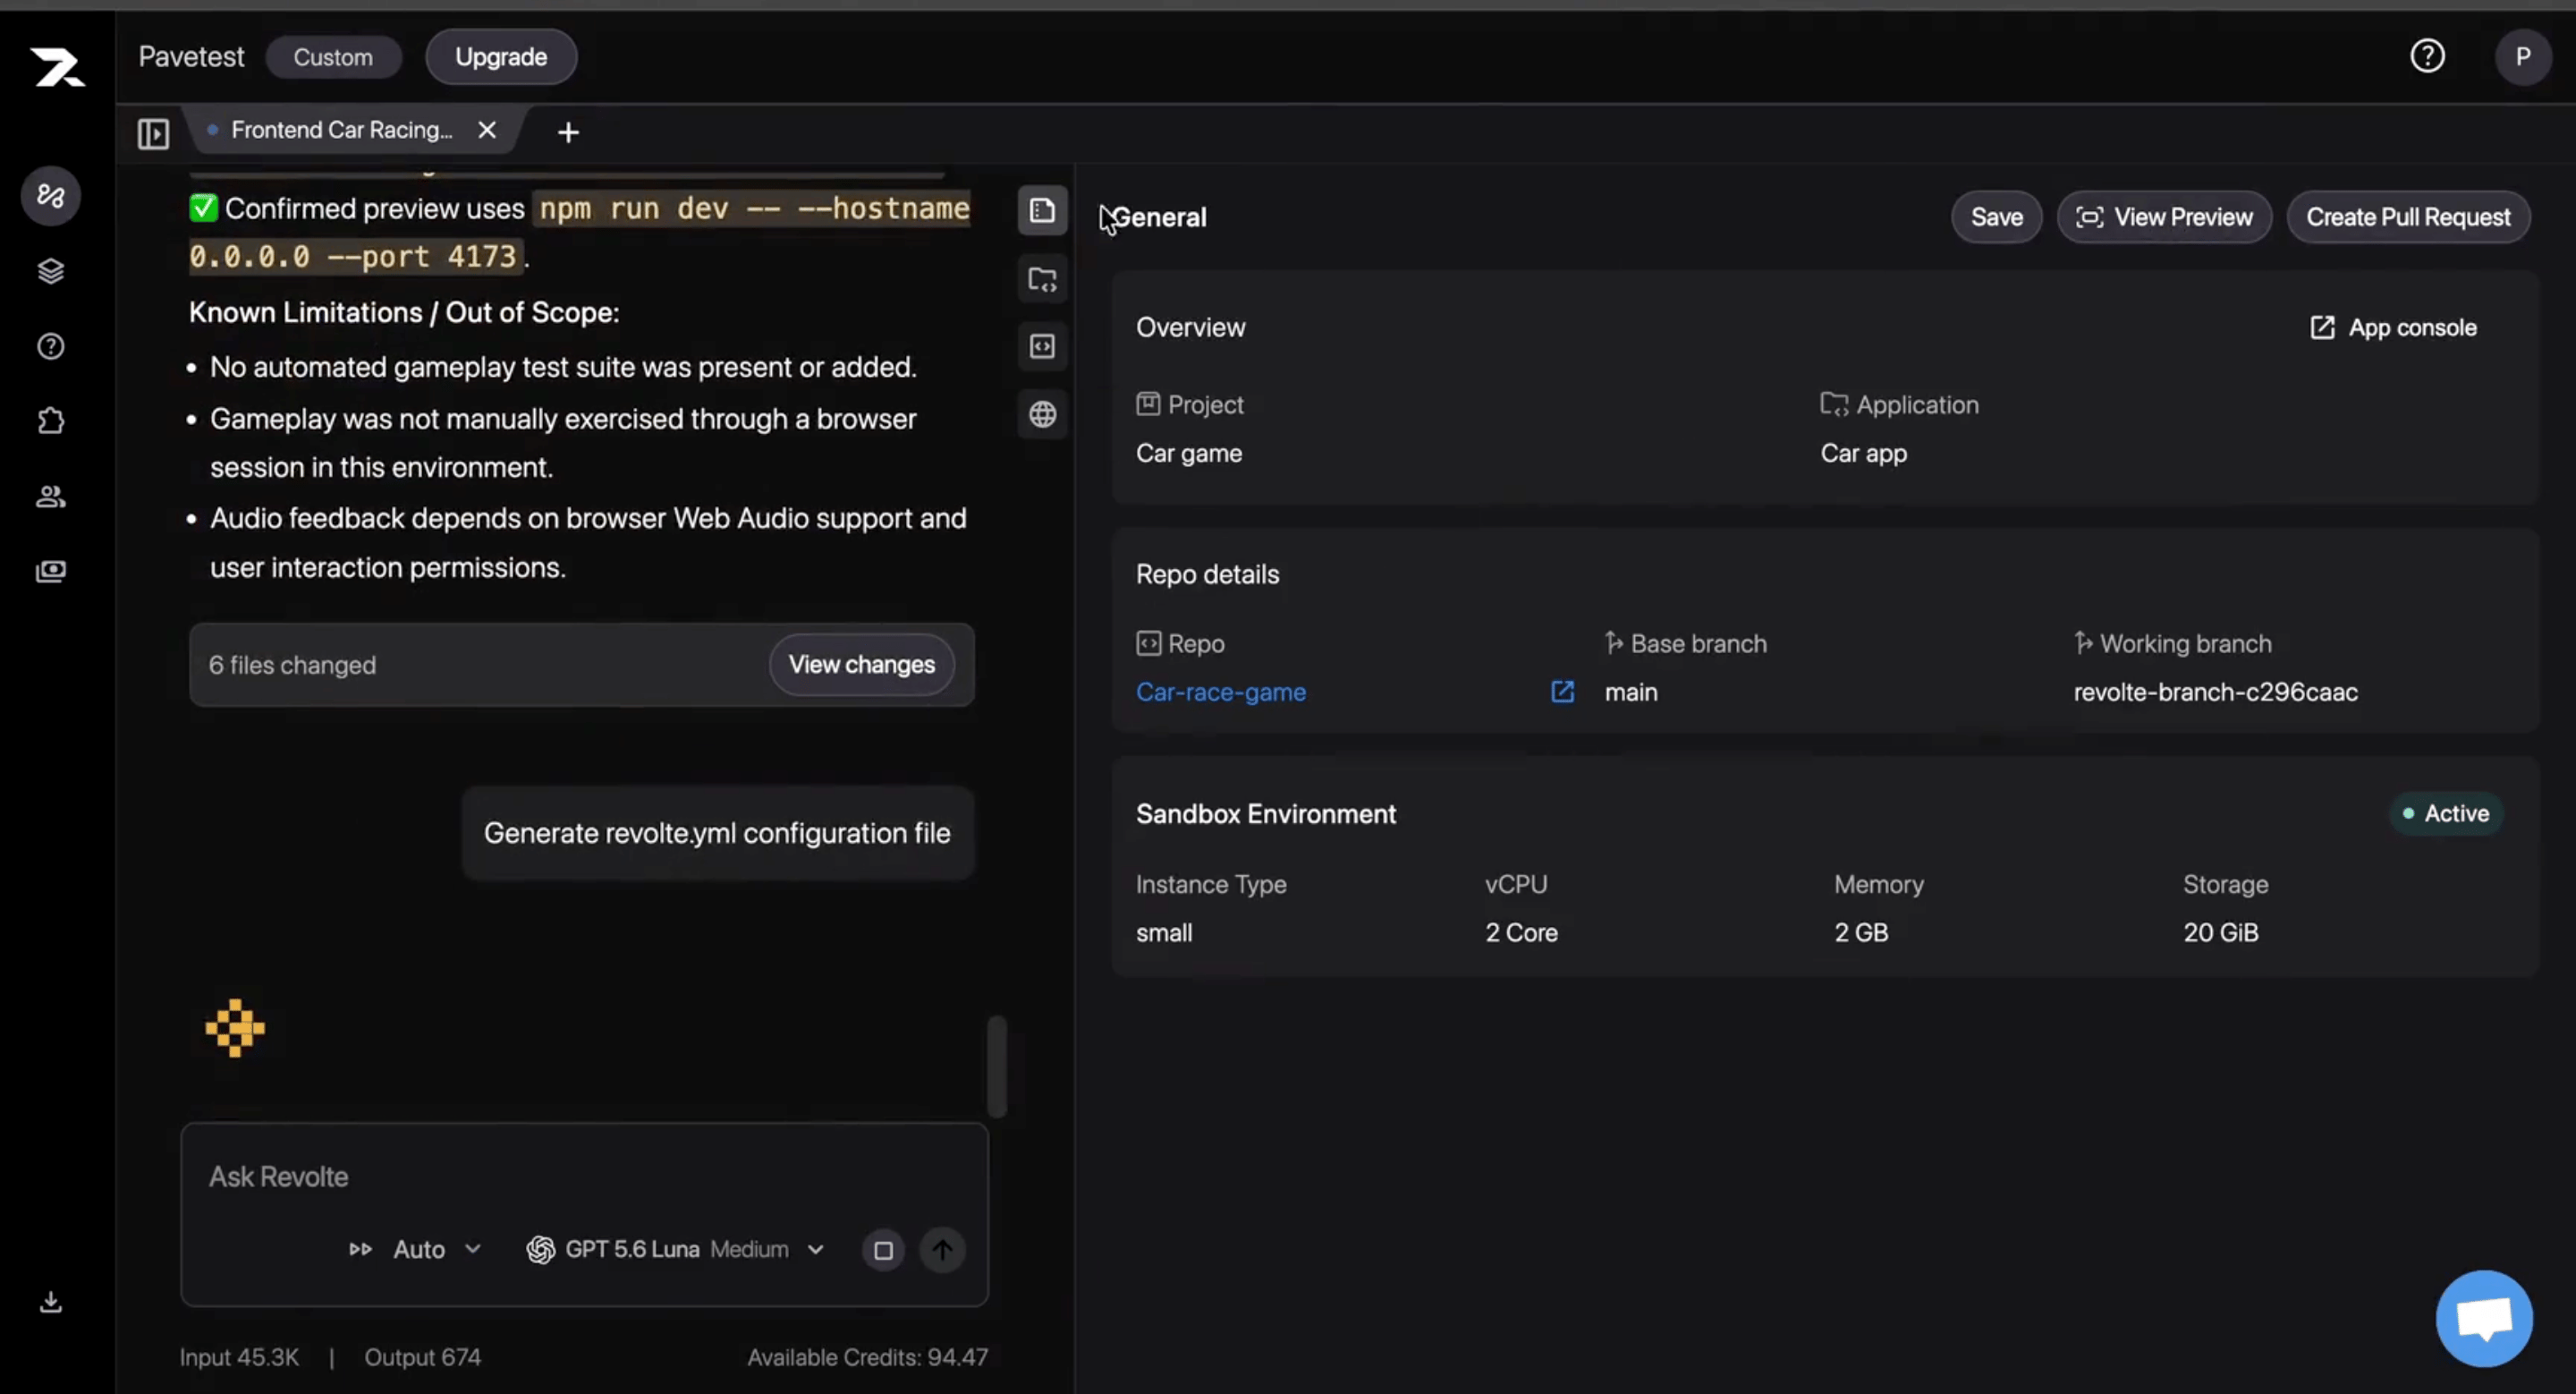
revolte.yml configuration file.2
Review the generated deployment files
Revolte analyzes the application and prepares the files required for deployment. Depending on the application, these can include: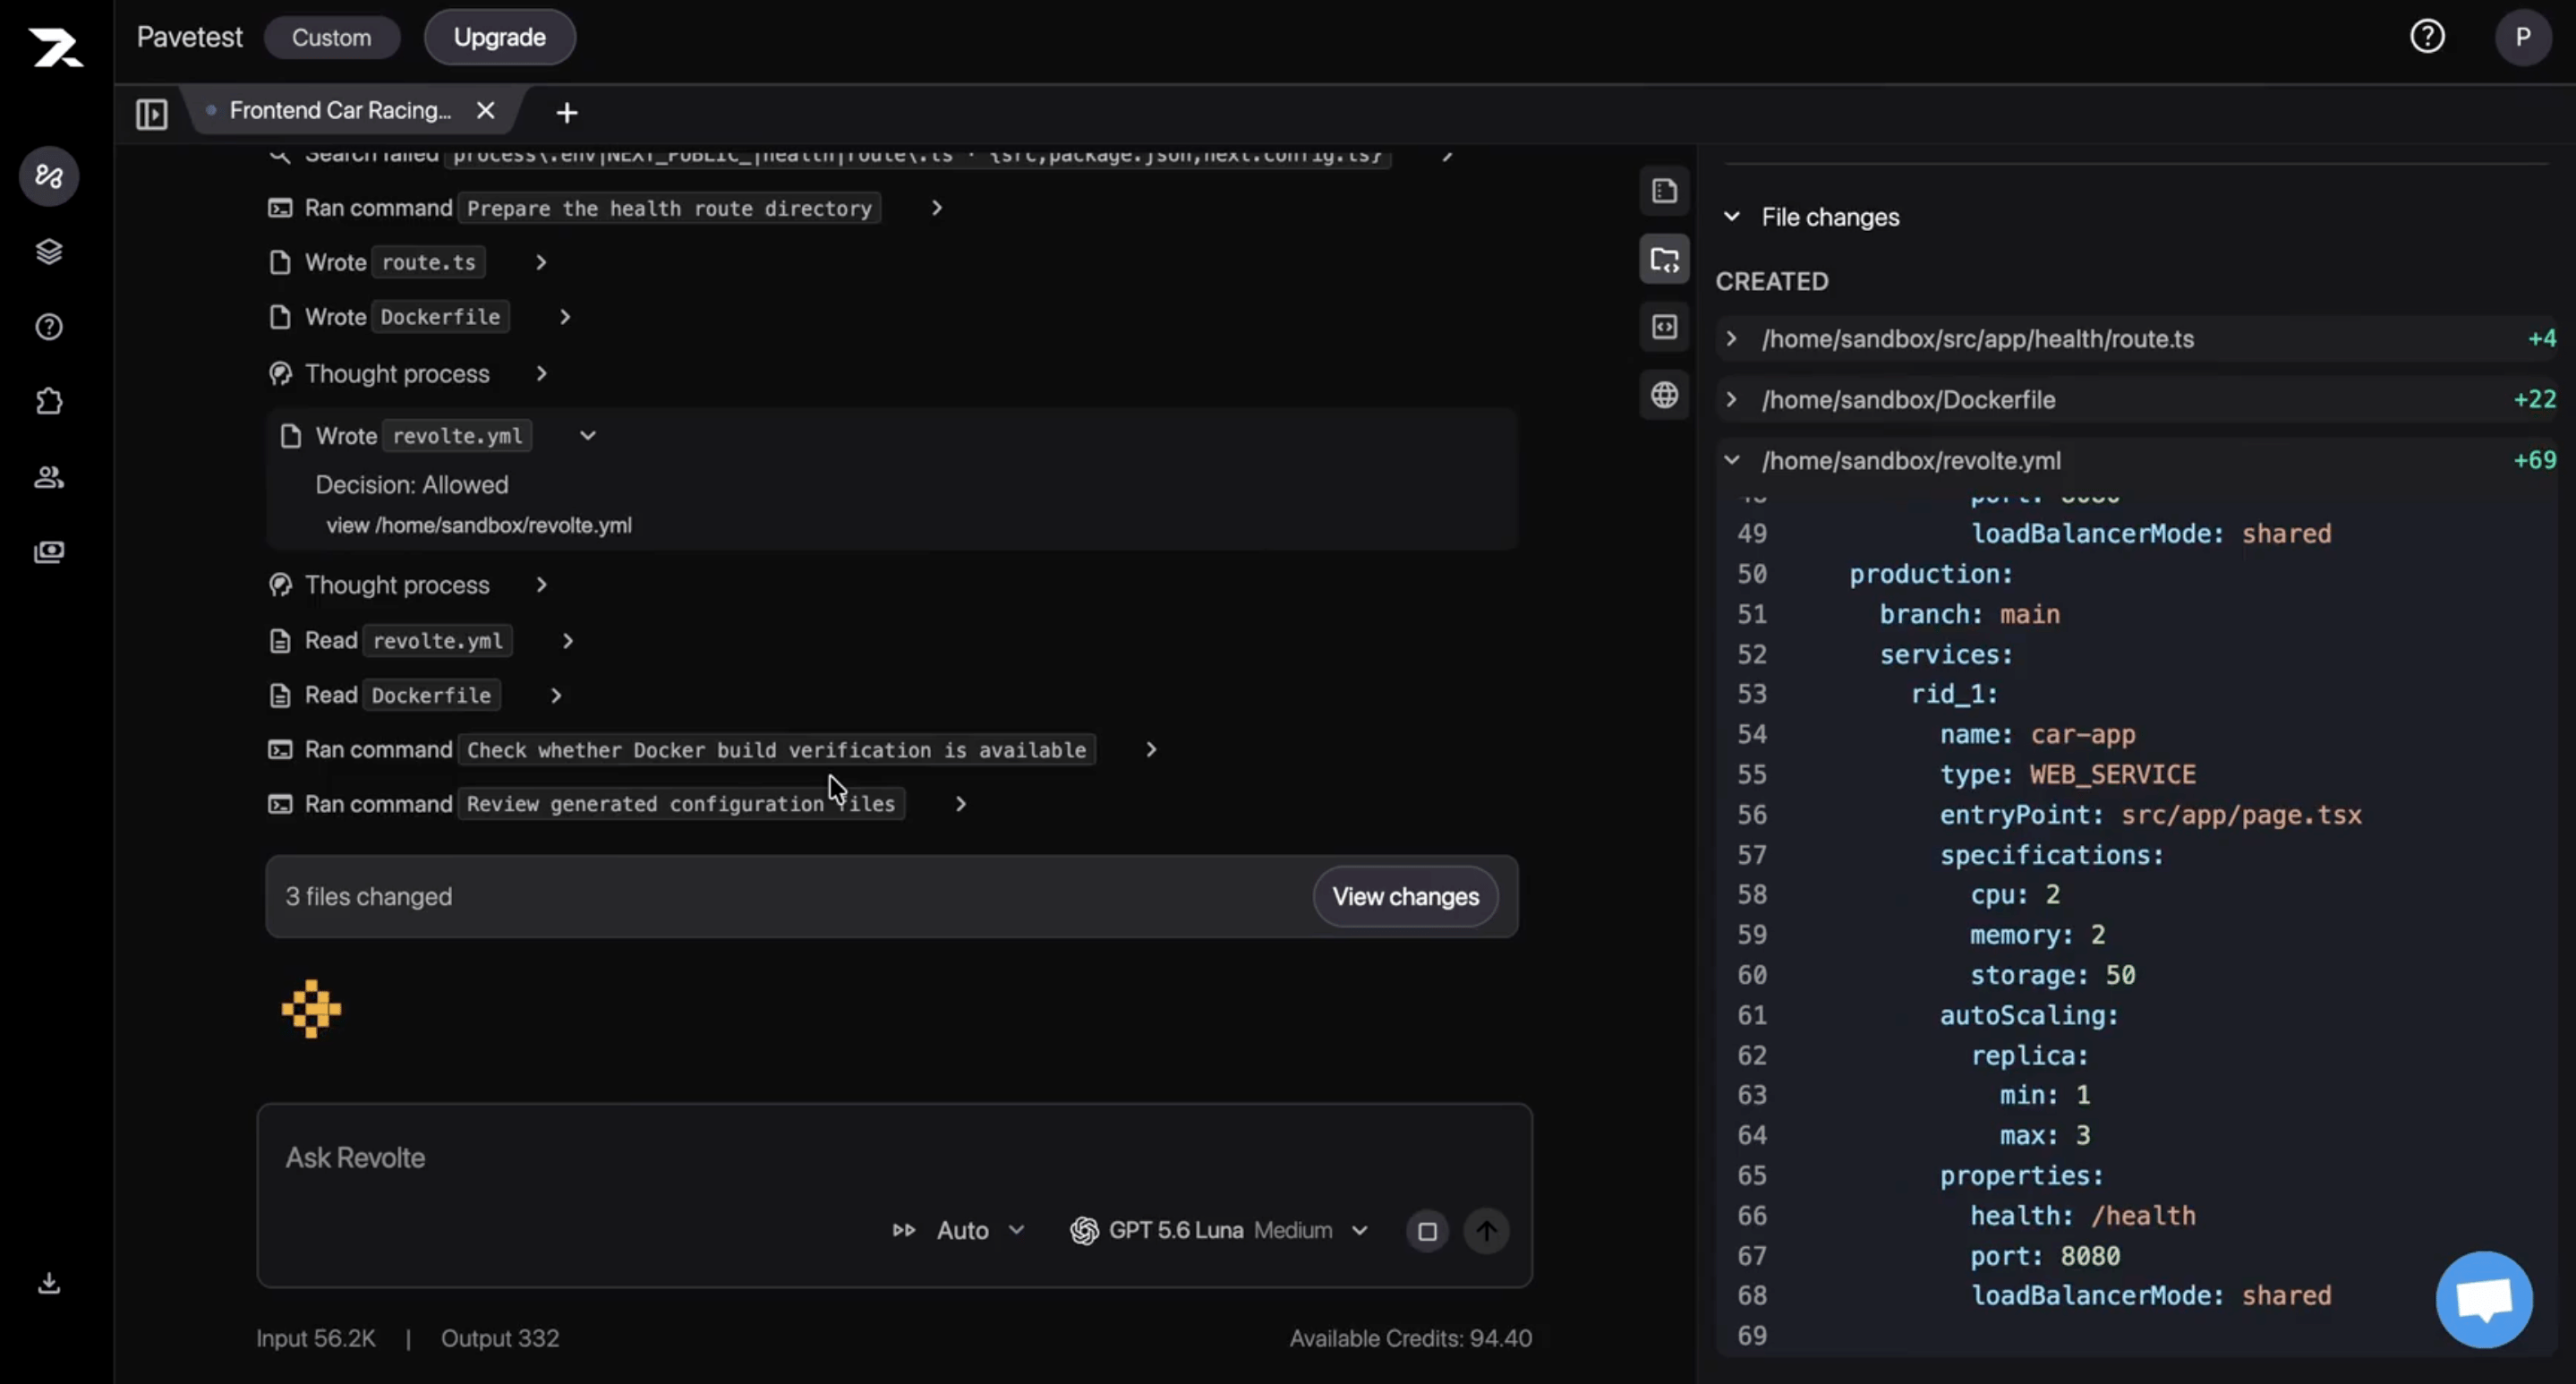
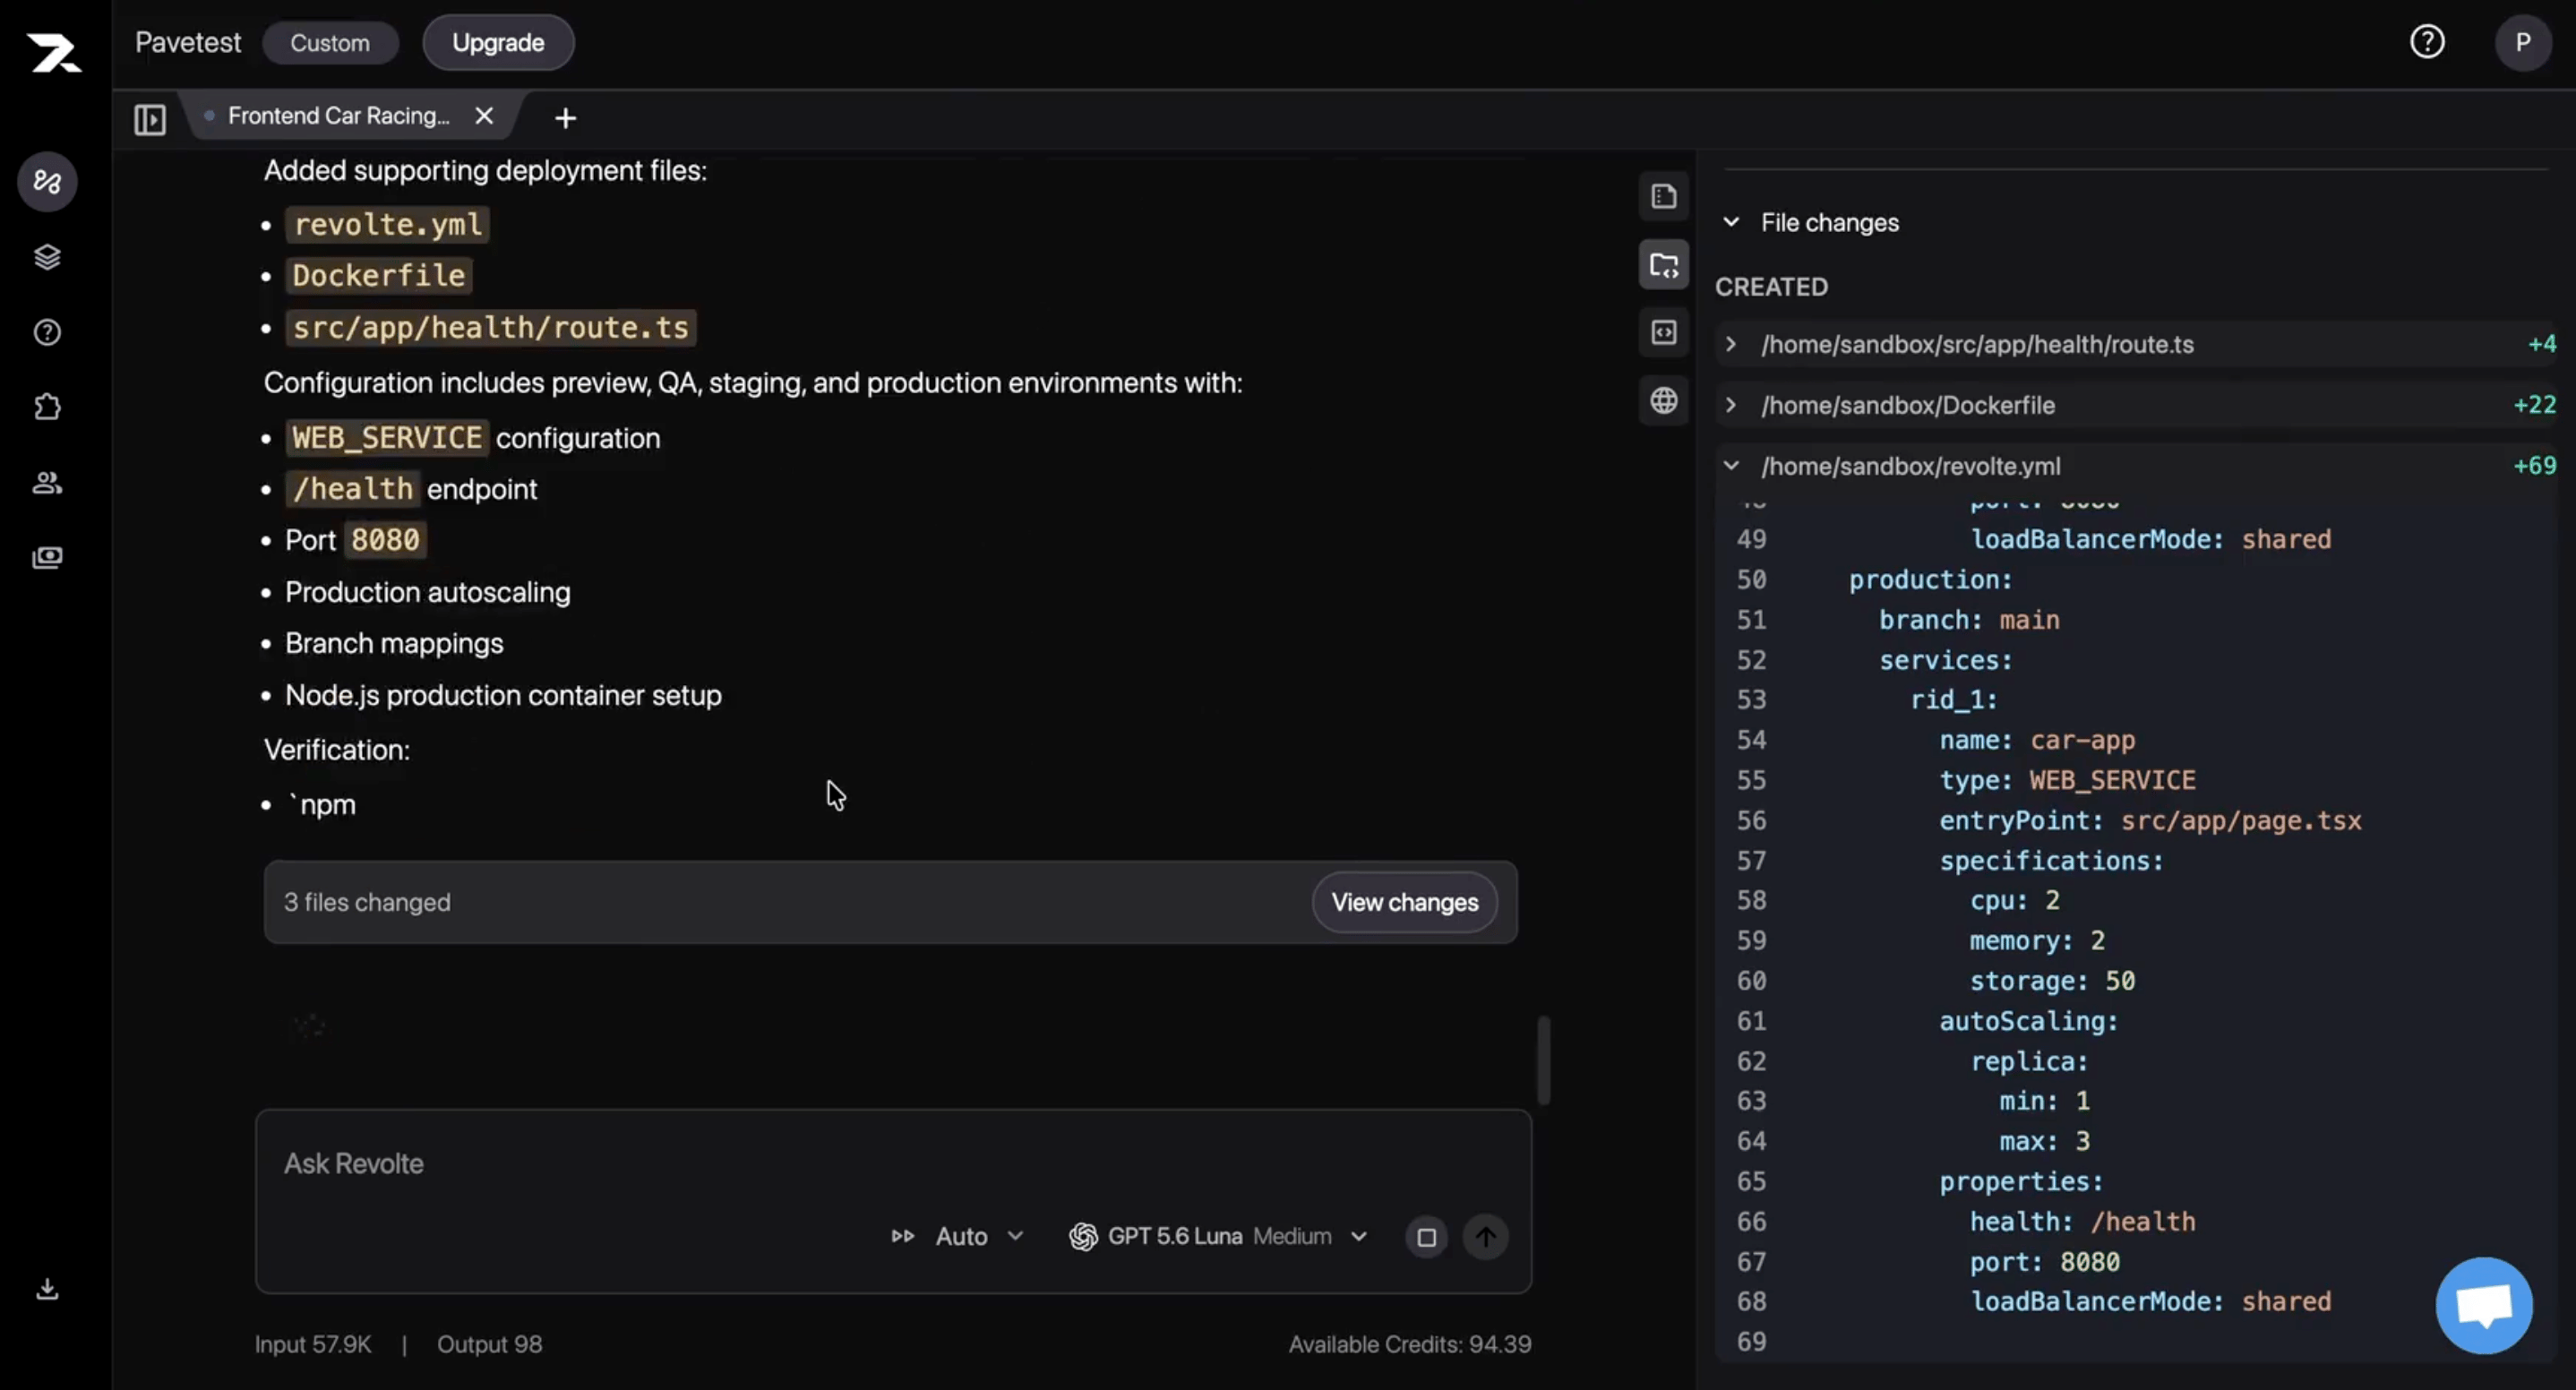
revolte.ymlfor environments, services, resources, branches, and scaling- A
Dockerfilefor the production runtime - A health-check endpoint used during deployment
3
Create the project and application if needed
If the project or application does not already exist, create them as new before continuing. This ensures the Preview deployment is associated with the correct workspace and app configuration.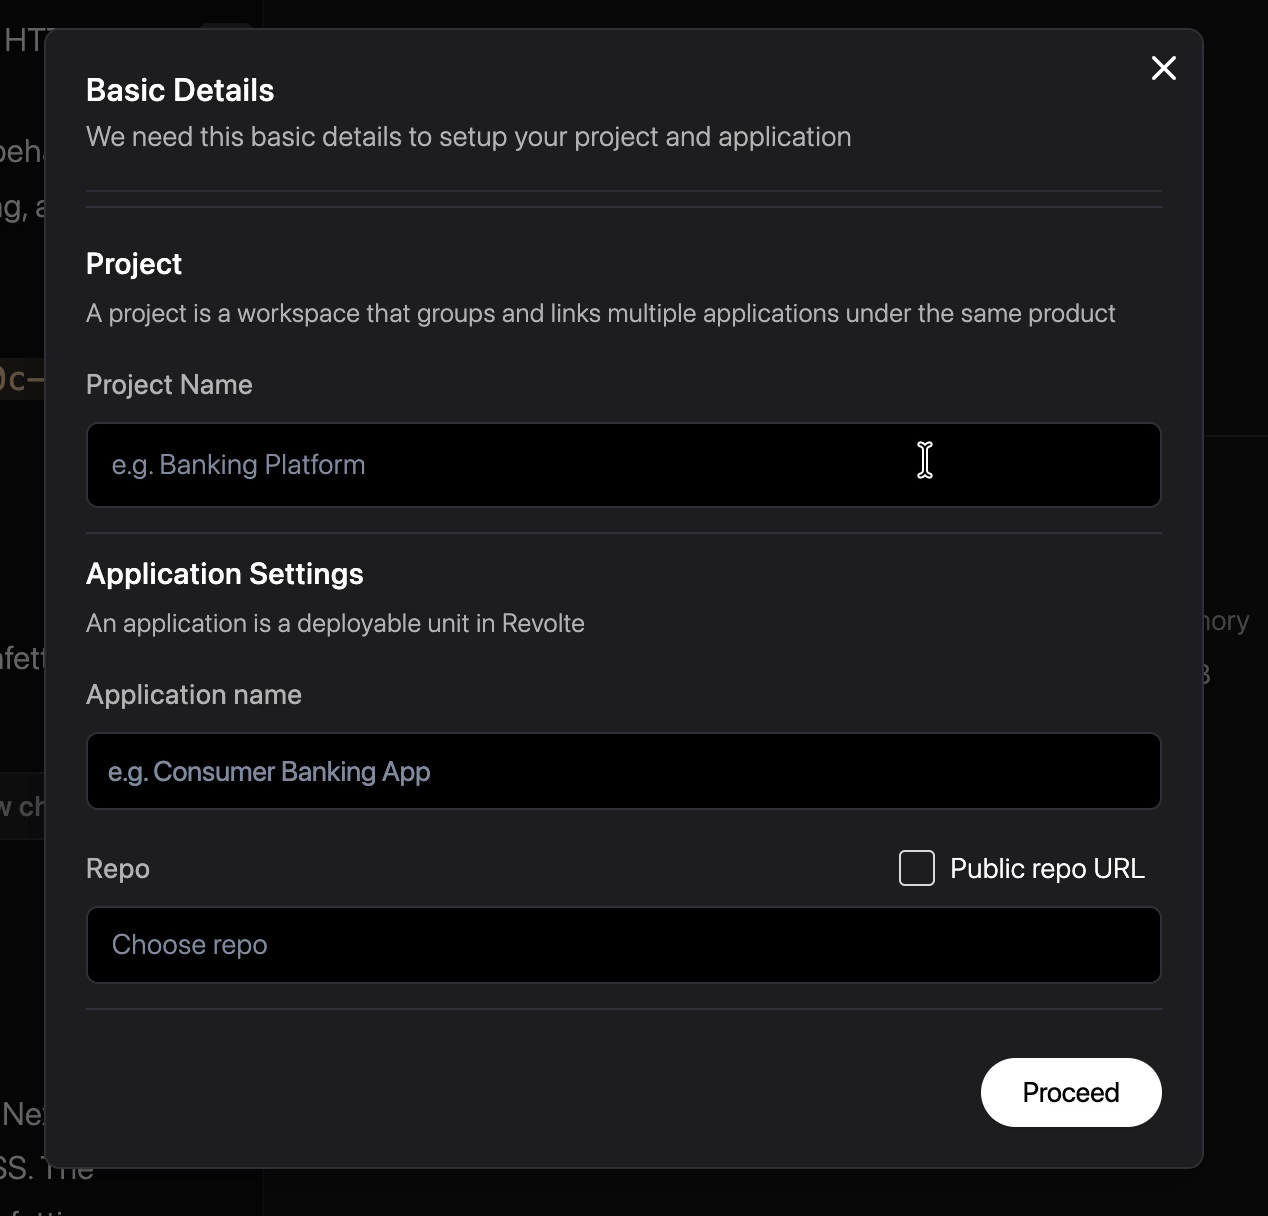
4
Commit the deployment configuration
Click View Preview again. If the generated files are still uncommitted, enter a commit message and click Proceed to commit and push them to the working branch.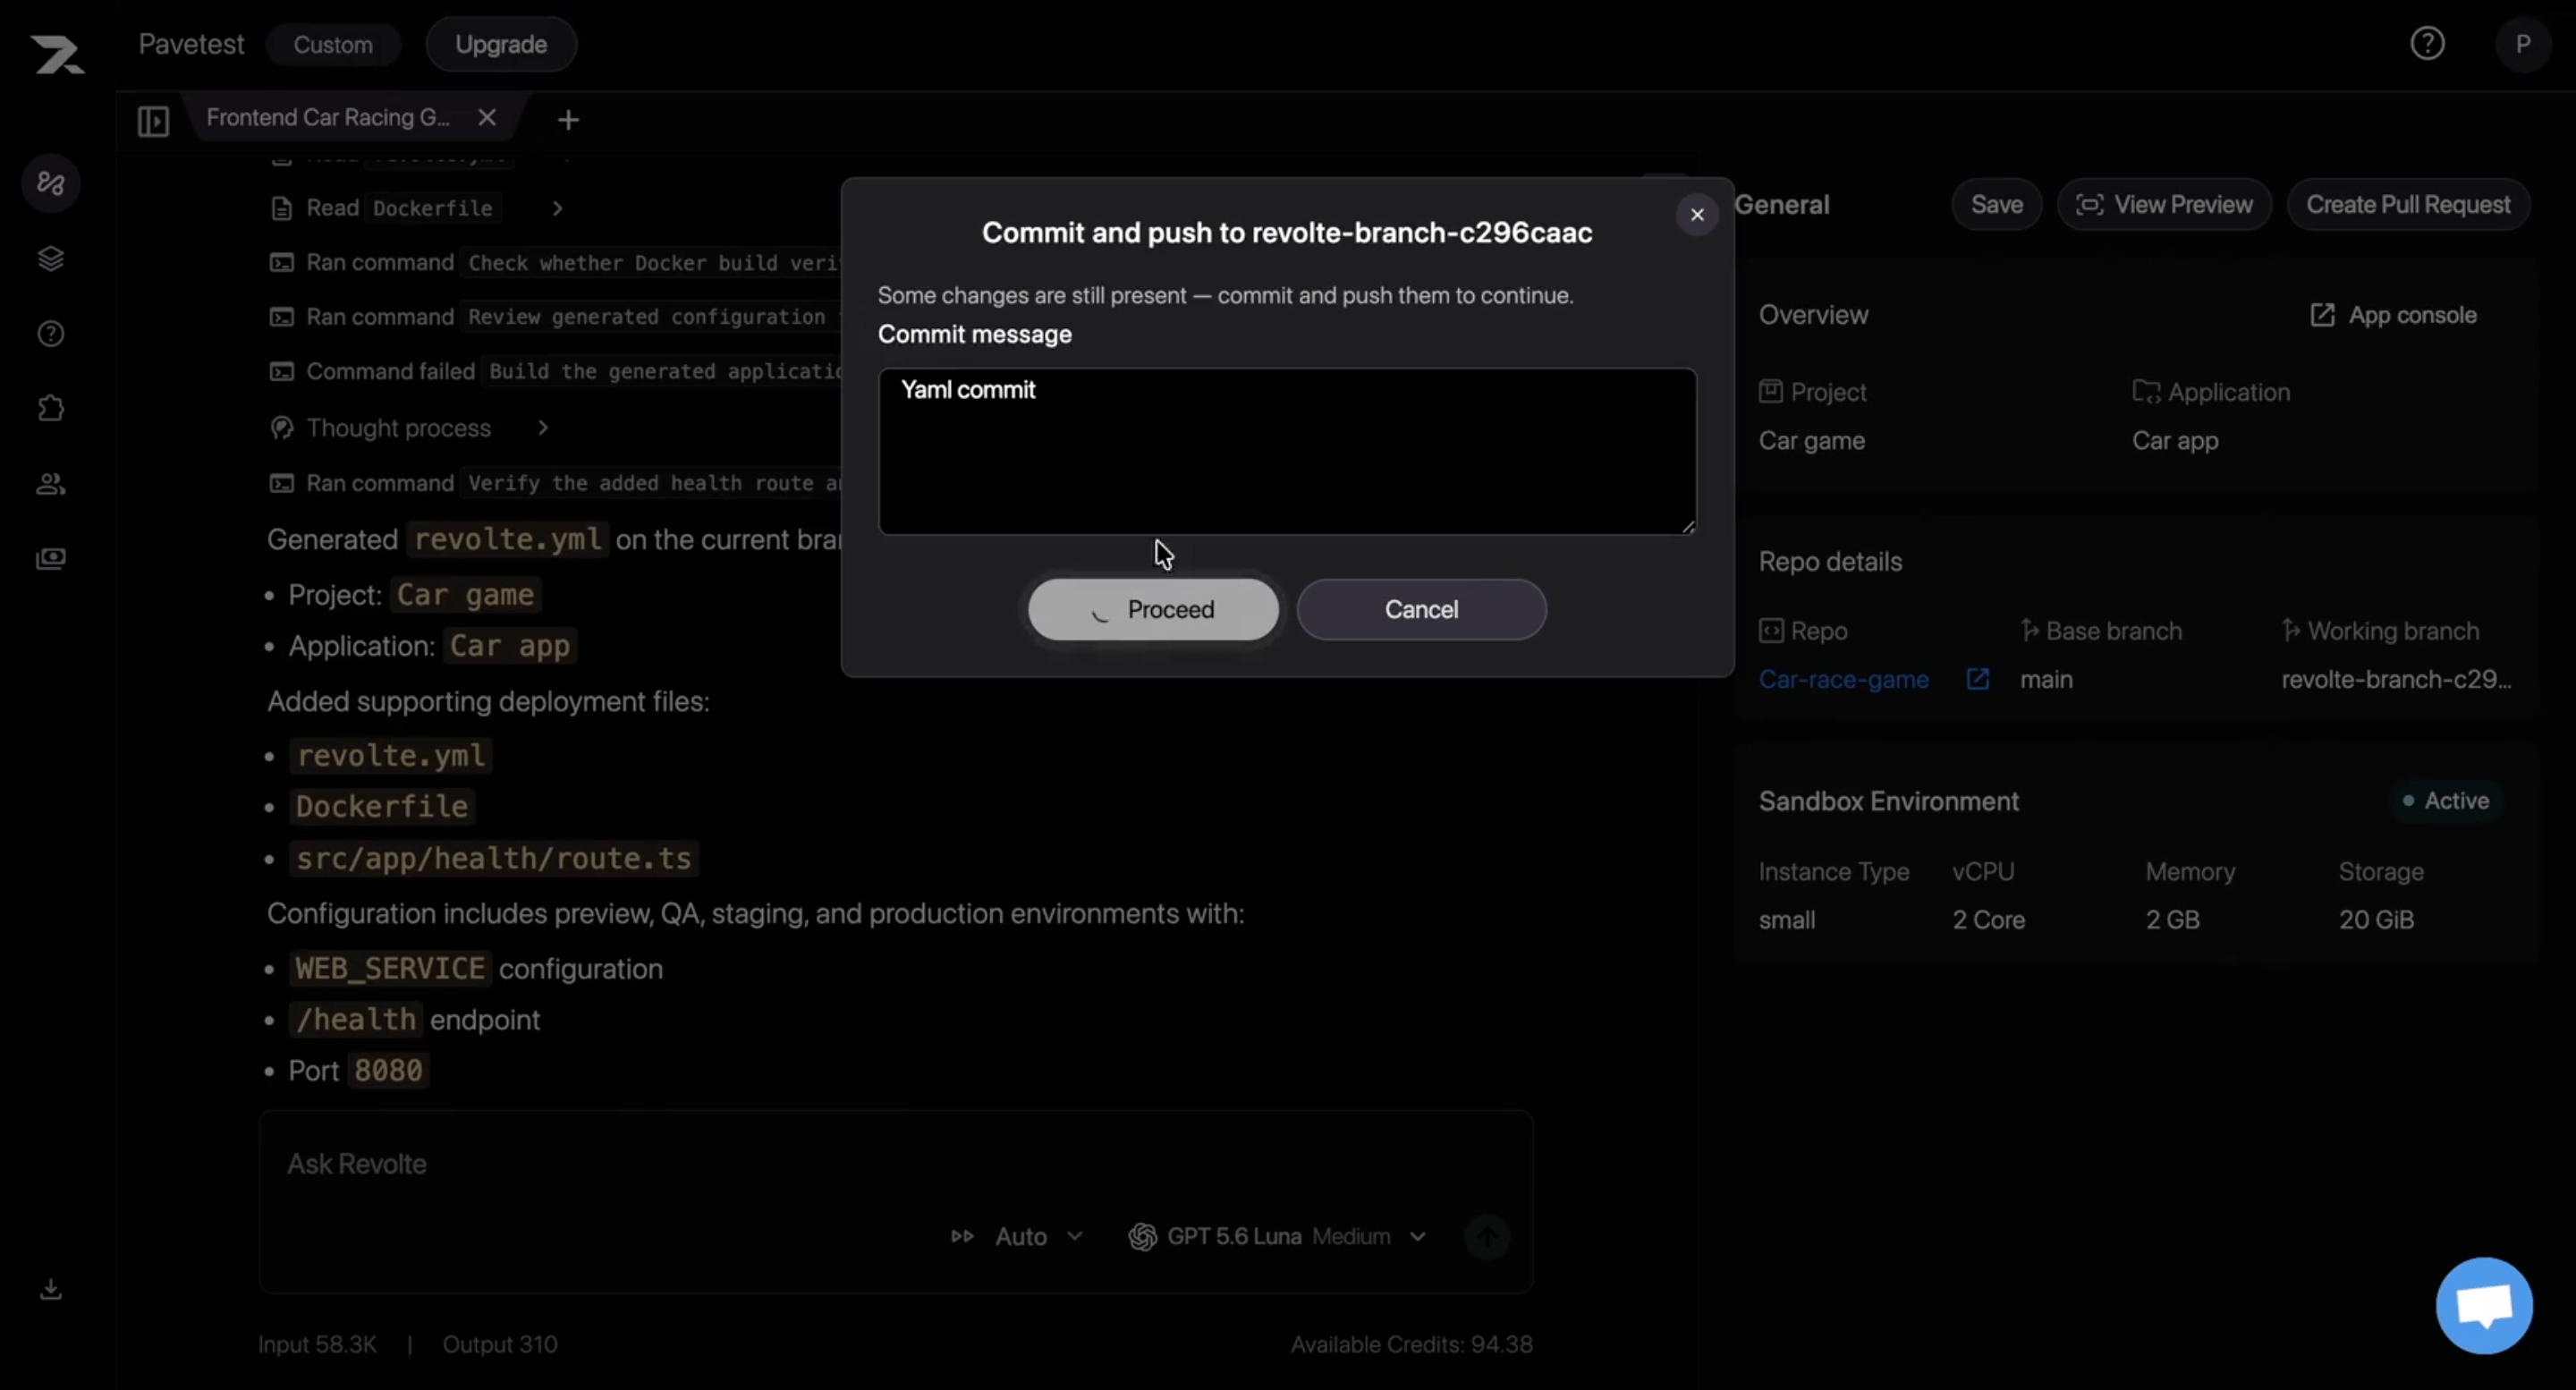
5
Select the cloud infrastructure
Choose the cloud provider and target infrastructure for the Preview environment before you launch it. Revolte uses this selection to provision the correct resources and runtime settings for your application.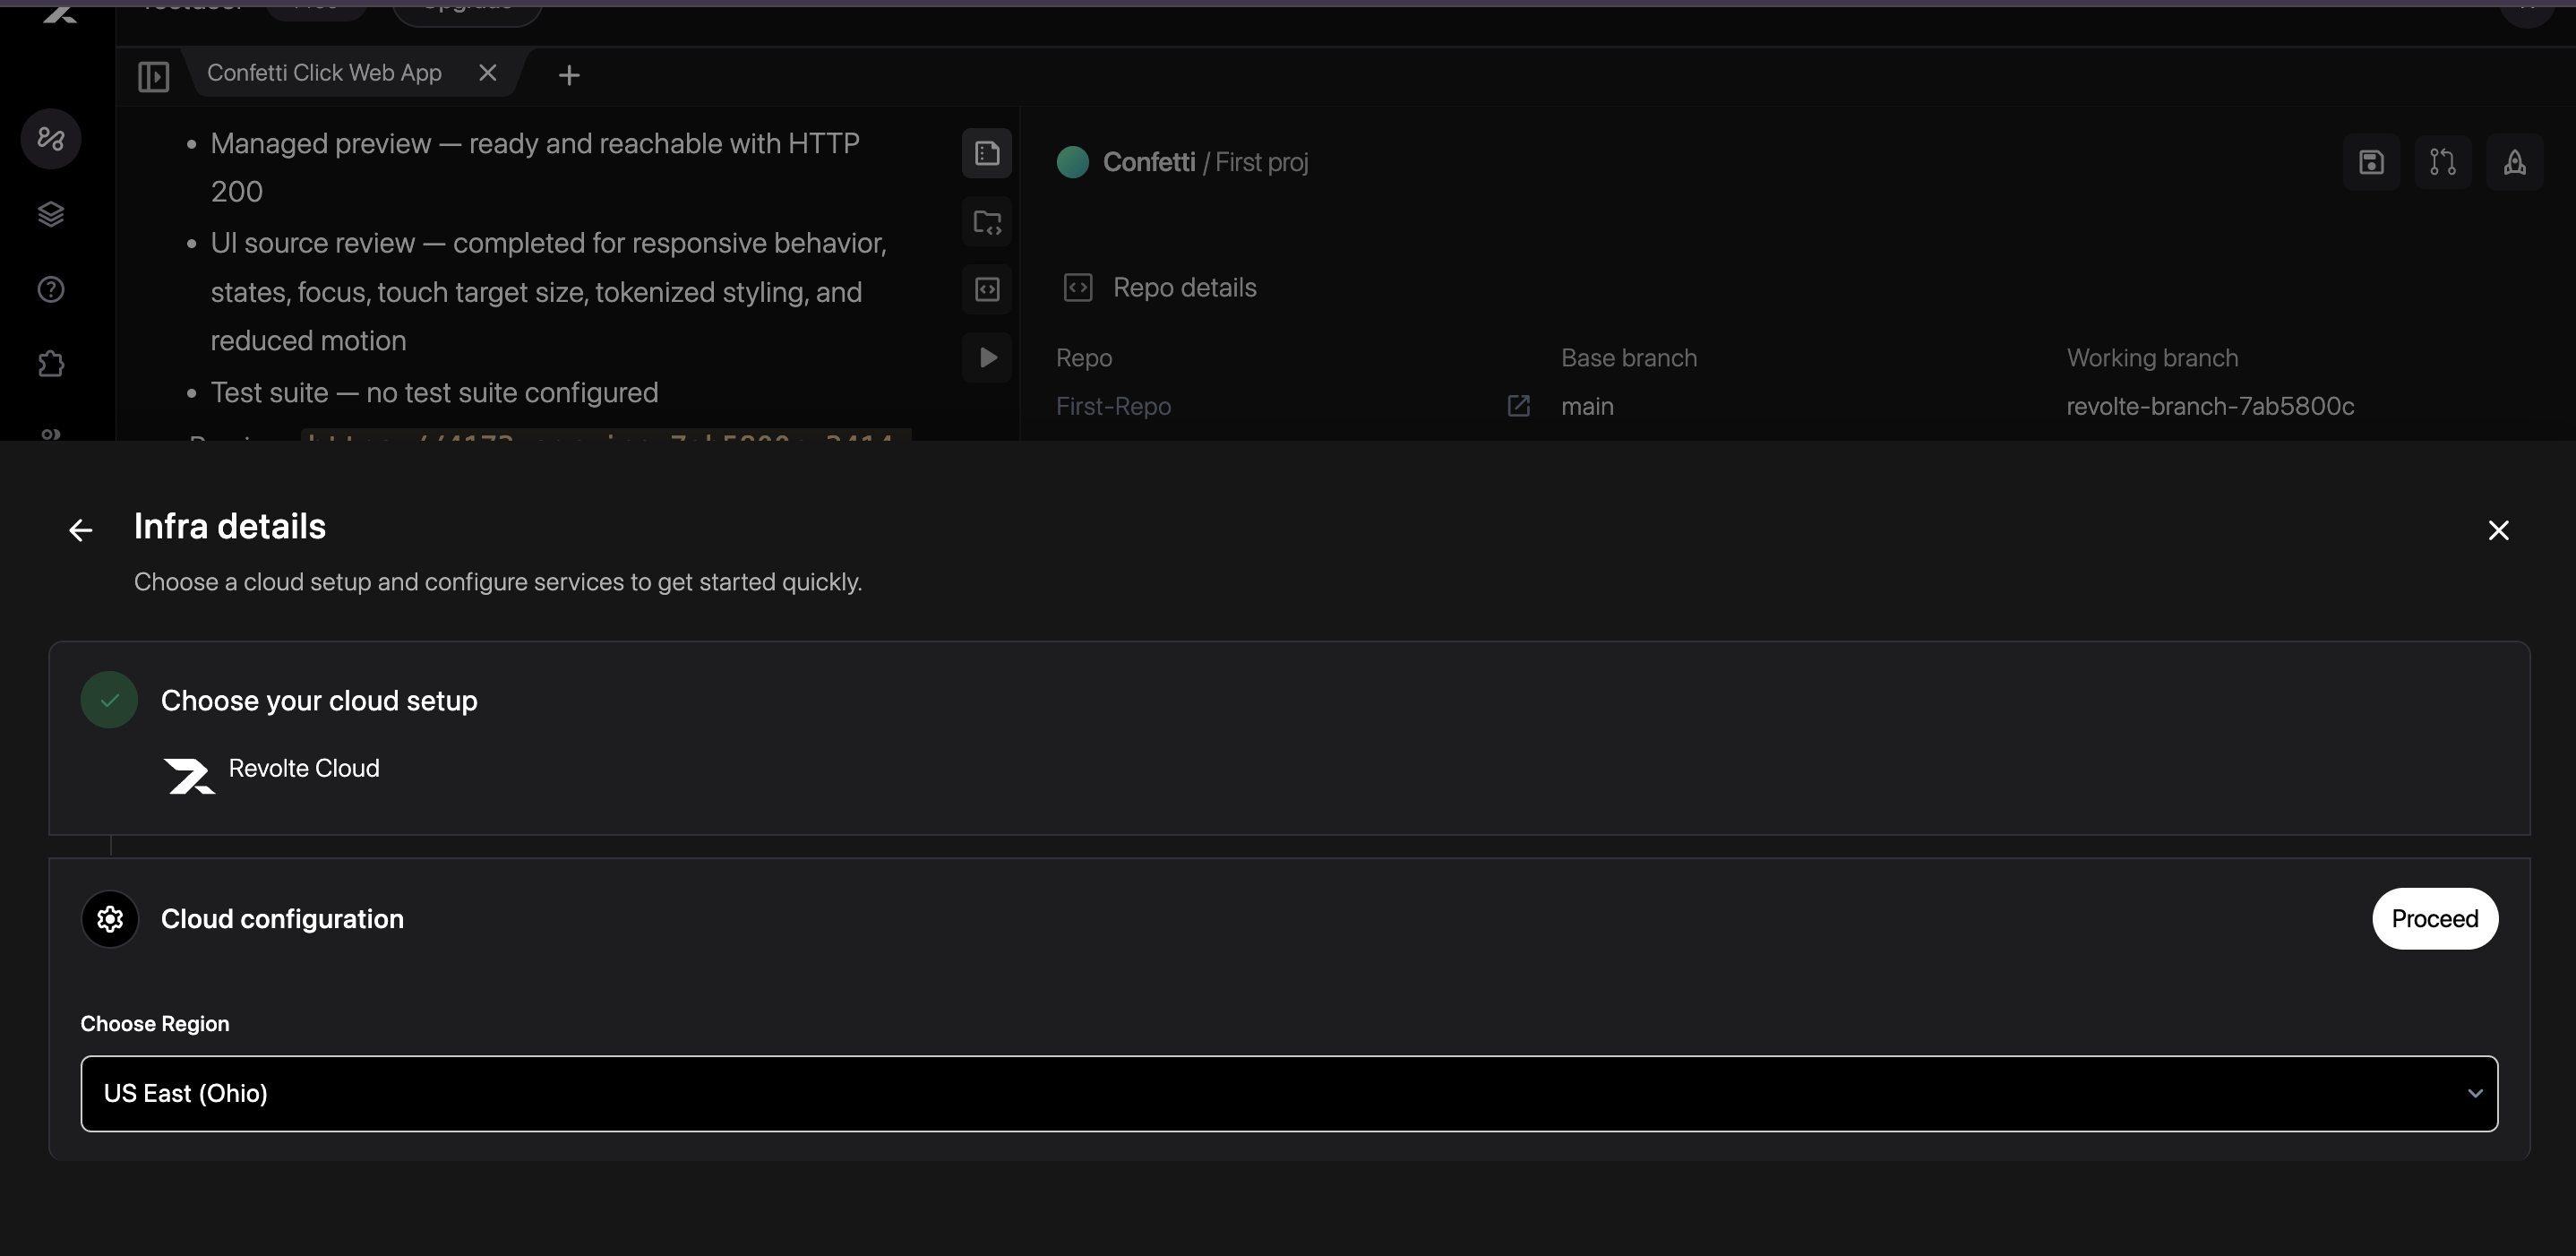
6
Review the YAML and launch Preview
Revolte opens the application’s deployment configuration page. Review the Preview environment in 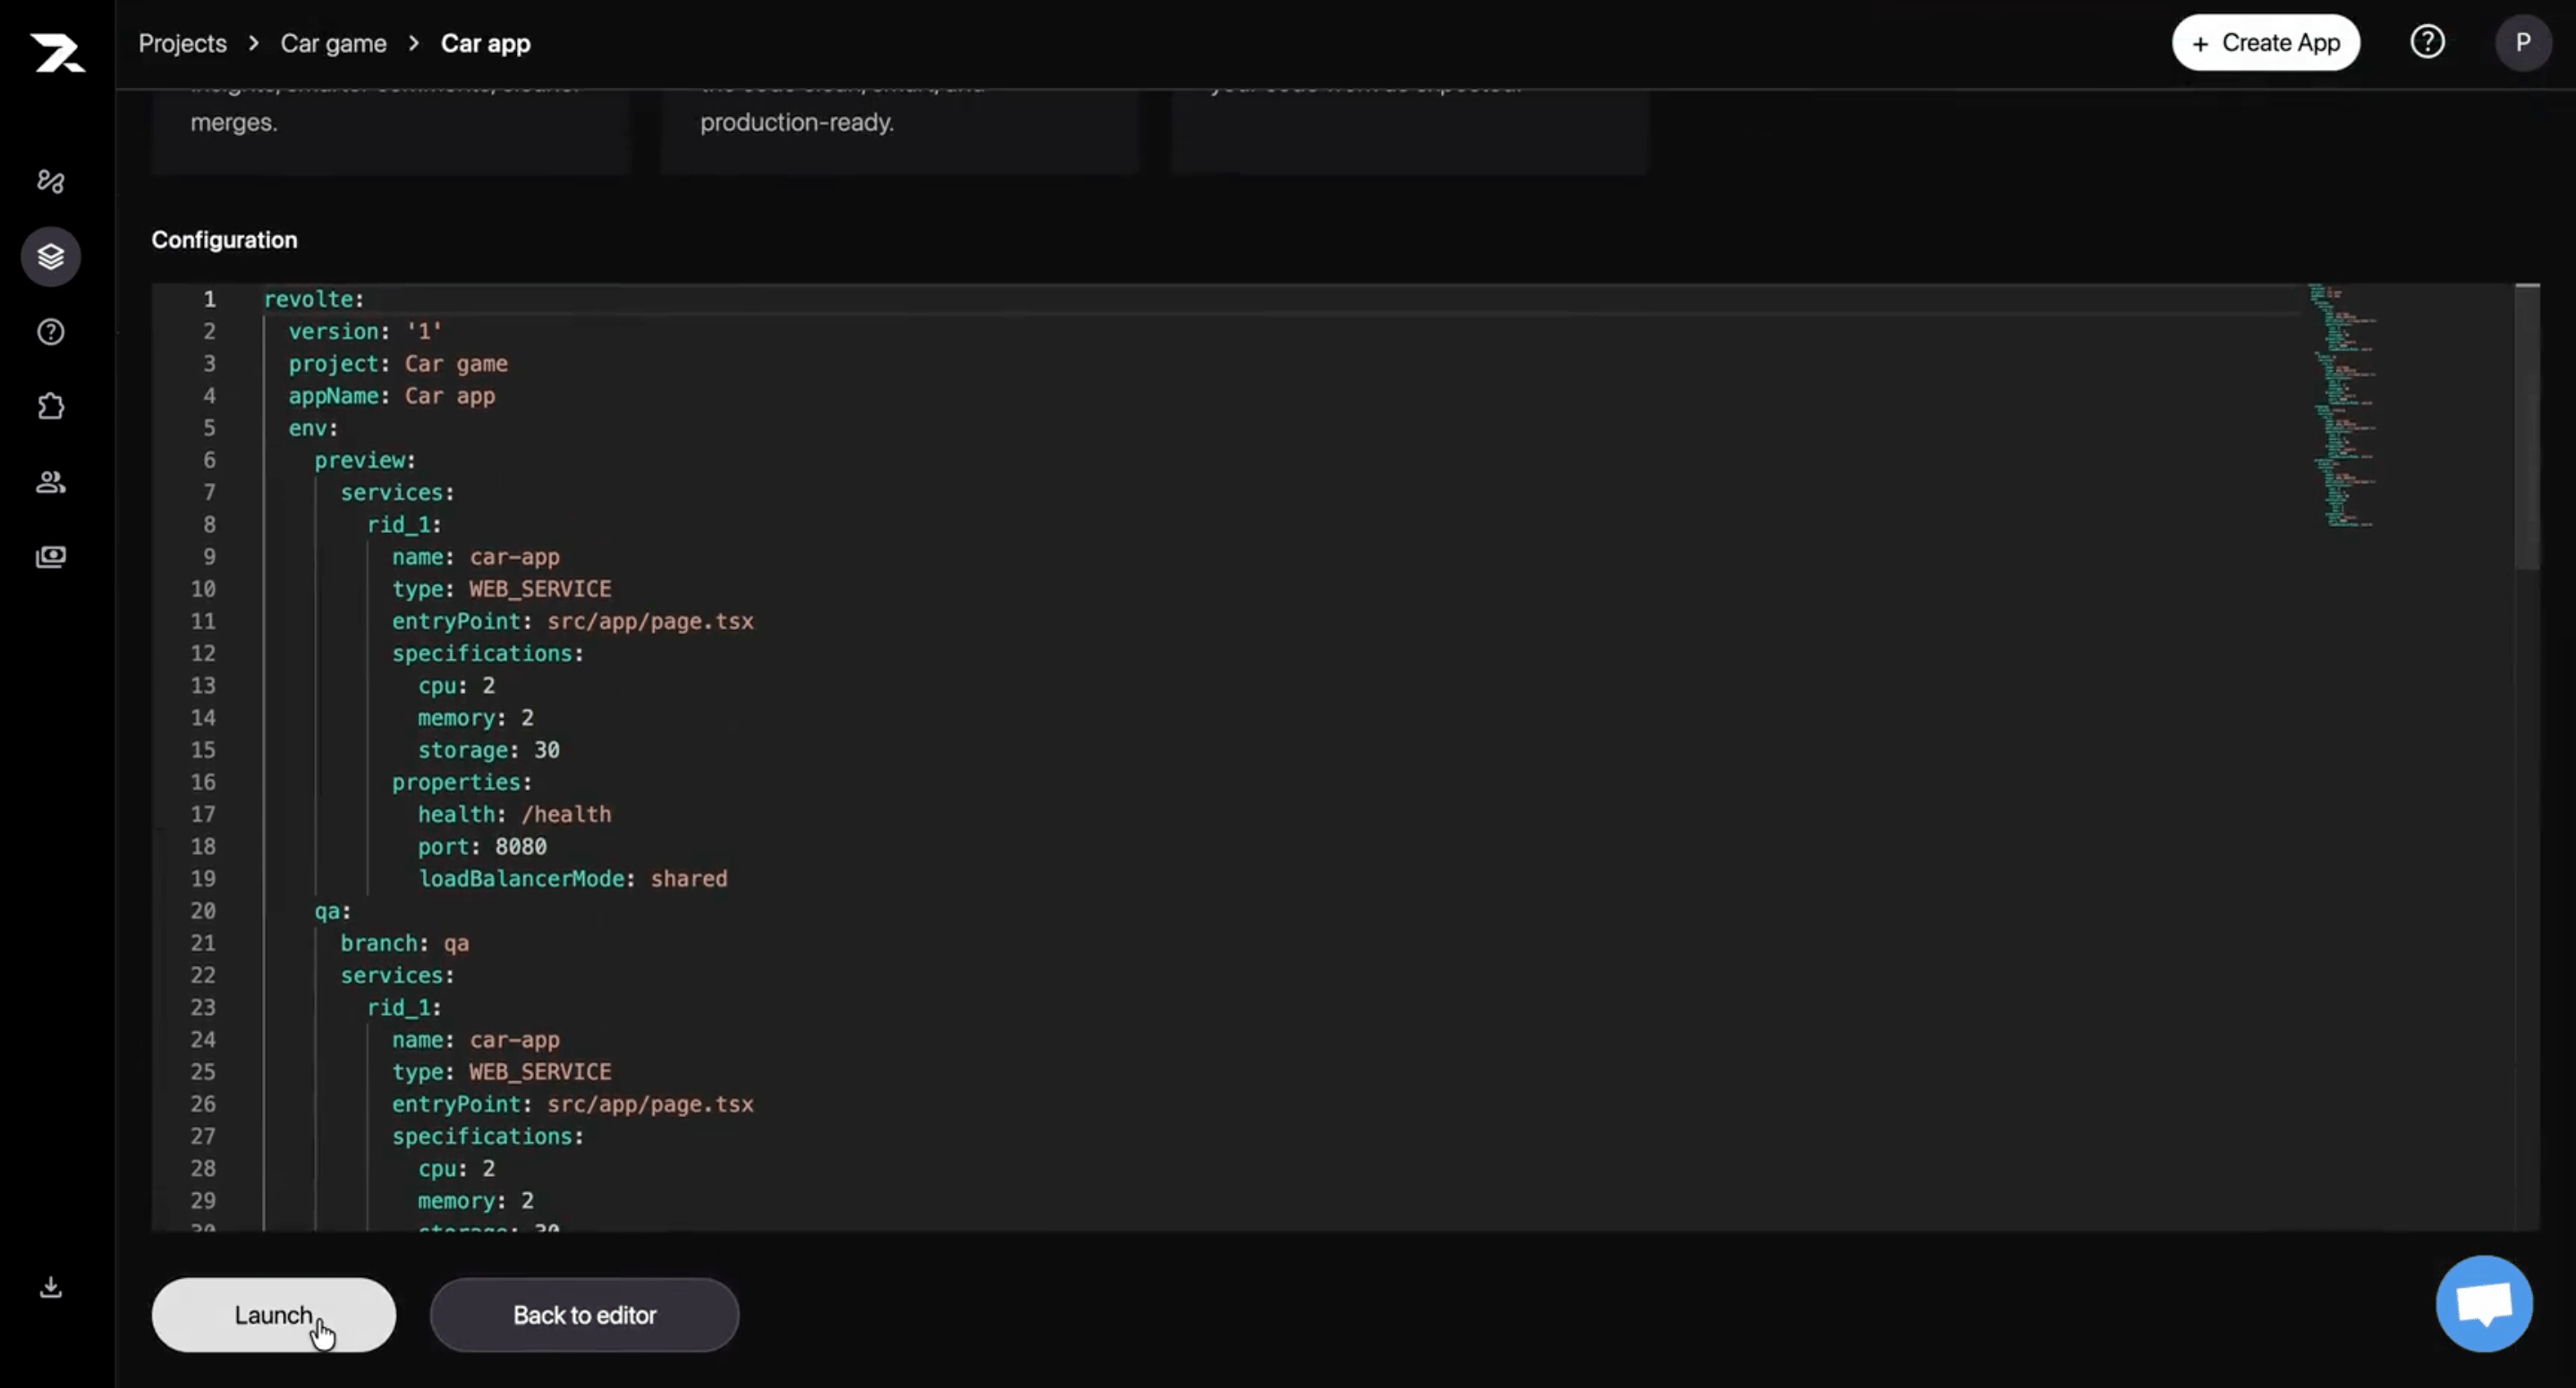
revolte.yml, confirm its service resources and runtime properties, then click Launch.revolte.yml reference.7
Confirm the launch checklist
Confirm that the latest deployment changes are committed. Click Confirm to start the Preview deployment.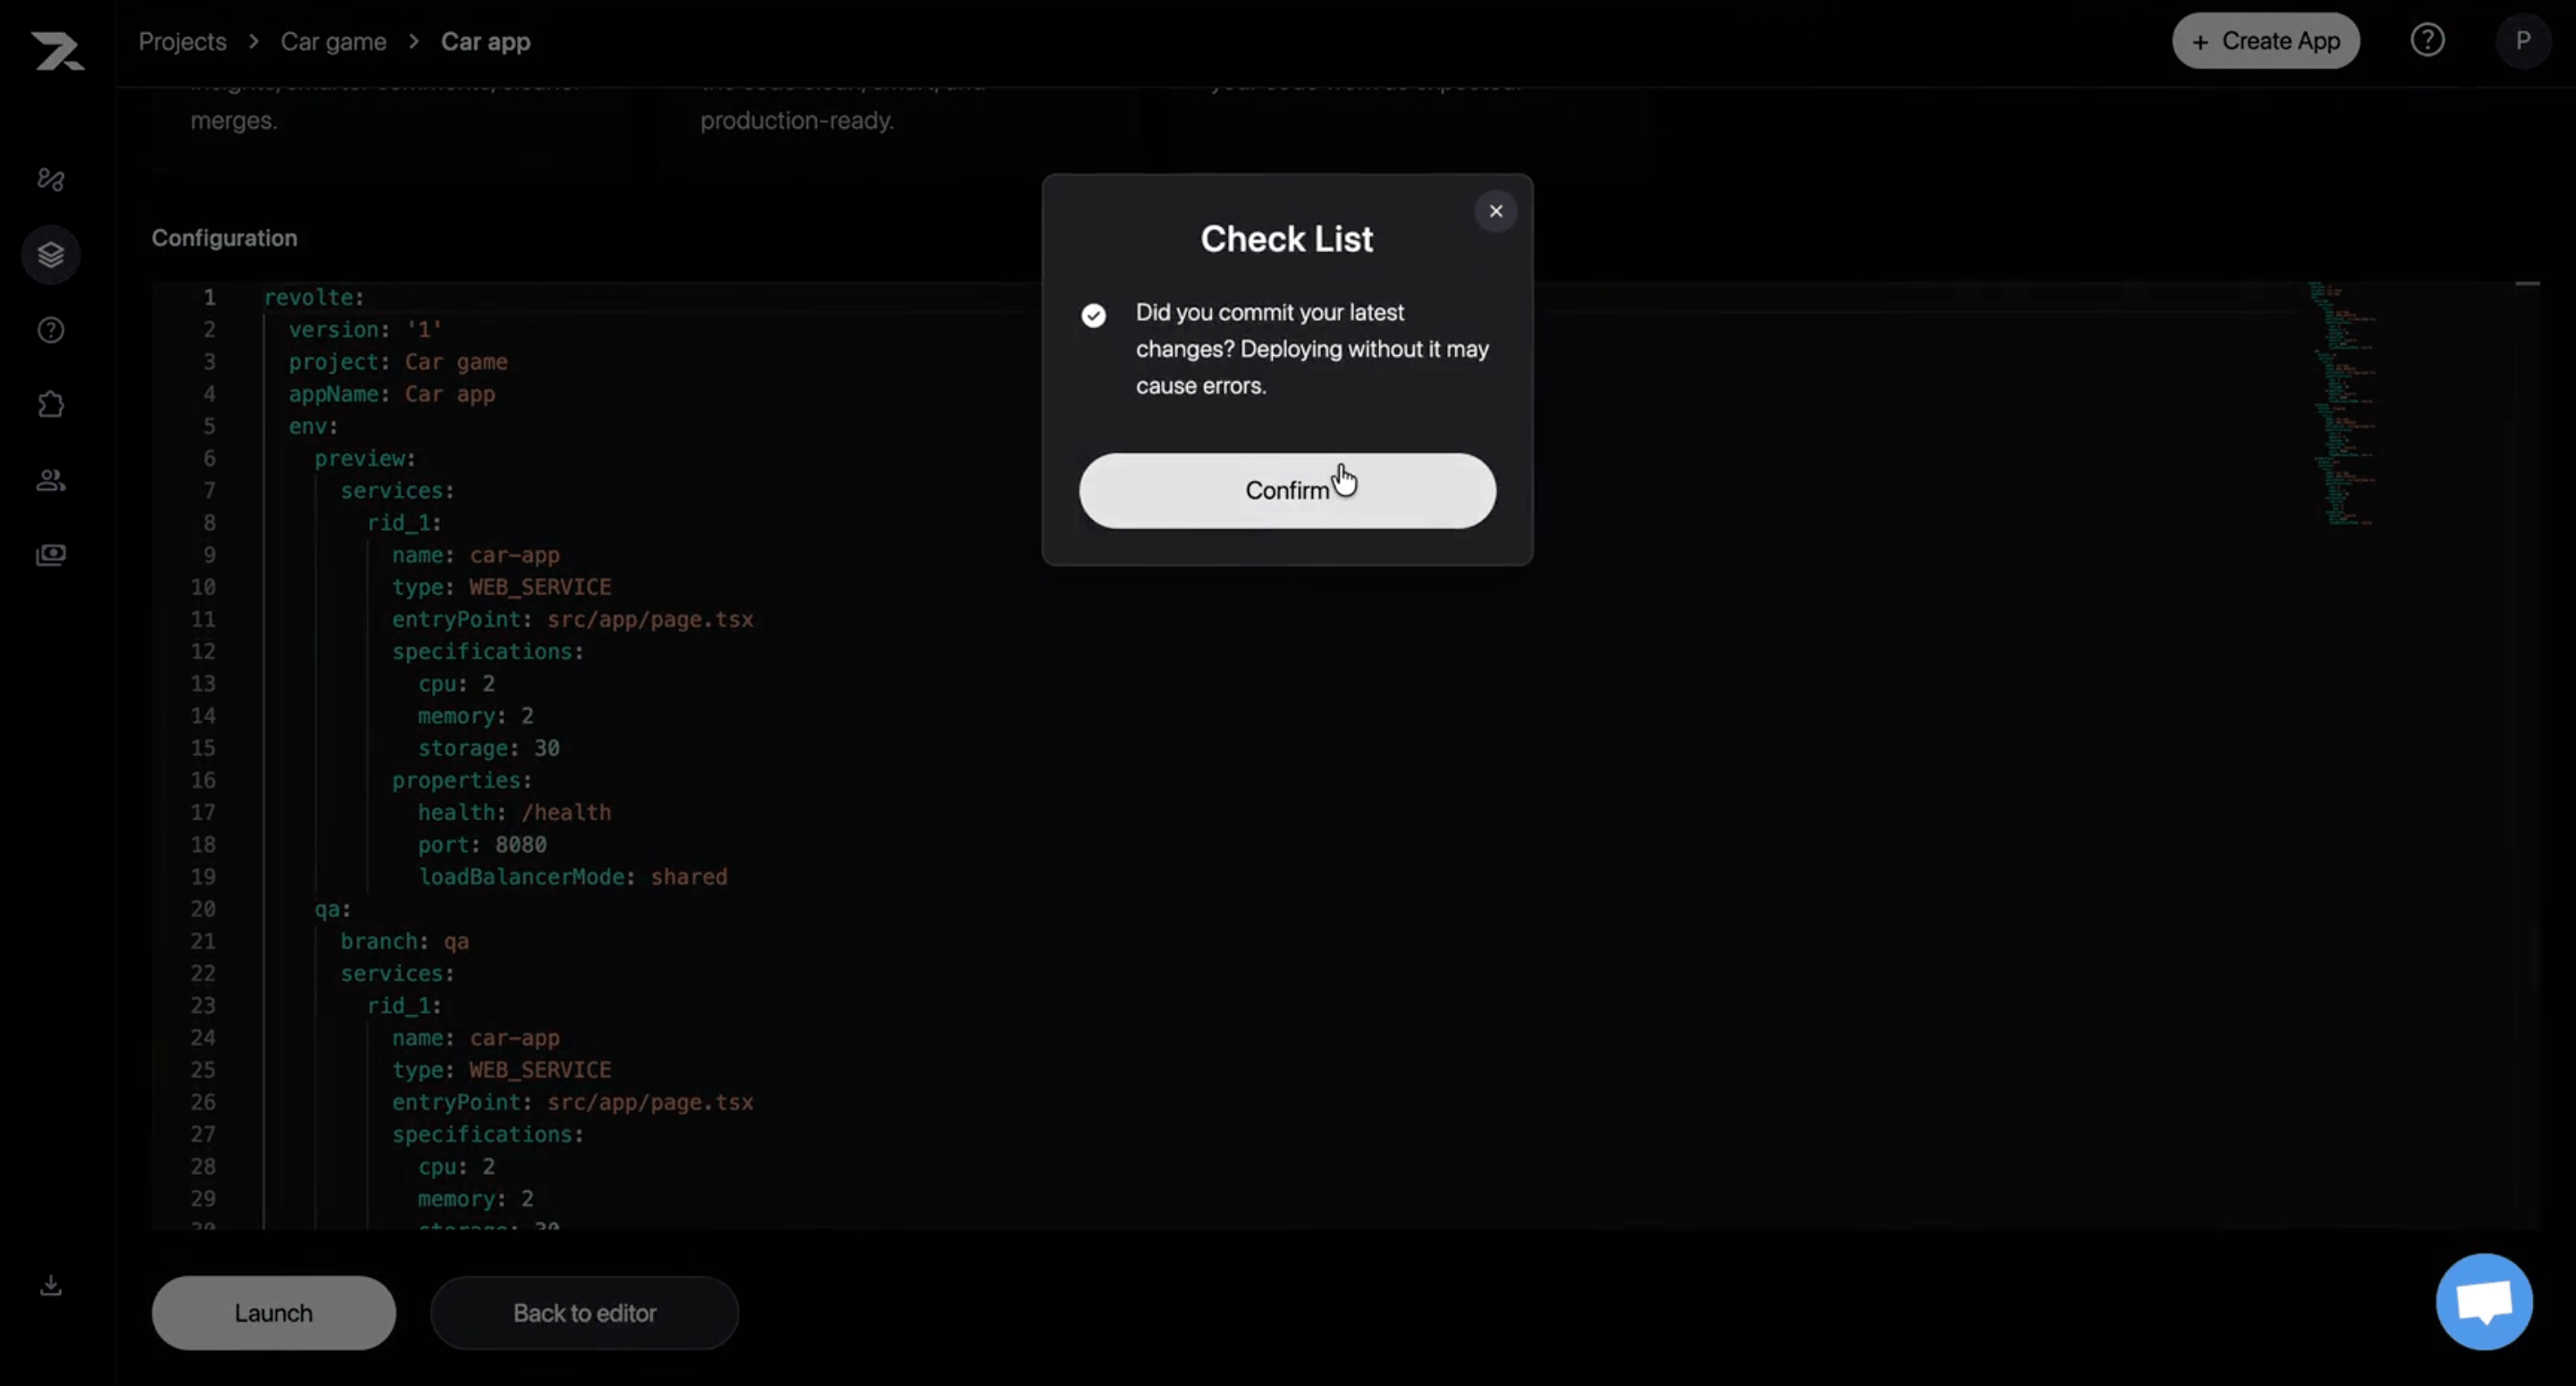
8
Deployment in progress
While the Preview environment is building and deploying, the dashboard shows the ongoing activity and progress indicators. Wait for the deployment to complete before validating the application.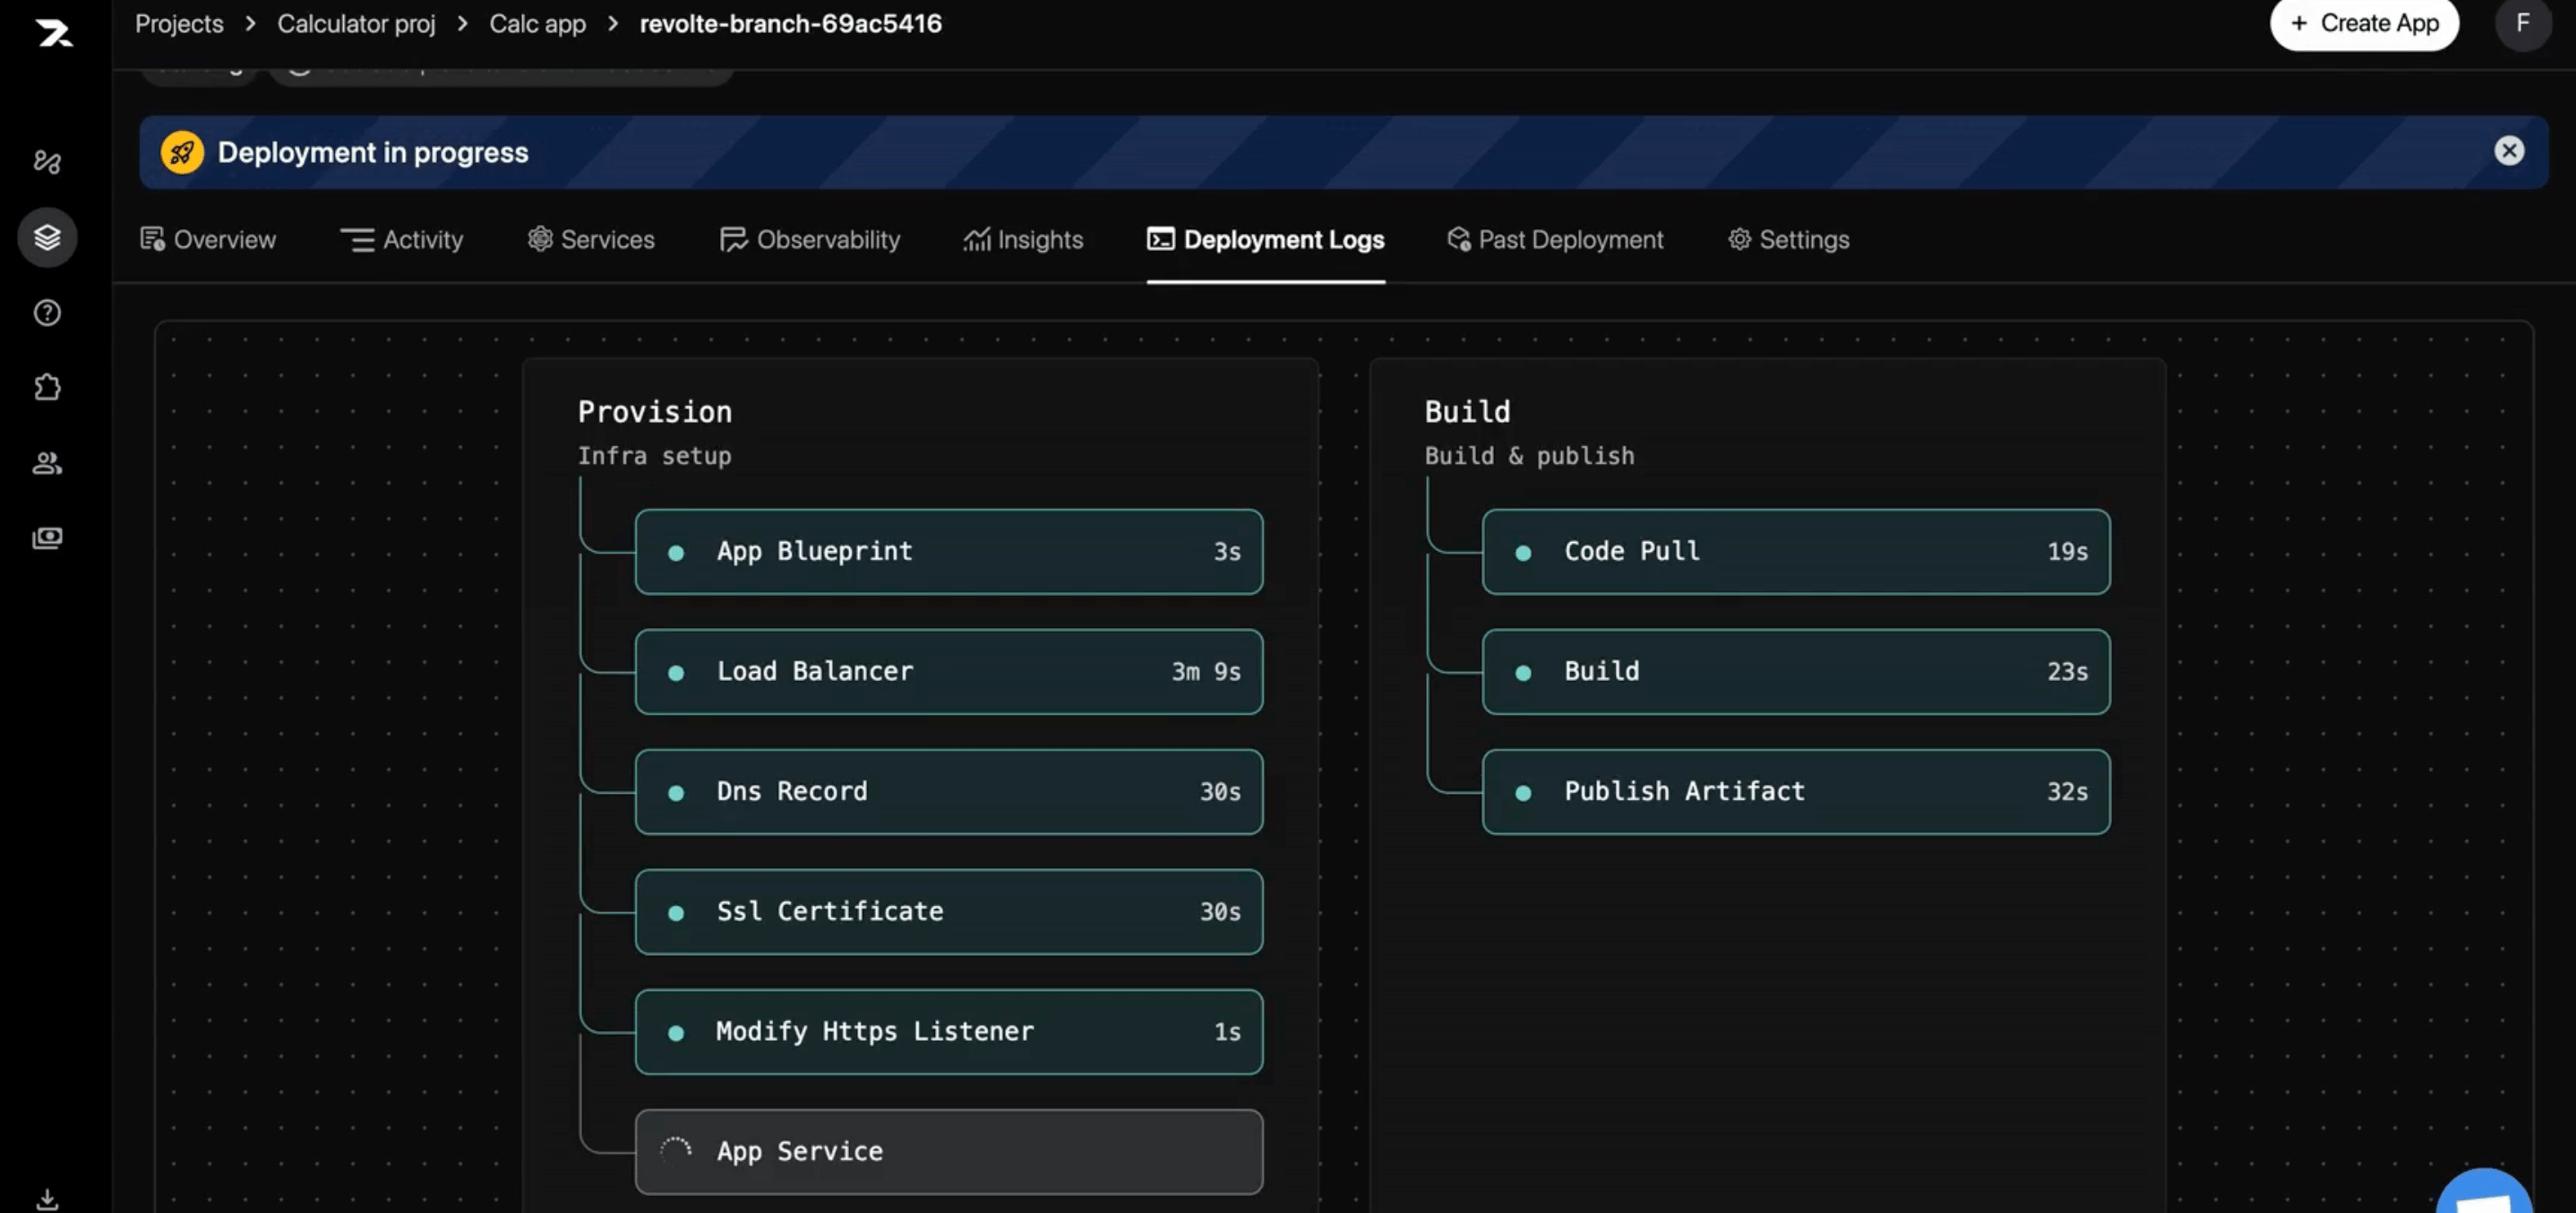
9
Monitor the Preview deployment
Revolte opens the Preview environment dashboard. Follow the activity timeline until the build and deployment succeed, then verify that the application health check is Live.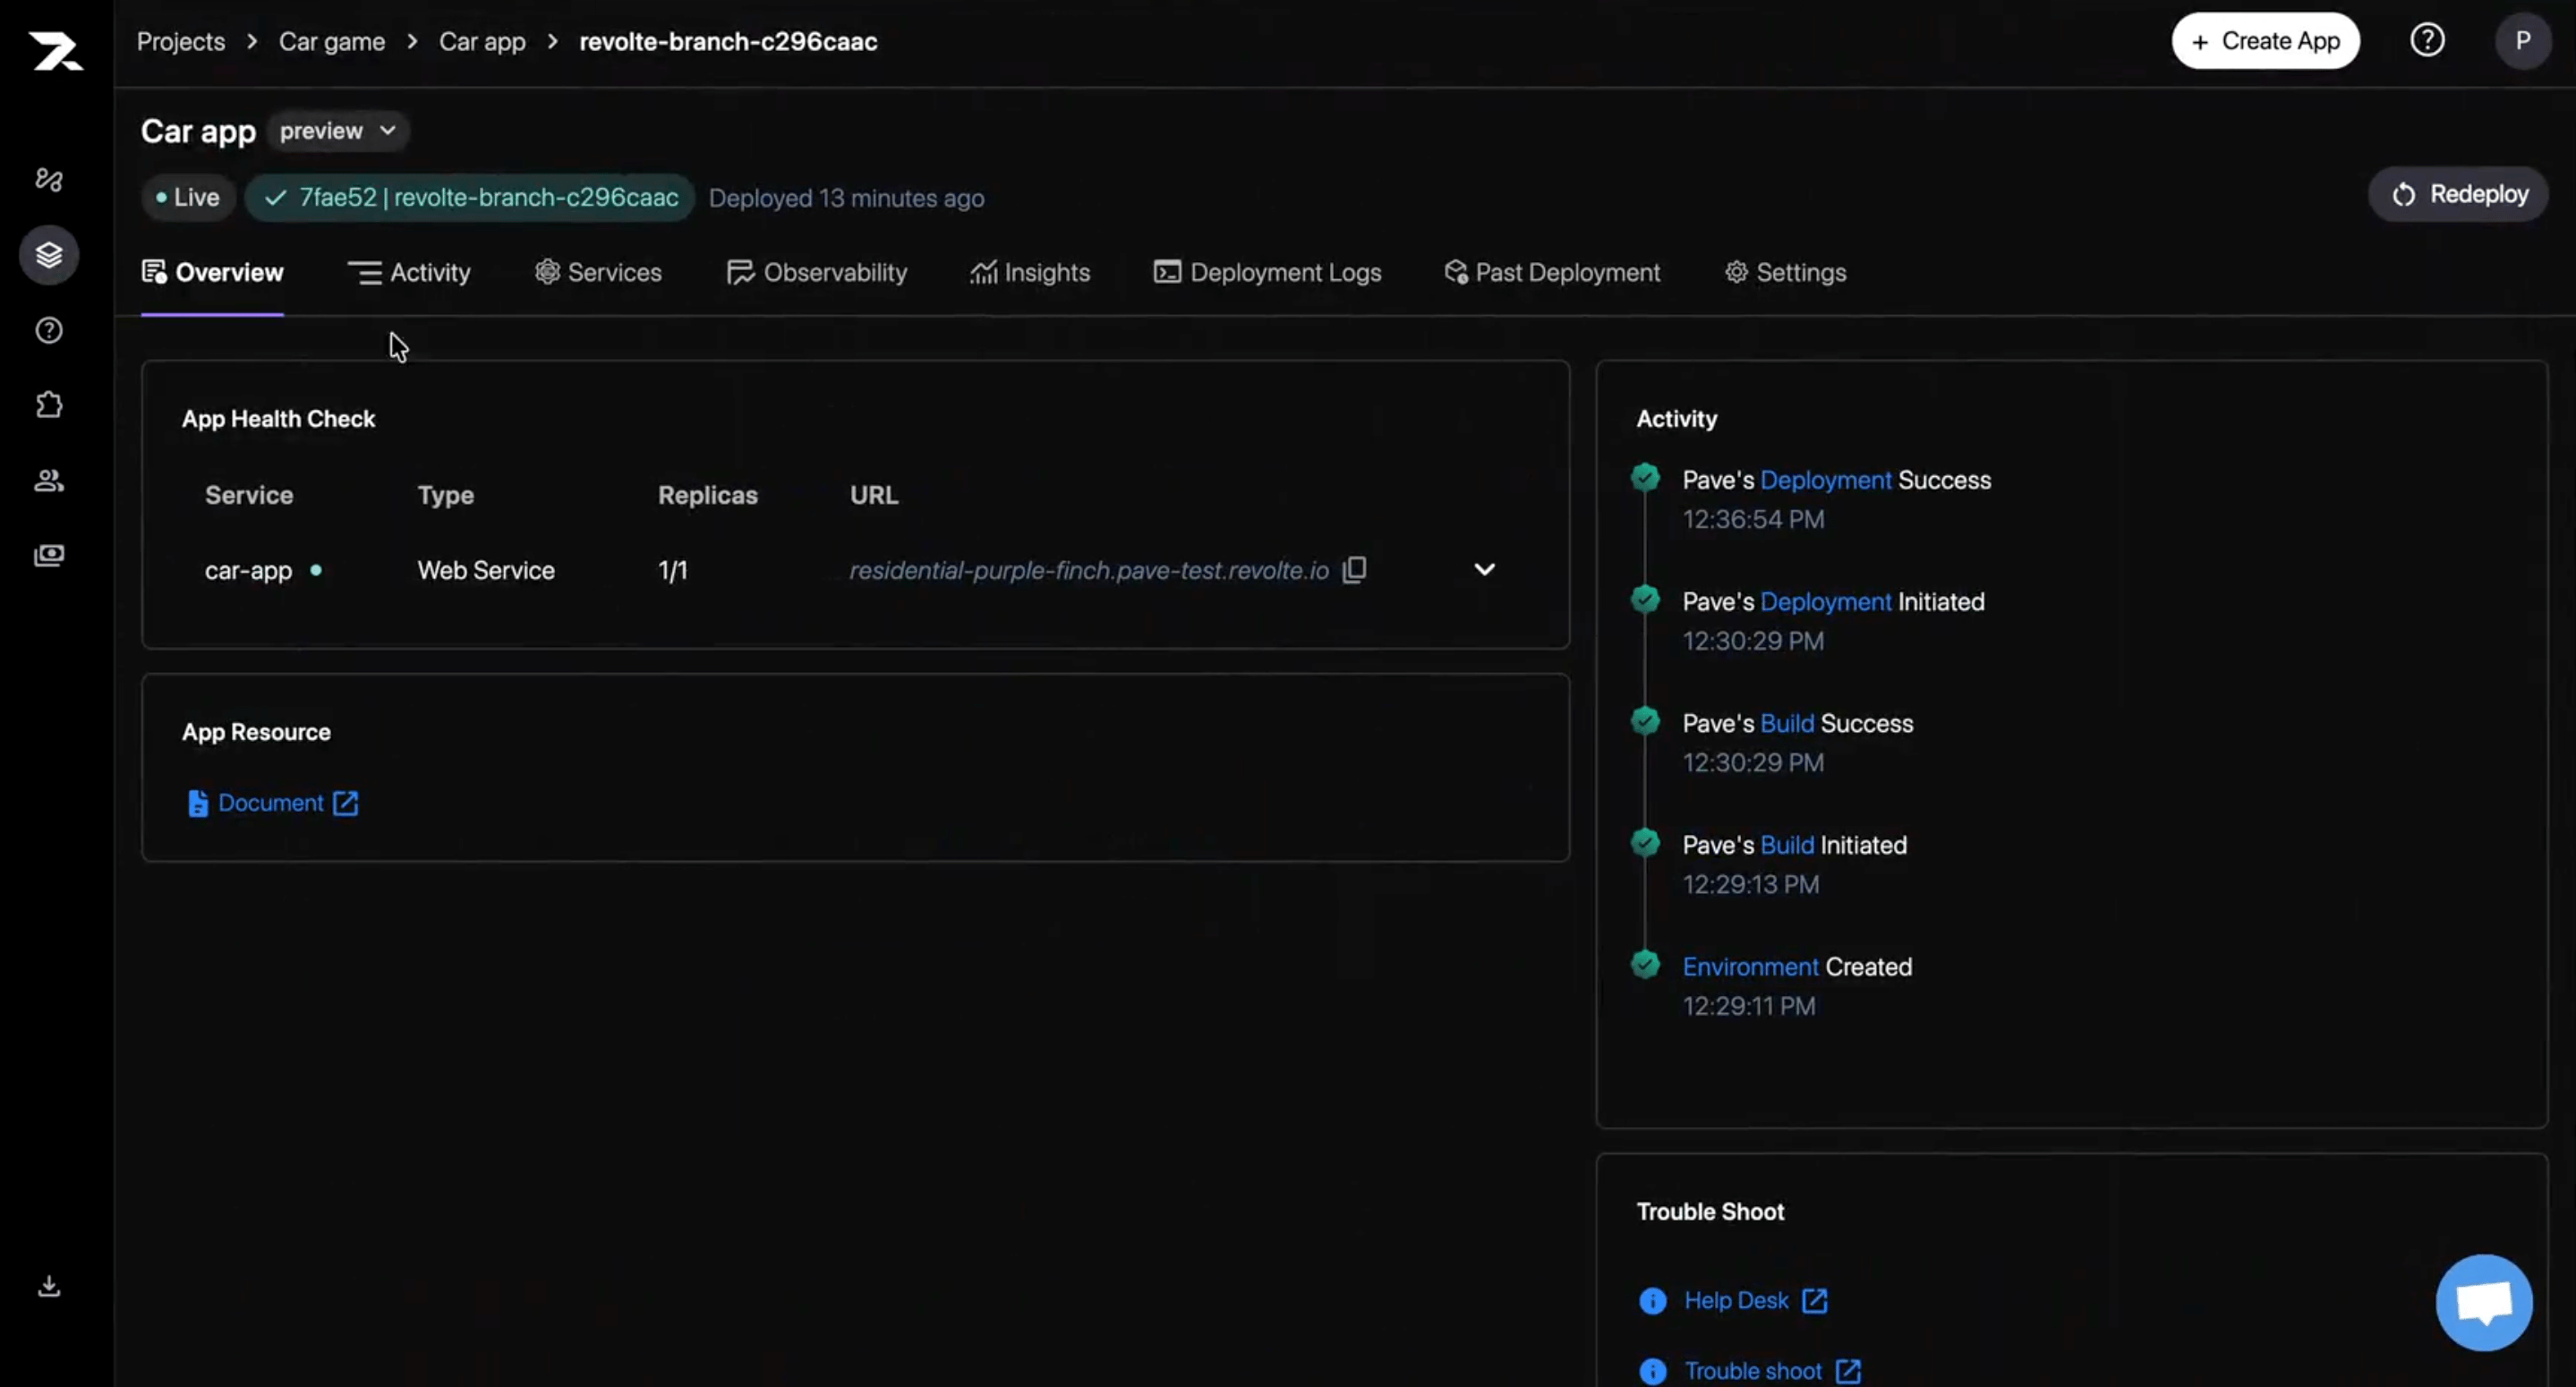
10
Open and validate the application
Open the generated Preview URL and test the deployed application. If you find an issue, return to Interactive Chat, make the change, commit it, and redeploy the Preview environment.