

Prerequisite: Ensure your repository is connected to a Revolte application. Learn how in the Get Started guide.
1
Initialize Workflow Automation
Navigate to the Chat section and select Autopilot. Connect your Jira workspace by installing the Revolte app from the Atlassian Marketplace, accepting the requested permissions, and selecting the Atlassian site to install to.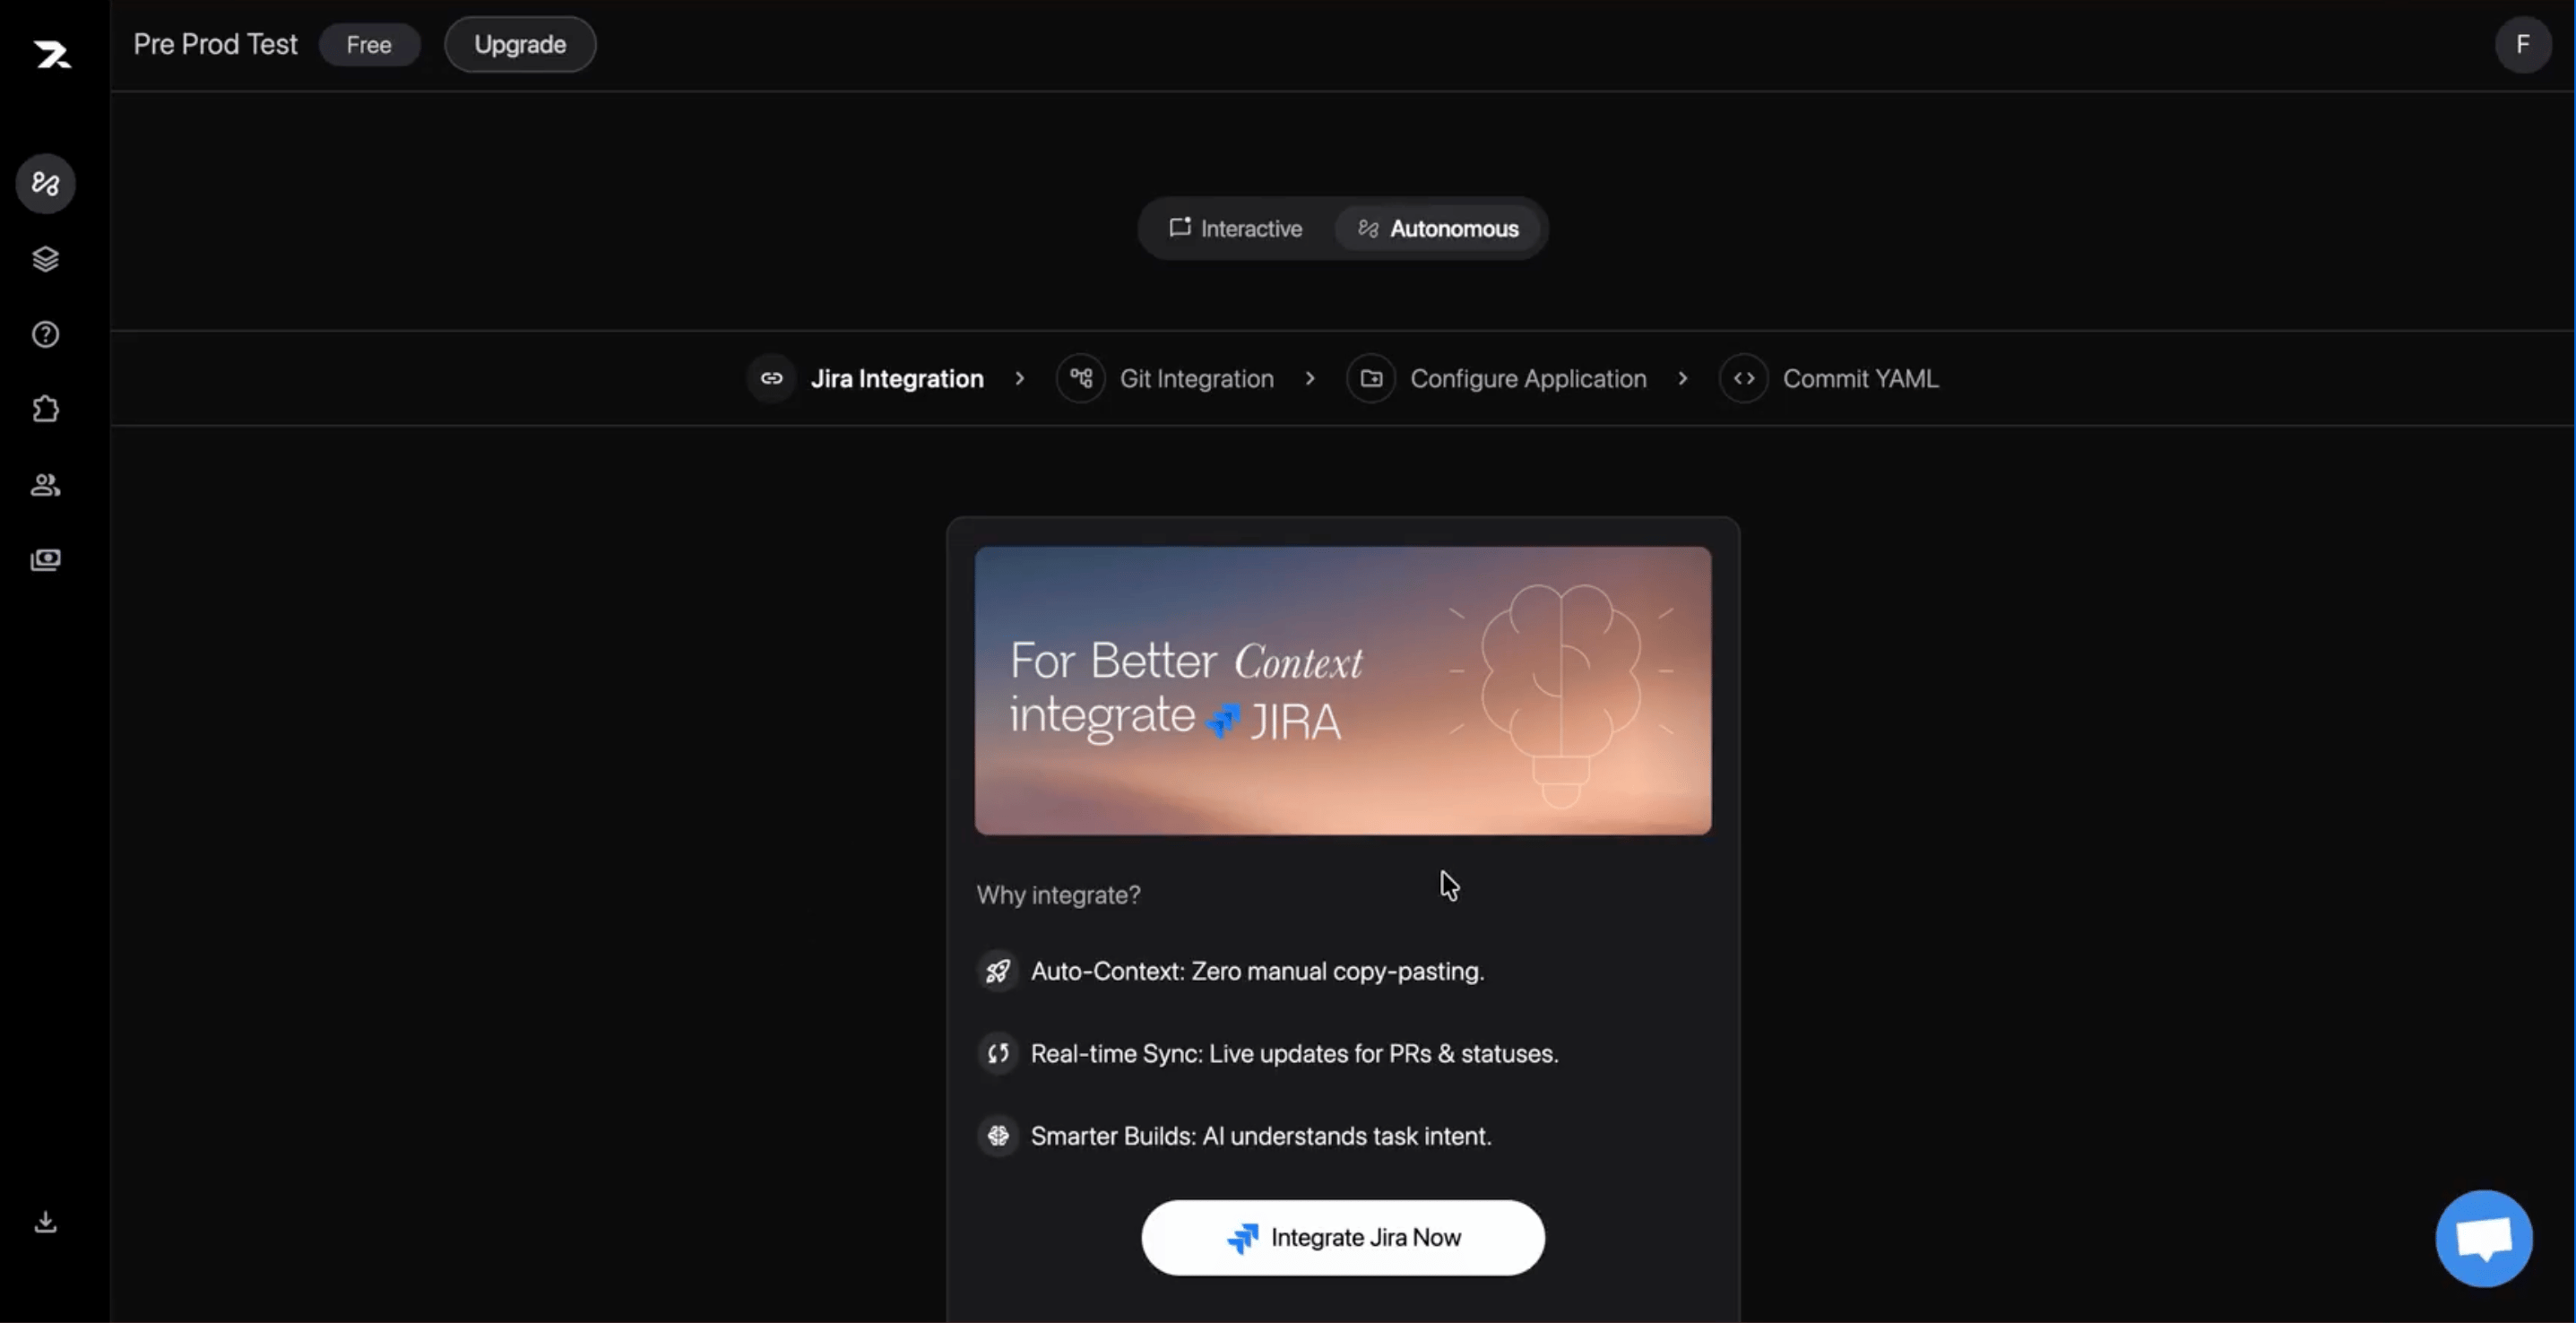
For the full step-by-step walkthrough, see Connect Jira.
2
Complete Remaining Setup Steps
Once your Jira integration is complete, carry on with the remaining steps in the setup flow: complete Git Integration to connect your repository, Configure Application to define your app’s service details, and Commit YAML to save your 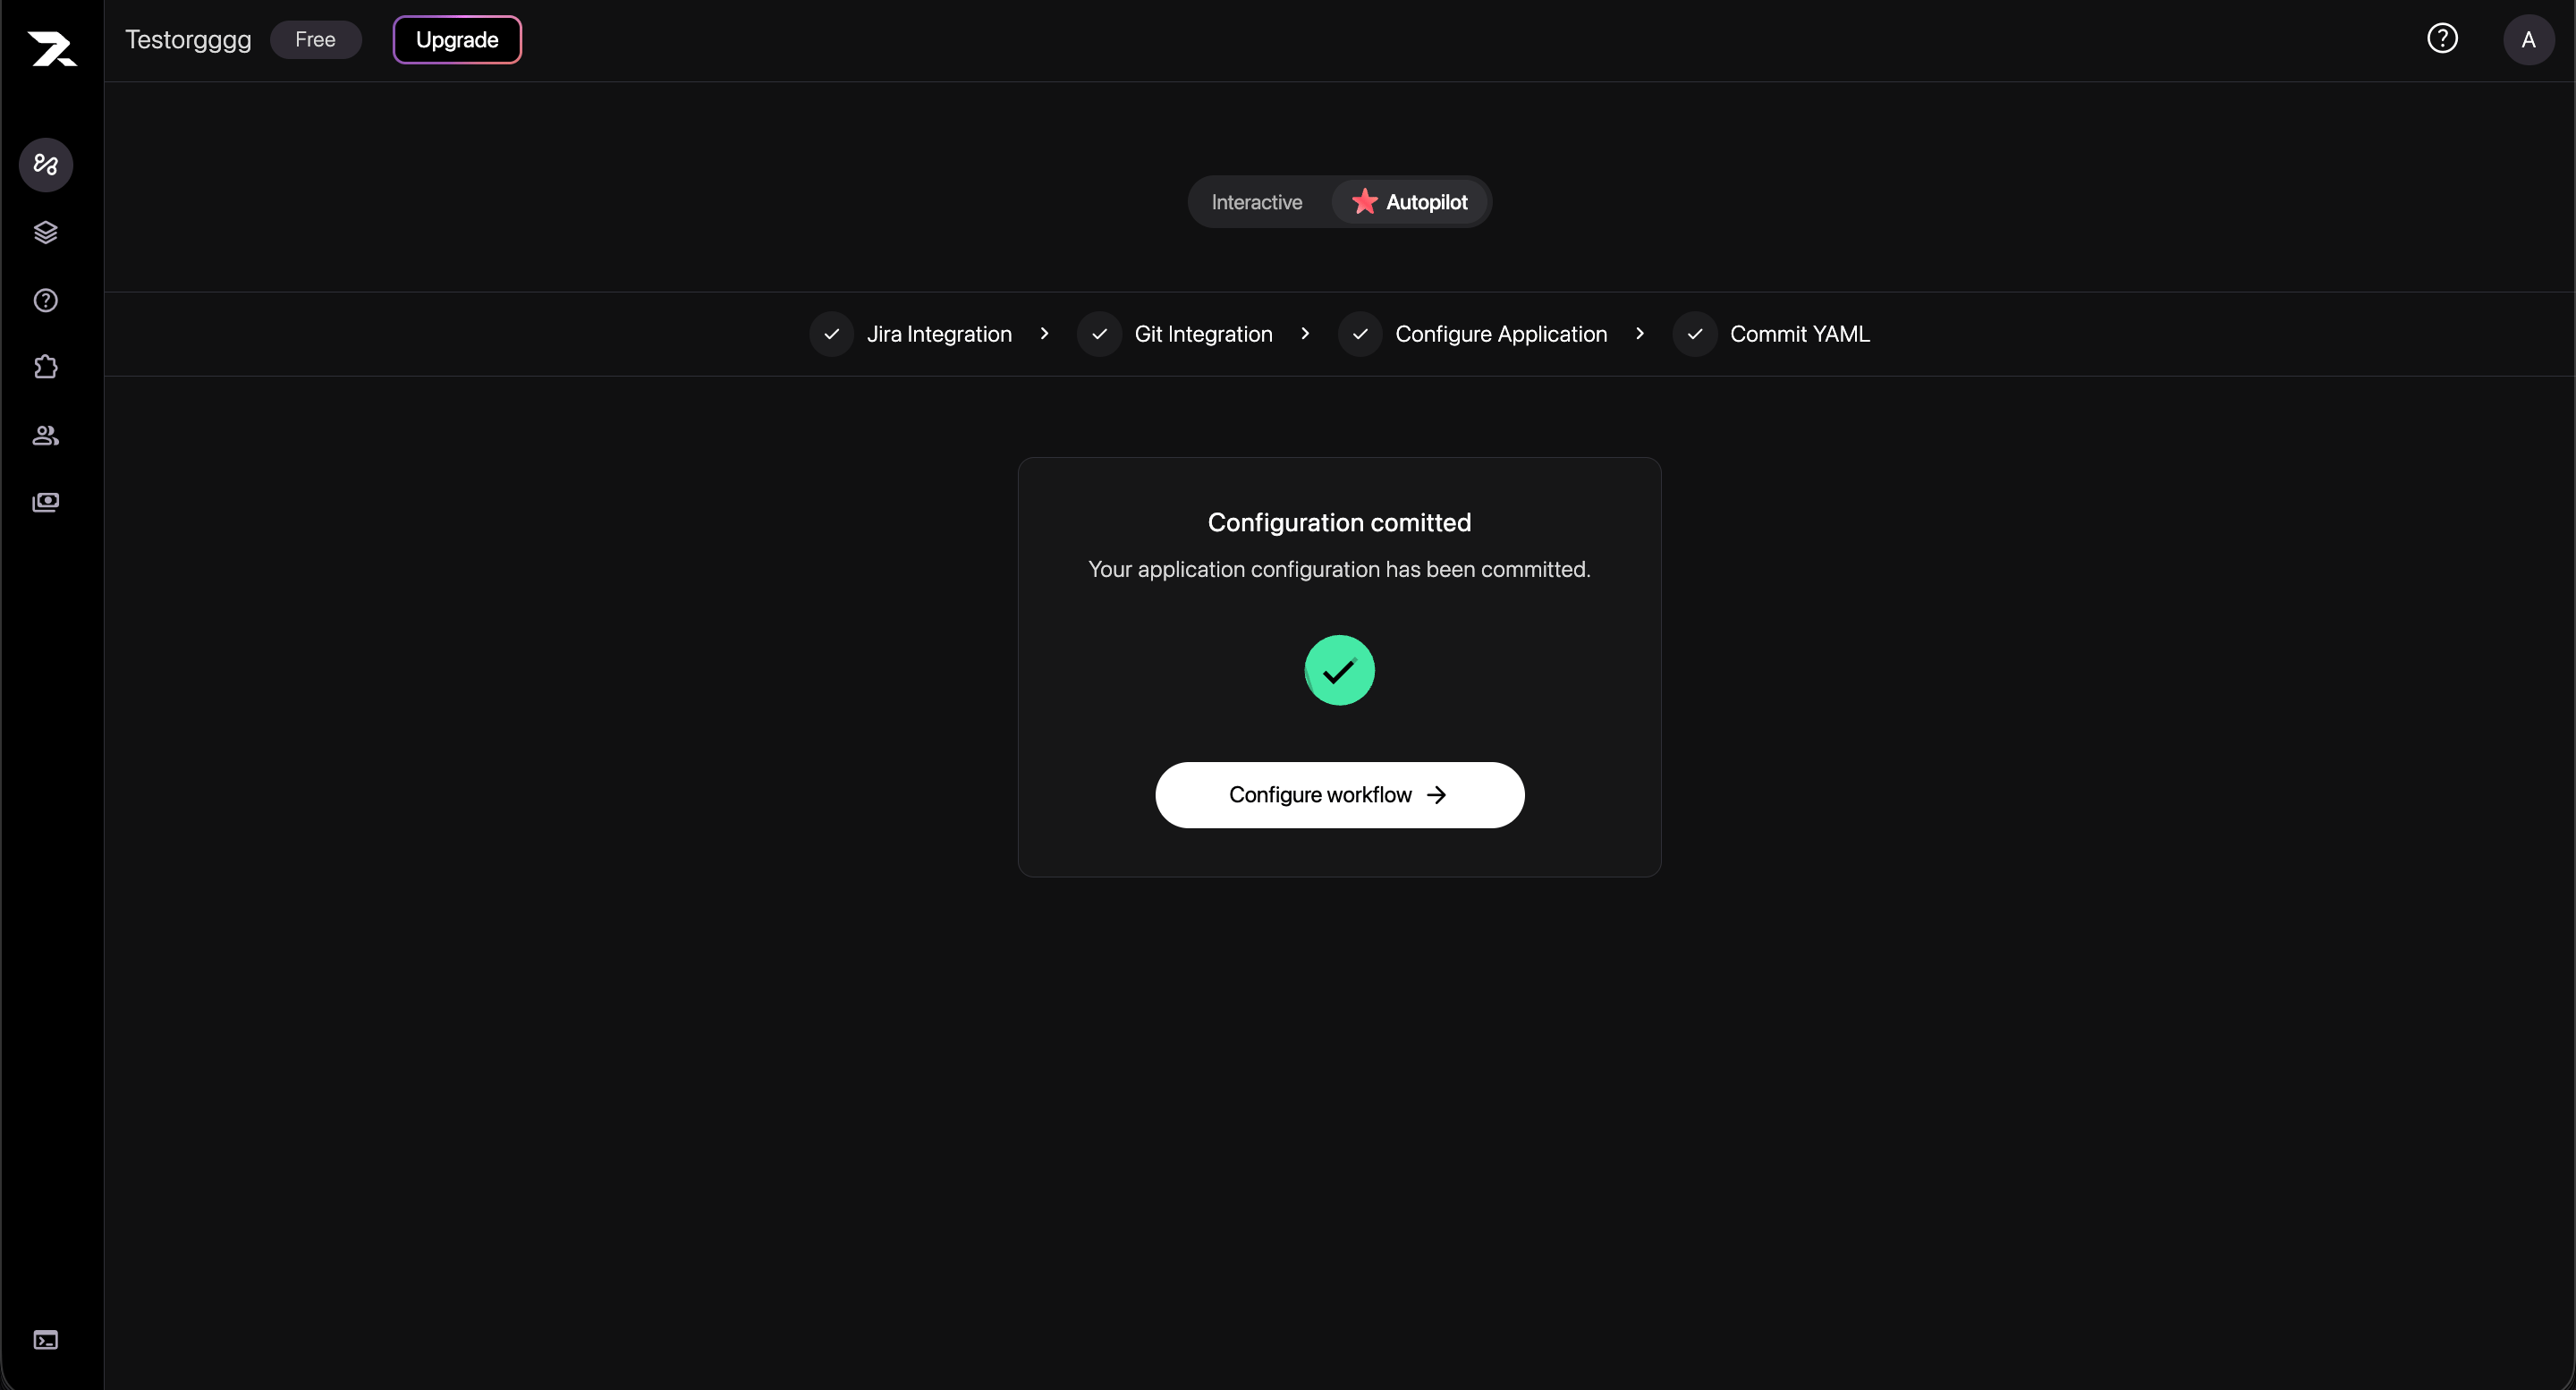
revolte.yml configuration.Once all four steps show a green checkmark and your configuration has been committed, you’re ready to set up the workflow. Click Configure workflow to proceed.3
Access Automation Control
Go to the Automation Configurations tab. If no workflows are active, you will see the initialization screen. Click Configure Automation.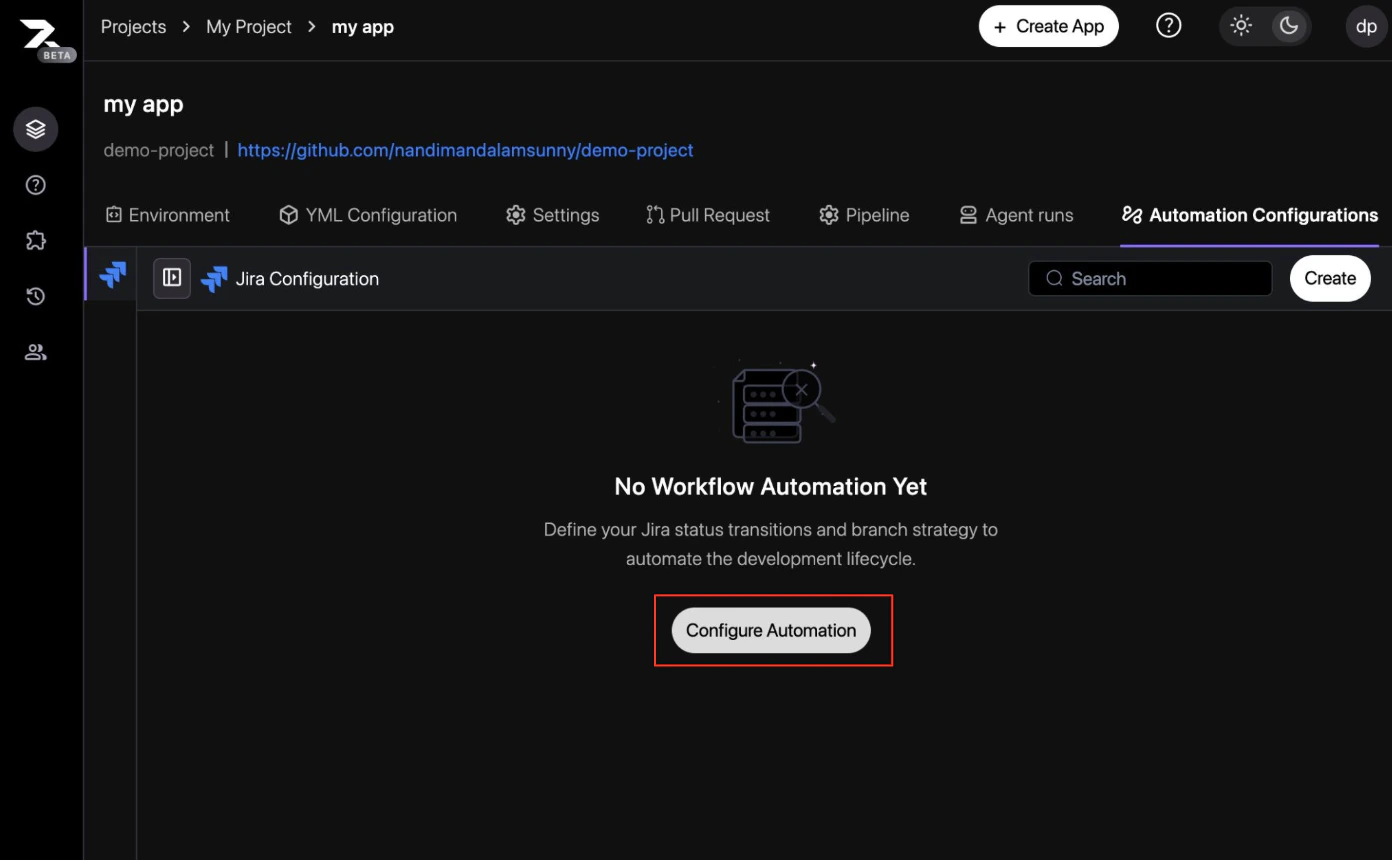
4
Map Status Transitions
Define how Revolte should interact with your Jira statuses.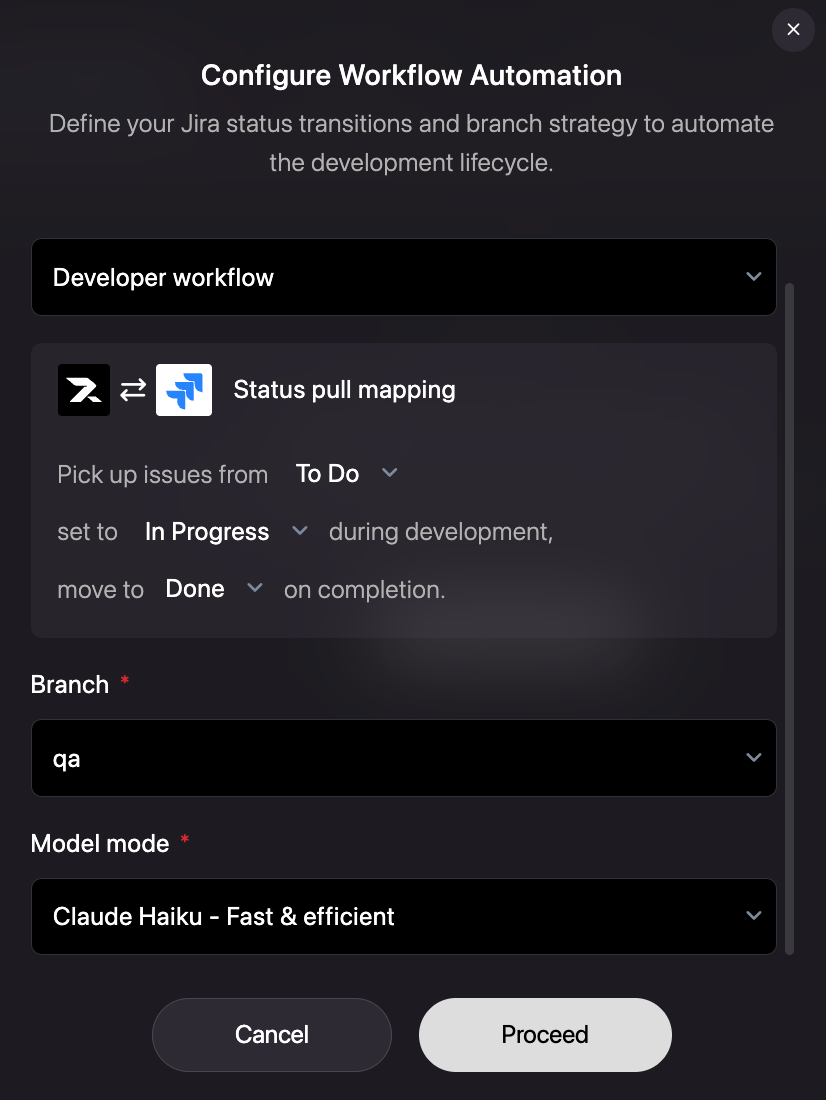
- Action: Select
Developer workflow. - Mapping: Choose which statuses trigger development, such as To Do to In Progress, and completion, such as Done.
- Target Branch: Specify the branch where AI changes should be proposed, such as
qaormain. - Model Mode: Select based on your needs, such as
Claude Haiku - Fast & efficient.
5
Confirm Workflow Creation
Once saved, your new workflow will appear in the active configurations list, showing the branch mapping and status flow.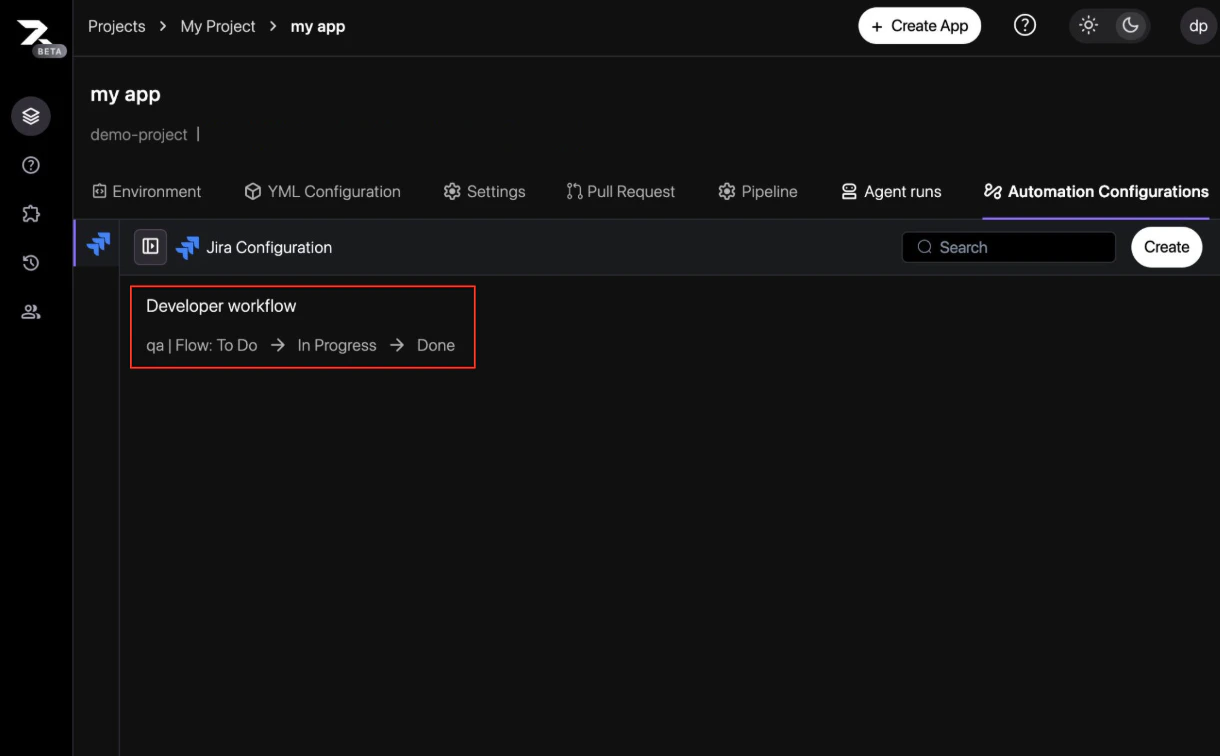
6
Select Target Application
To trigger the workflow for a specific task, open the ticket in Jira and locate the Revolte section in the right sidebar. Under Select Application, select your target application service from the dropdown menu.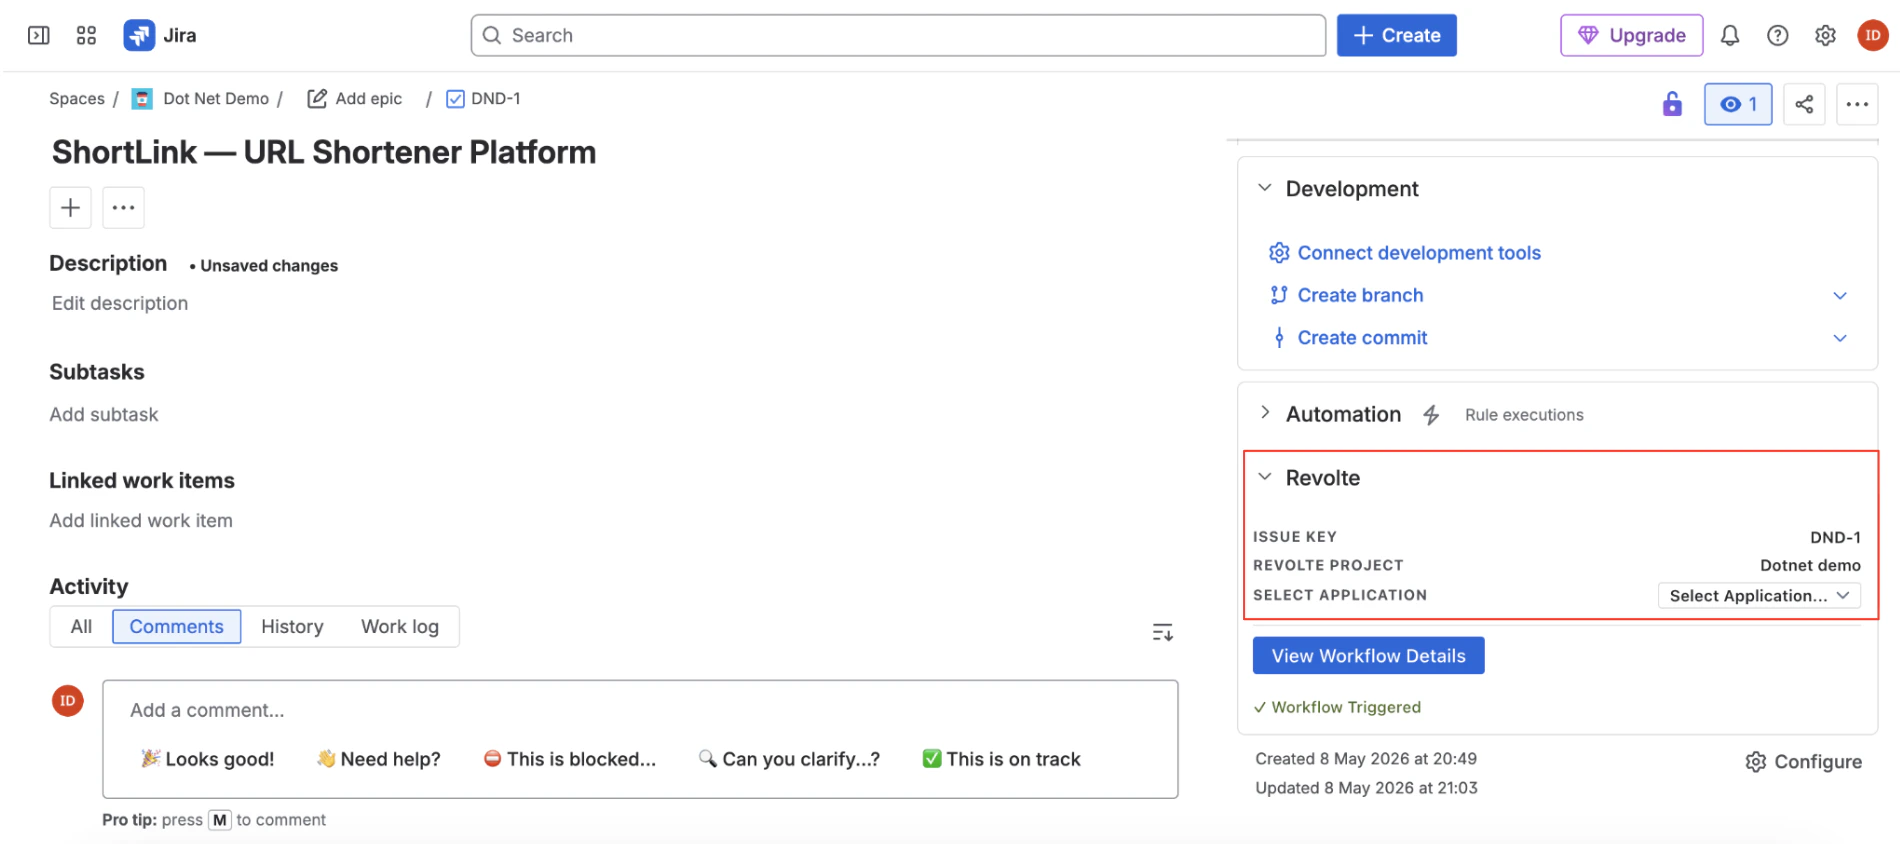
See the Jira Integration Guide for detailed integration steps.
7
Trigger and Monitor Workflow
Selecting the application instantly triggers the AI agent workflow. The sidebar updates to display a Workflow Triggered success status. Click View Workflow Details to jump directly into the live agent execution dashboard.
8
Monitor Live Progress
Switch back to the Revolte dashboard under Agent runs to see the real-time status of your workflow.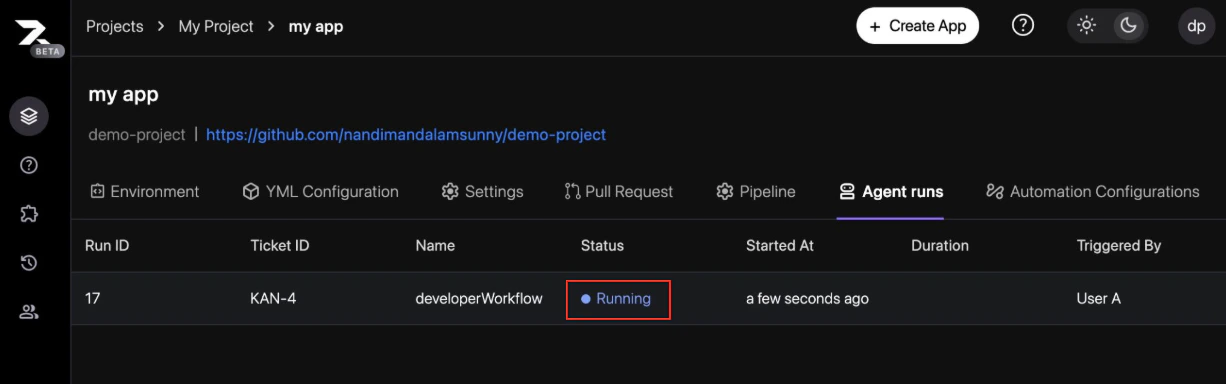
9
Review Execution Summary
Once complete, drill down into the run to see the execution stages, including Sandbox Provisioning, Code Setup, and Token Usage statistics.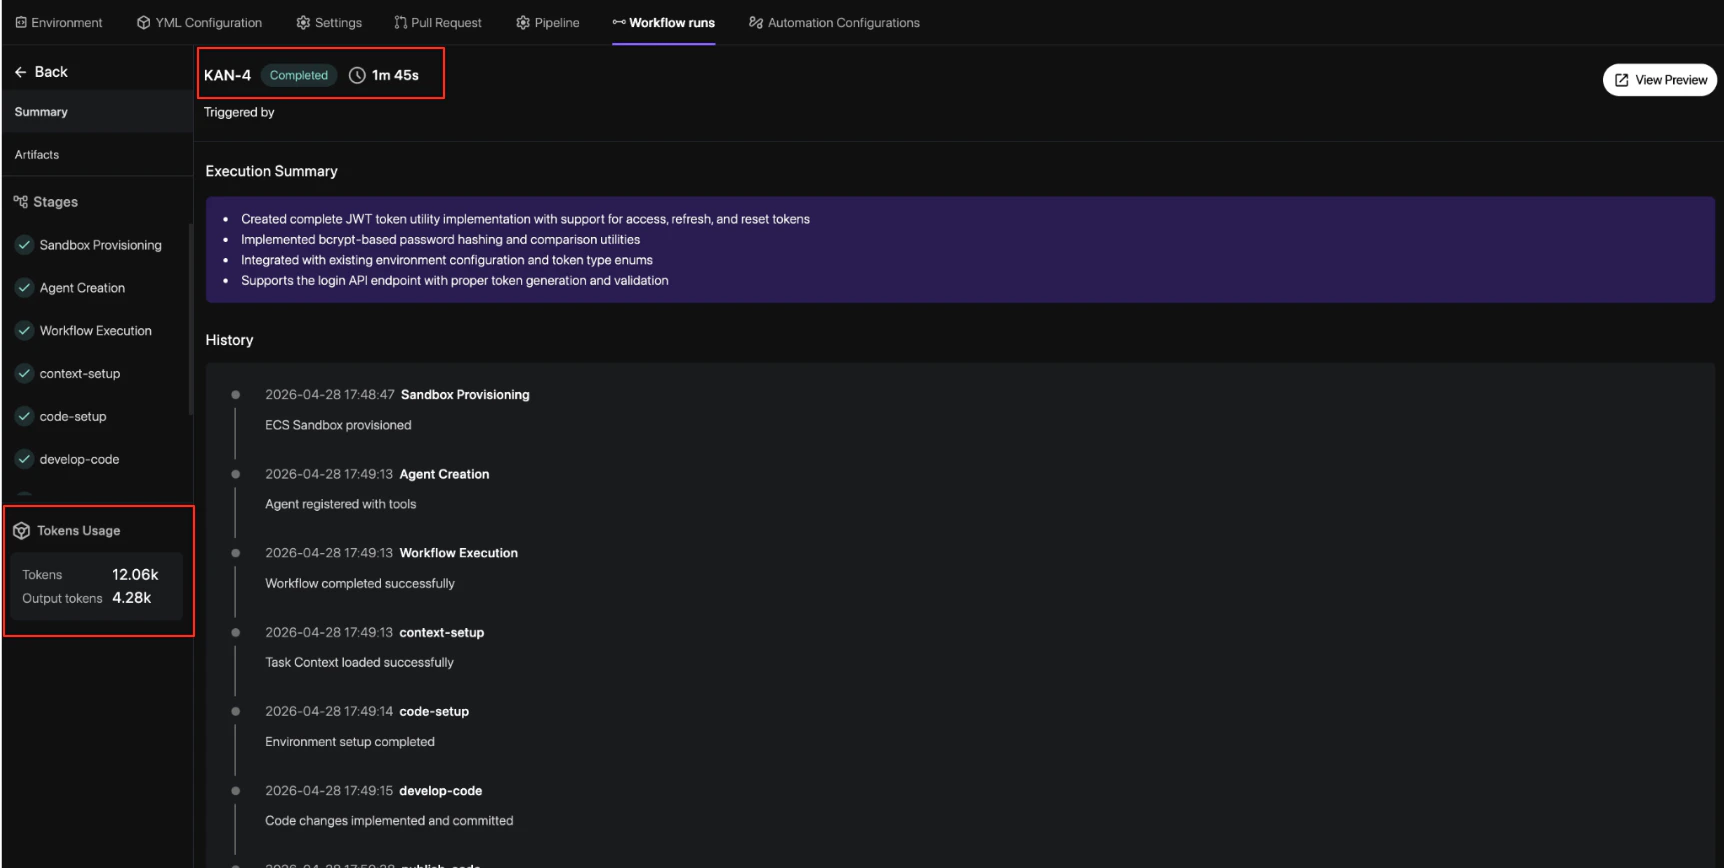
10
Inspect Implementation Plan
Navigate to the Artifacts tab to review the AI-generated implementation plan, including sub-tasks and proposed file changes.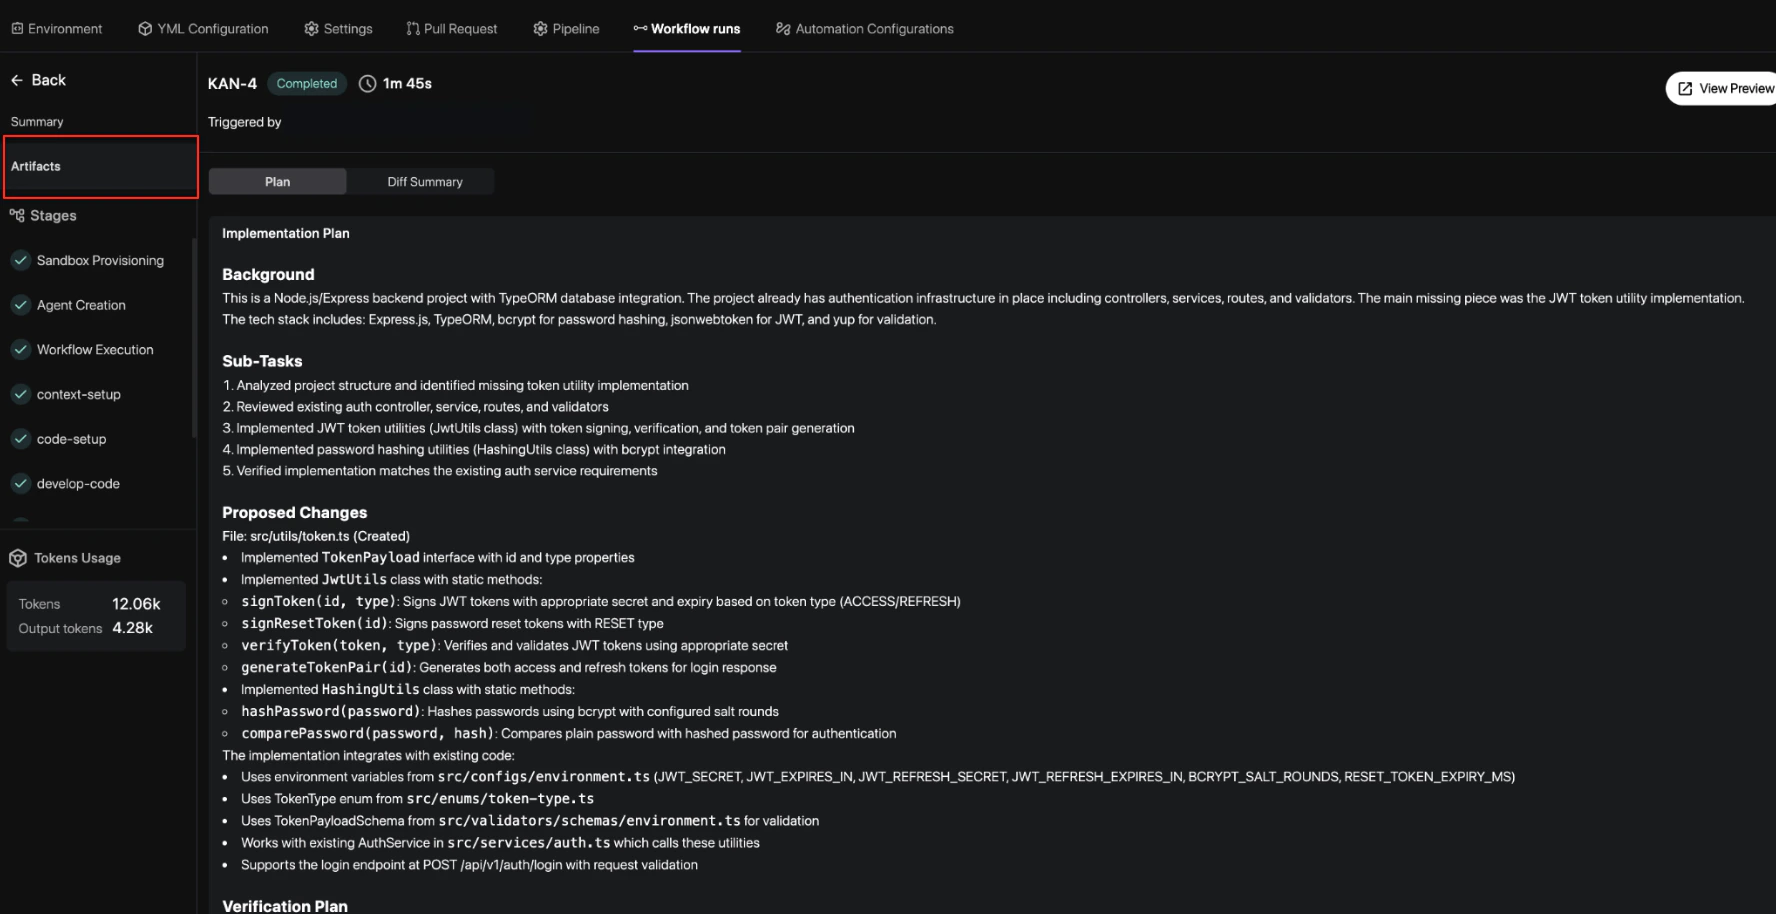
11
Analyze Code Diffs
Finally, use the Diff Summary tab to inspect every line of code modified or created by the agent before finalizing the delivery.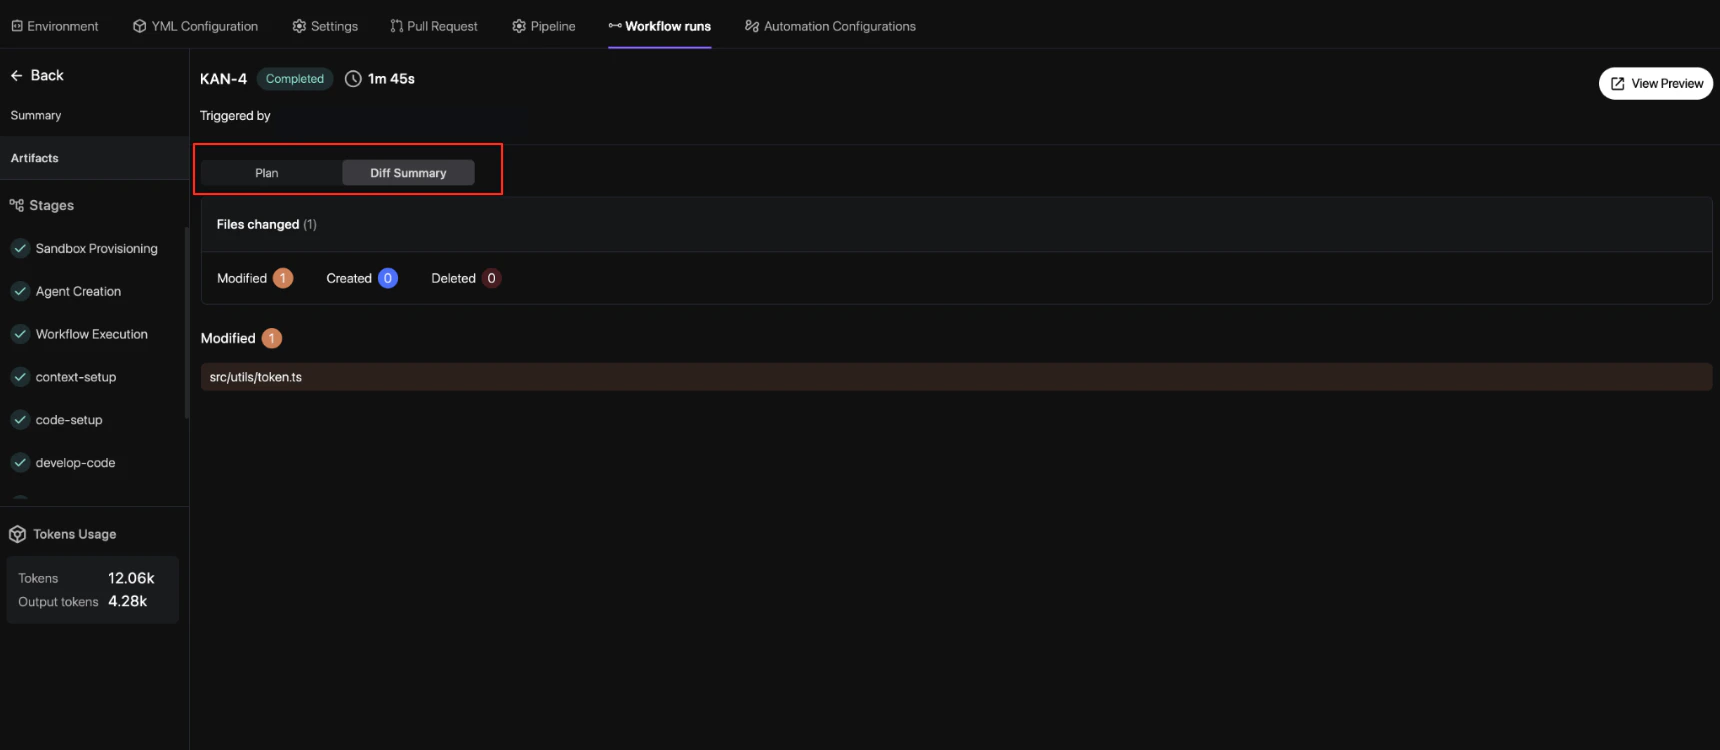
12
Review and Merge
Once the agent finishes, it automatically opens a pull request on GitHub, or your configured Git provider, so you can review and merge the proposed changes.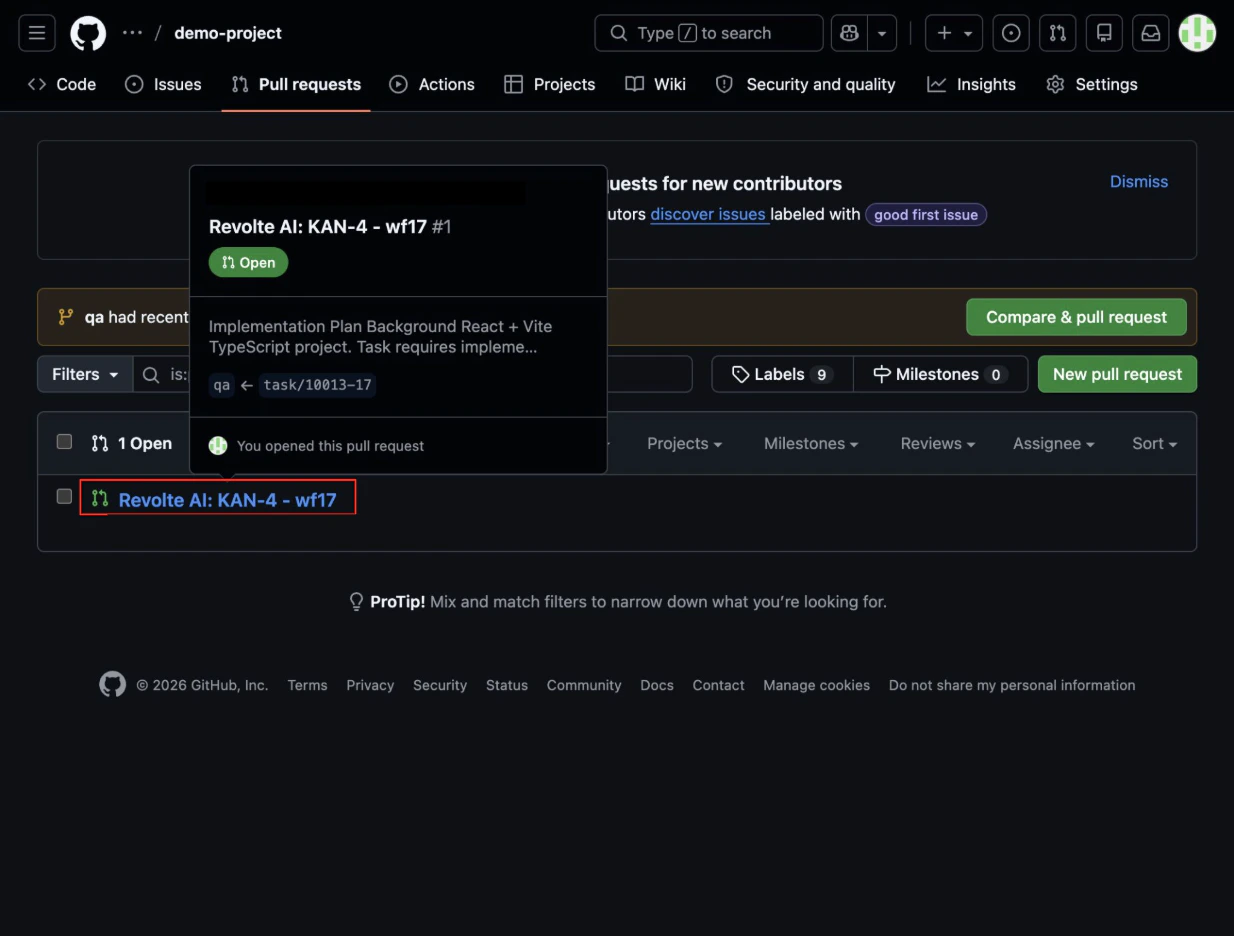
13
Deploy to Preview
After merging, you can deploy the changes to a preview environment. Click View Preview and confirm the deployment using your 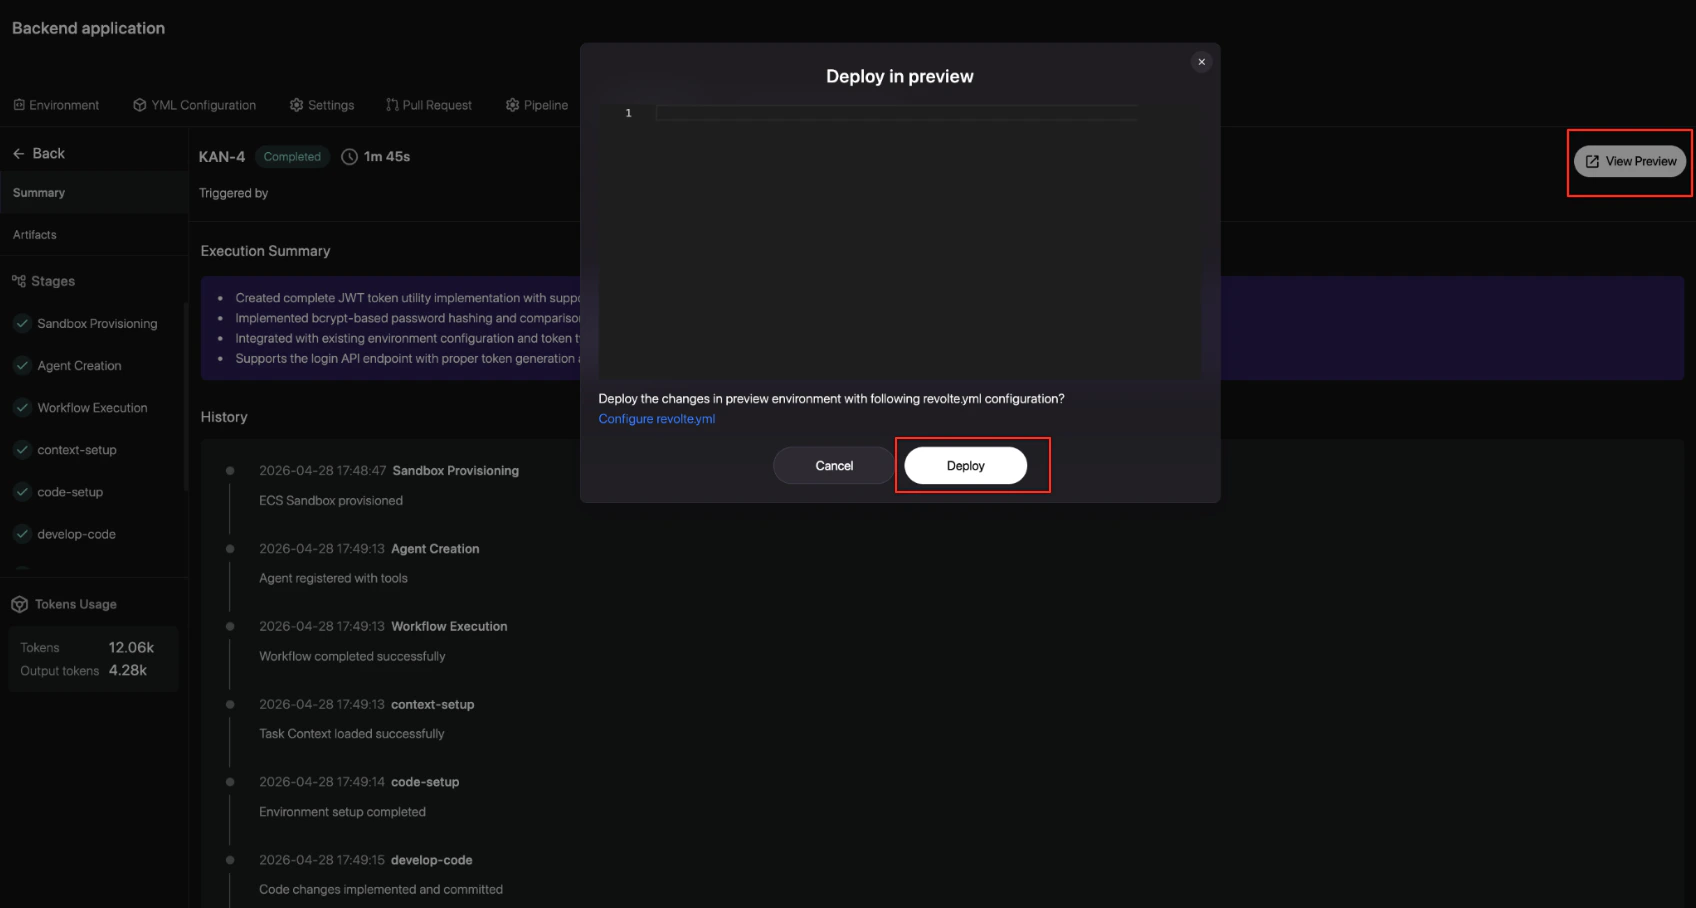
revolte.yml configuration.Next steps
- Workflow Overview
- Quality Assurance Gates Coming Soon
- Product Strategy Automation Coming Soon