Configuration
Revolte offers two ways to connect your Jira workspace: either during the initial onboarding flow or directly from the application workspace settings.- Onboarding Flow
- From the Application (Extensions)
Configure your Jira integration during your initial workspace setup sequence.
1
Install and Configure
Install the Revolte app from the Atlassian Marketplace and connect your Revolte workspace to your Jira site.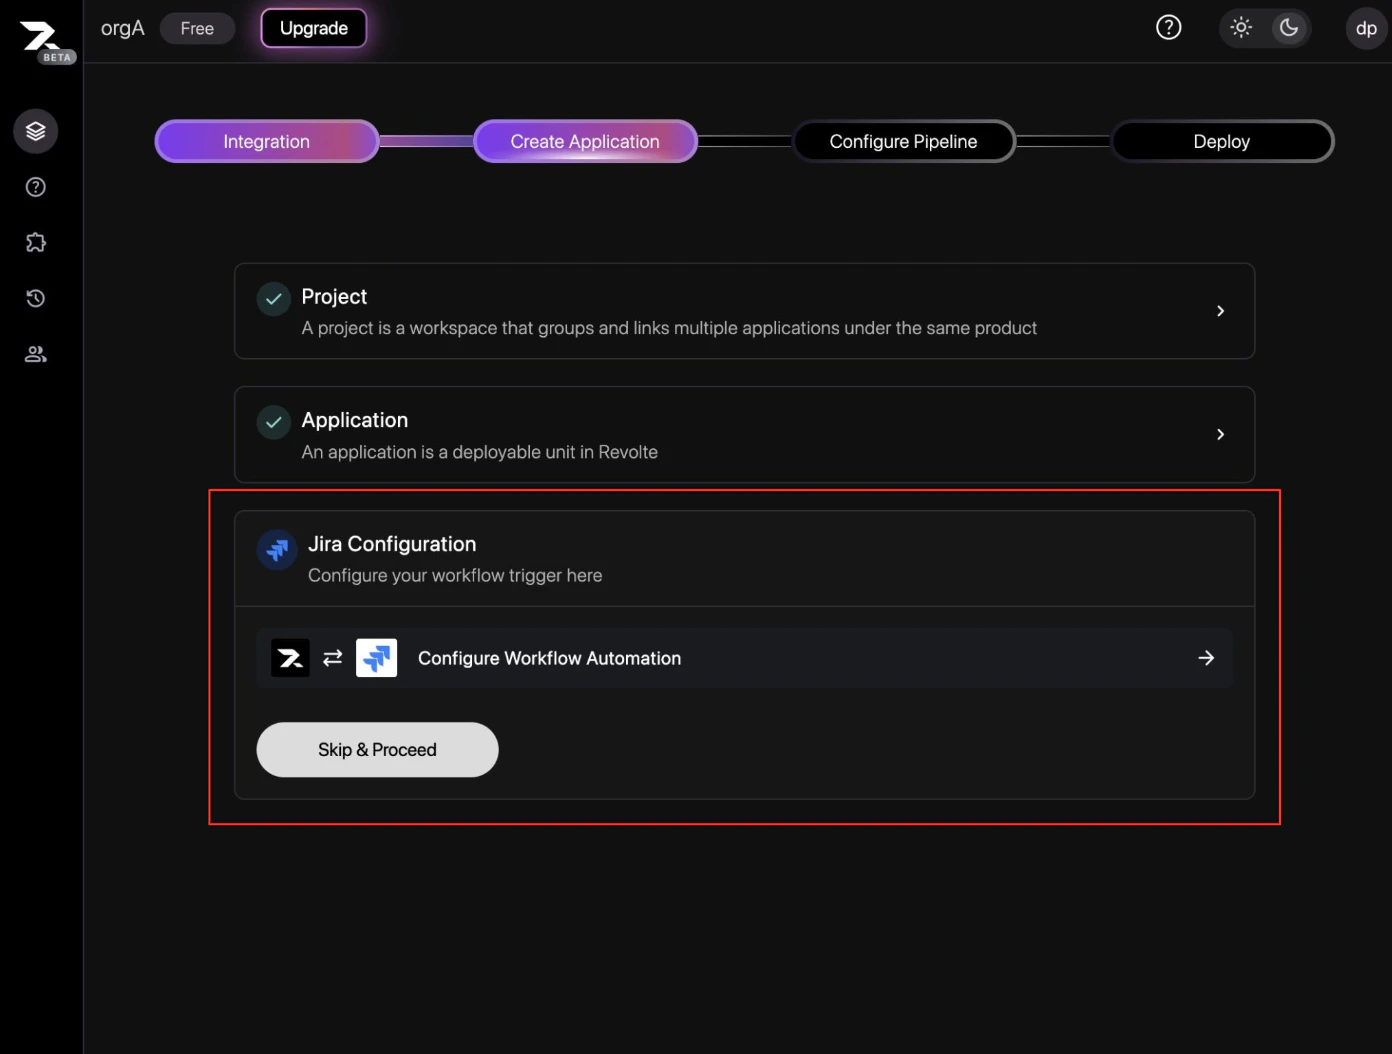
2
Map Projects
Map your Revolte projects to your corresponding Jira projects to finalize the integration.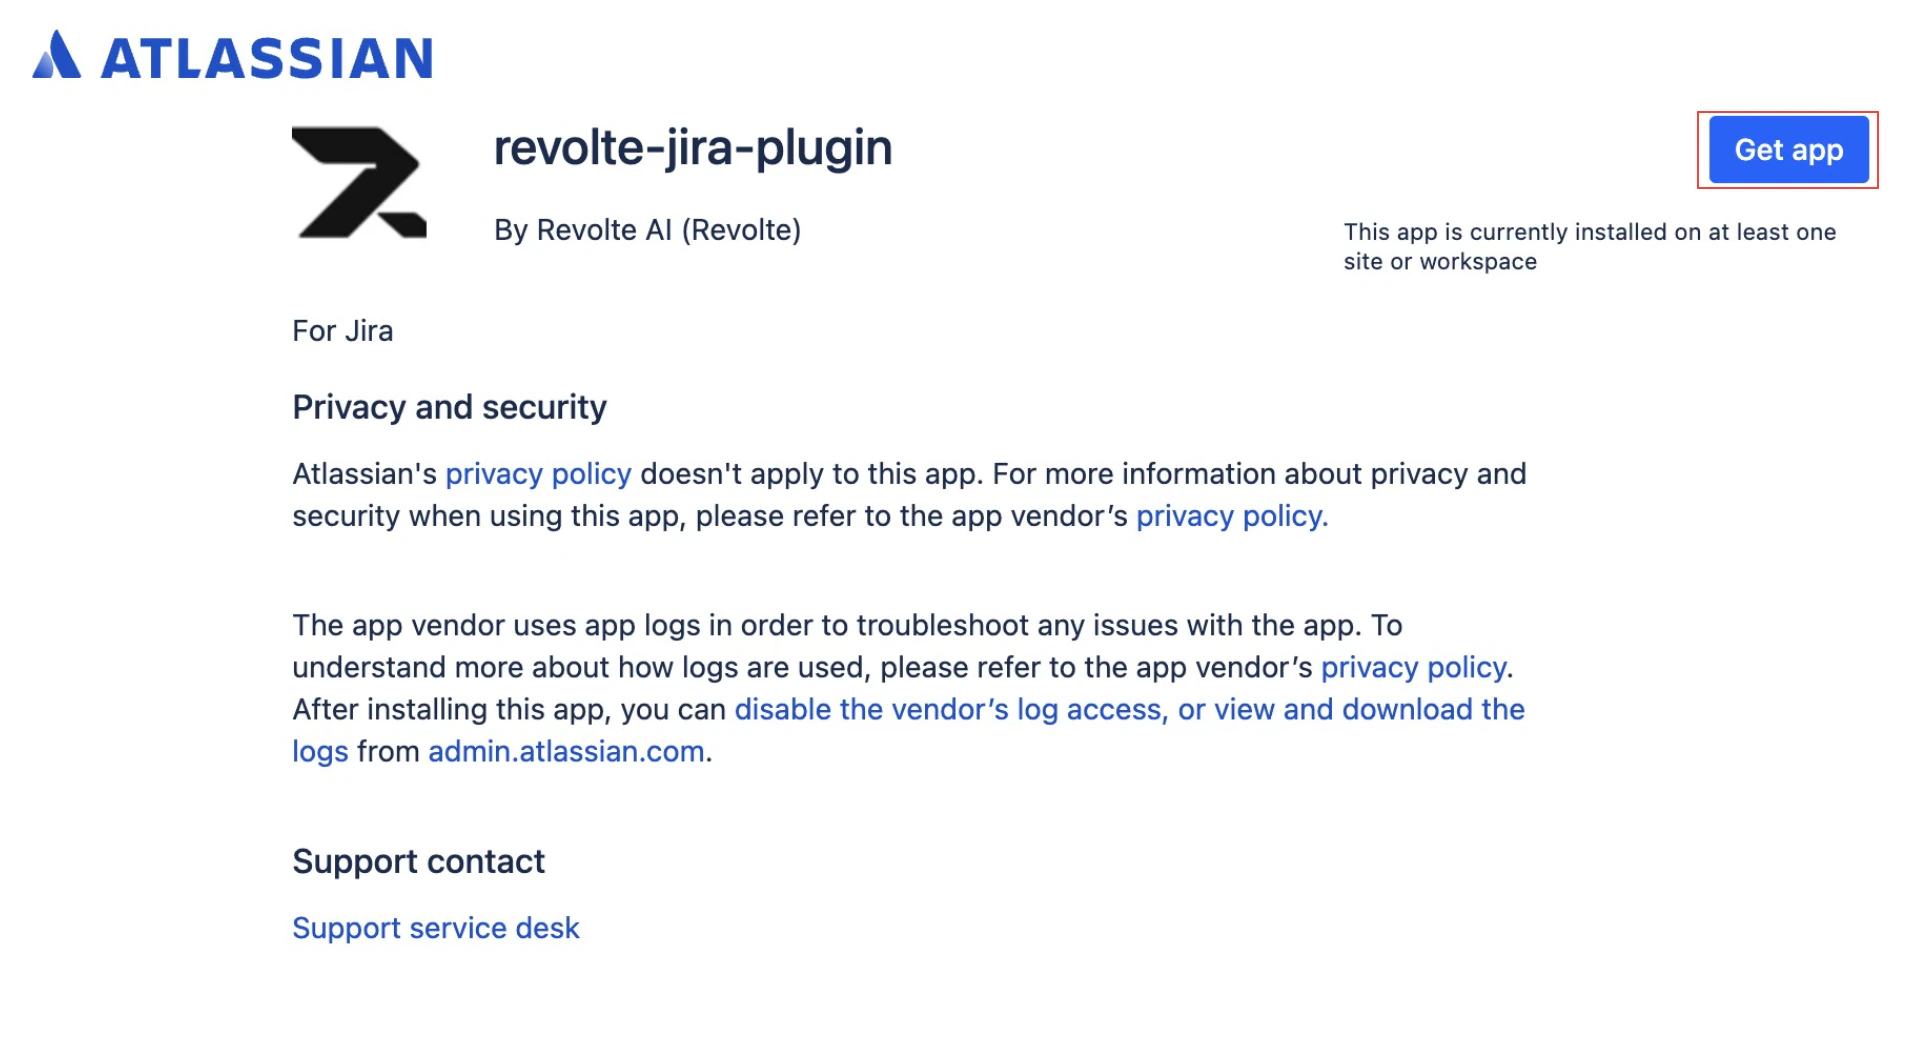
Triggering workflows from Jira
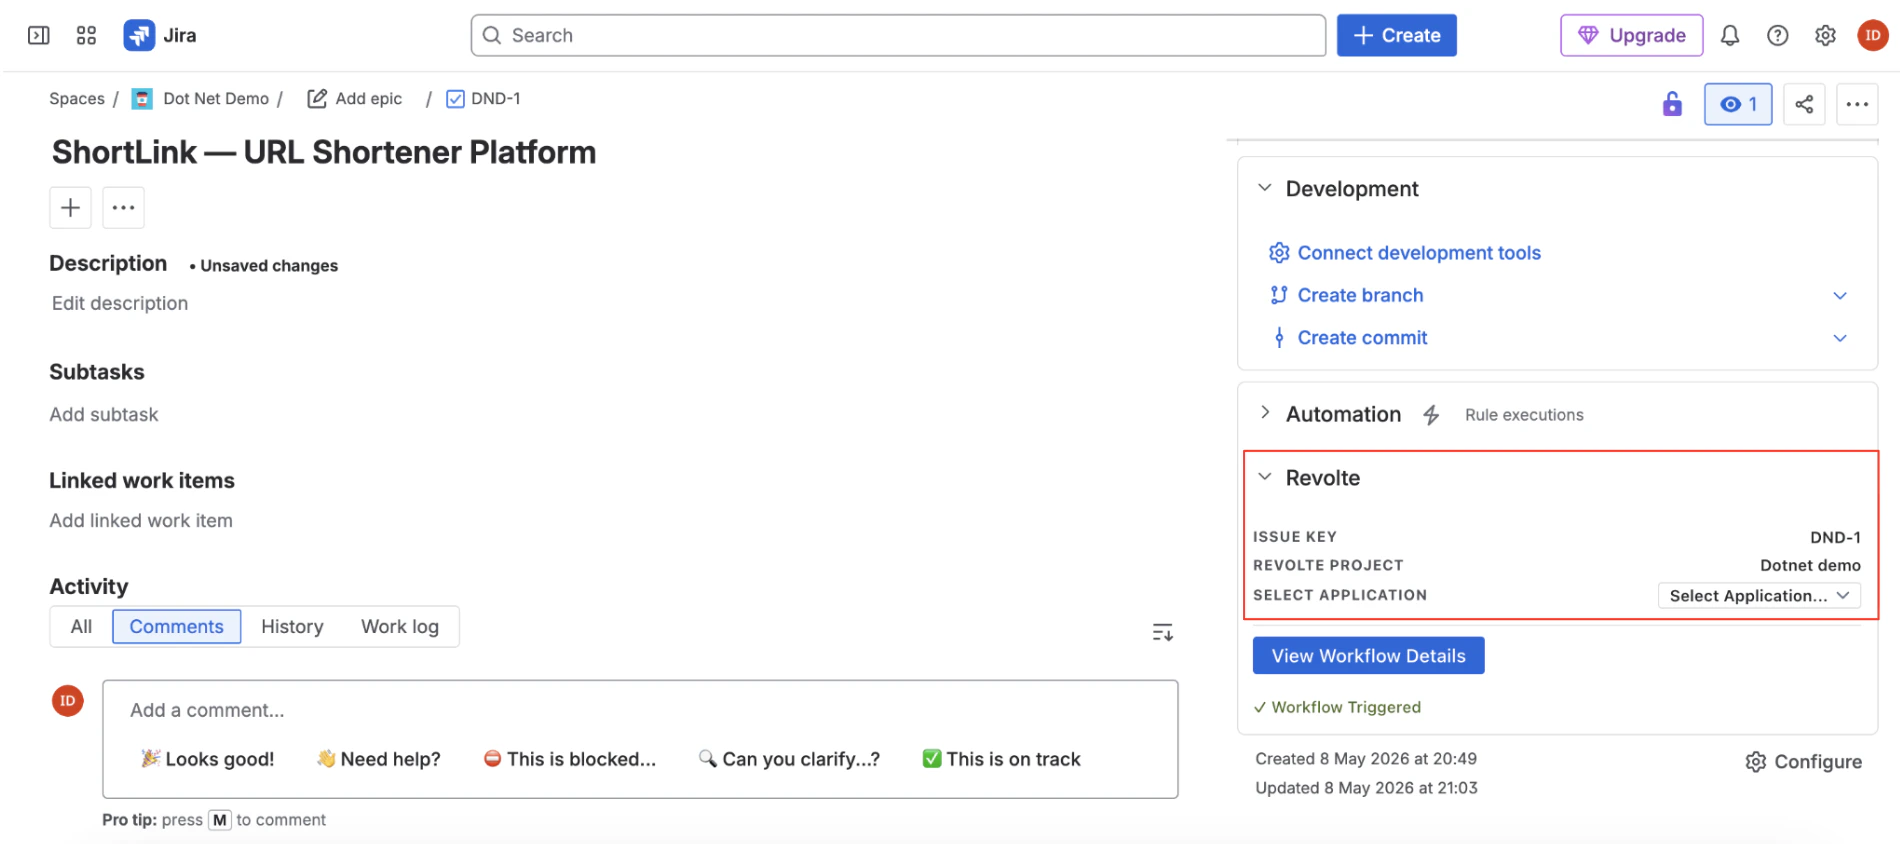
Once you install the Revolte app and map your projects, a Revolte section appears in the right sidebar of every linked Jira issue details page.Select application to trigger
- Open any linked Jira ticket.
- Locate the Revolte panel in the right sidebar.
- Under Select Application, choose the target application service from the dropdown menu.
- Once selected, the AI agent is instantly triggered to begin analyzing requirements, executing sandbox builds, and implementing code changes.
Sidebar panel elements
The sidebar panel provides full visibility and control over the execution state:- Issue Key: Displays the current Jira issue key (e.g.,
DND-1). - Revolte Project: Displays the mapped project context (e.g.,
Dotnet demo). - Select Application: A dropdown to associate the issue with a specific service and launch the development workflow.
- View Workflow Details: Action button linking directly to the Revolte dashboard. Click to view live agent execution progress, step logs, and implementation plans.
- Workflow Status: Displays real-time state feedback (e.g.,
Workflow Triggeredwith a green checkmark) once the AI agent starts executing.