Connect Jira when your team wants to start autonomous work from its existing backlog. The Jira ticket supplies the request, while the selected Revolte application identifies the codebase that should be changed.
1

Open Autopilot

In Revolte, open Chat, select Autopilot, and begin the Jira integration step.
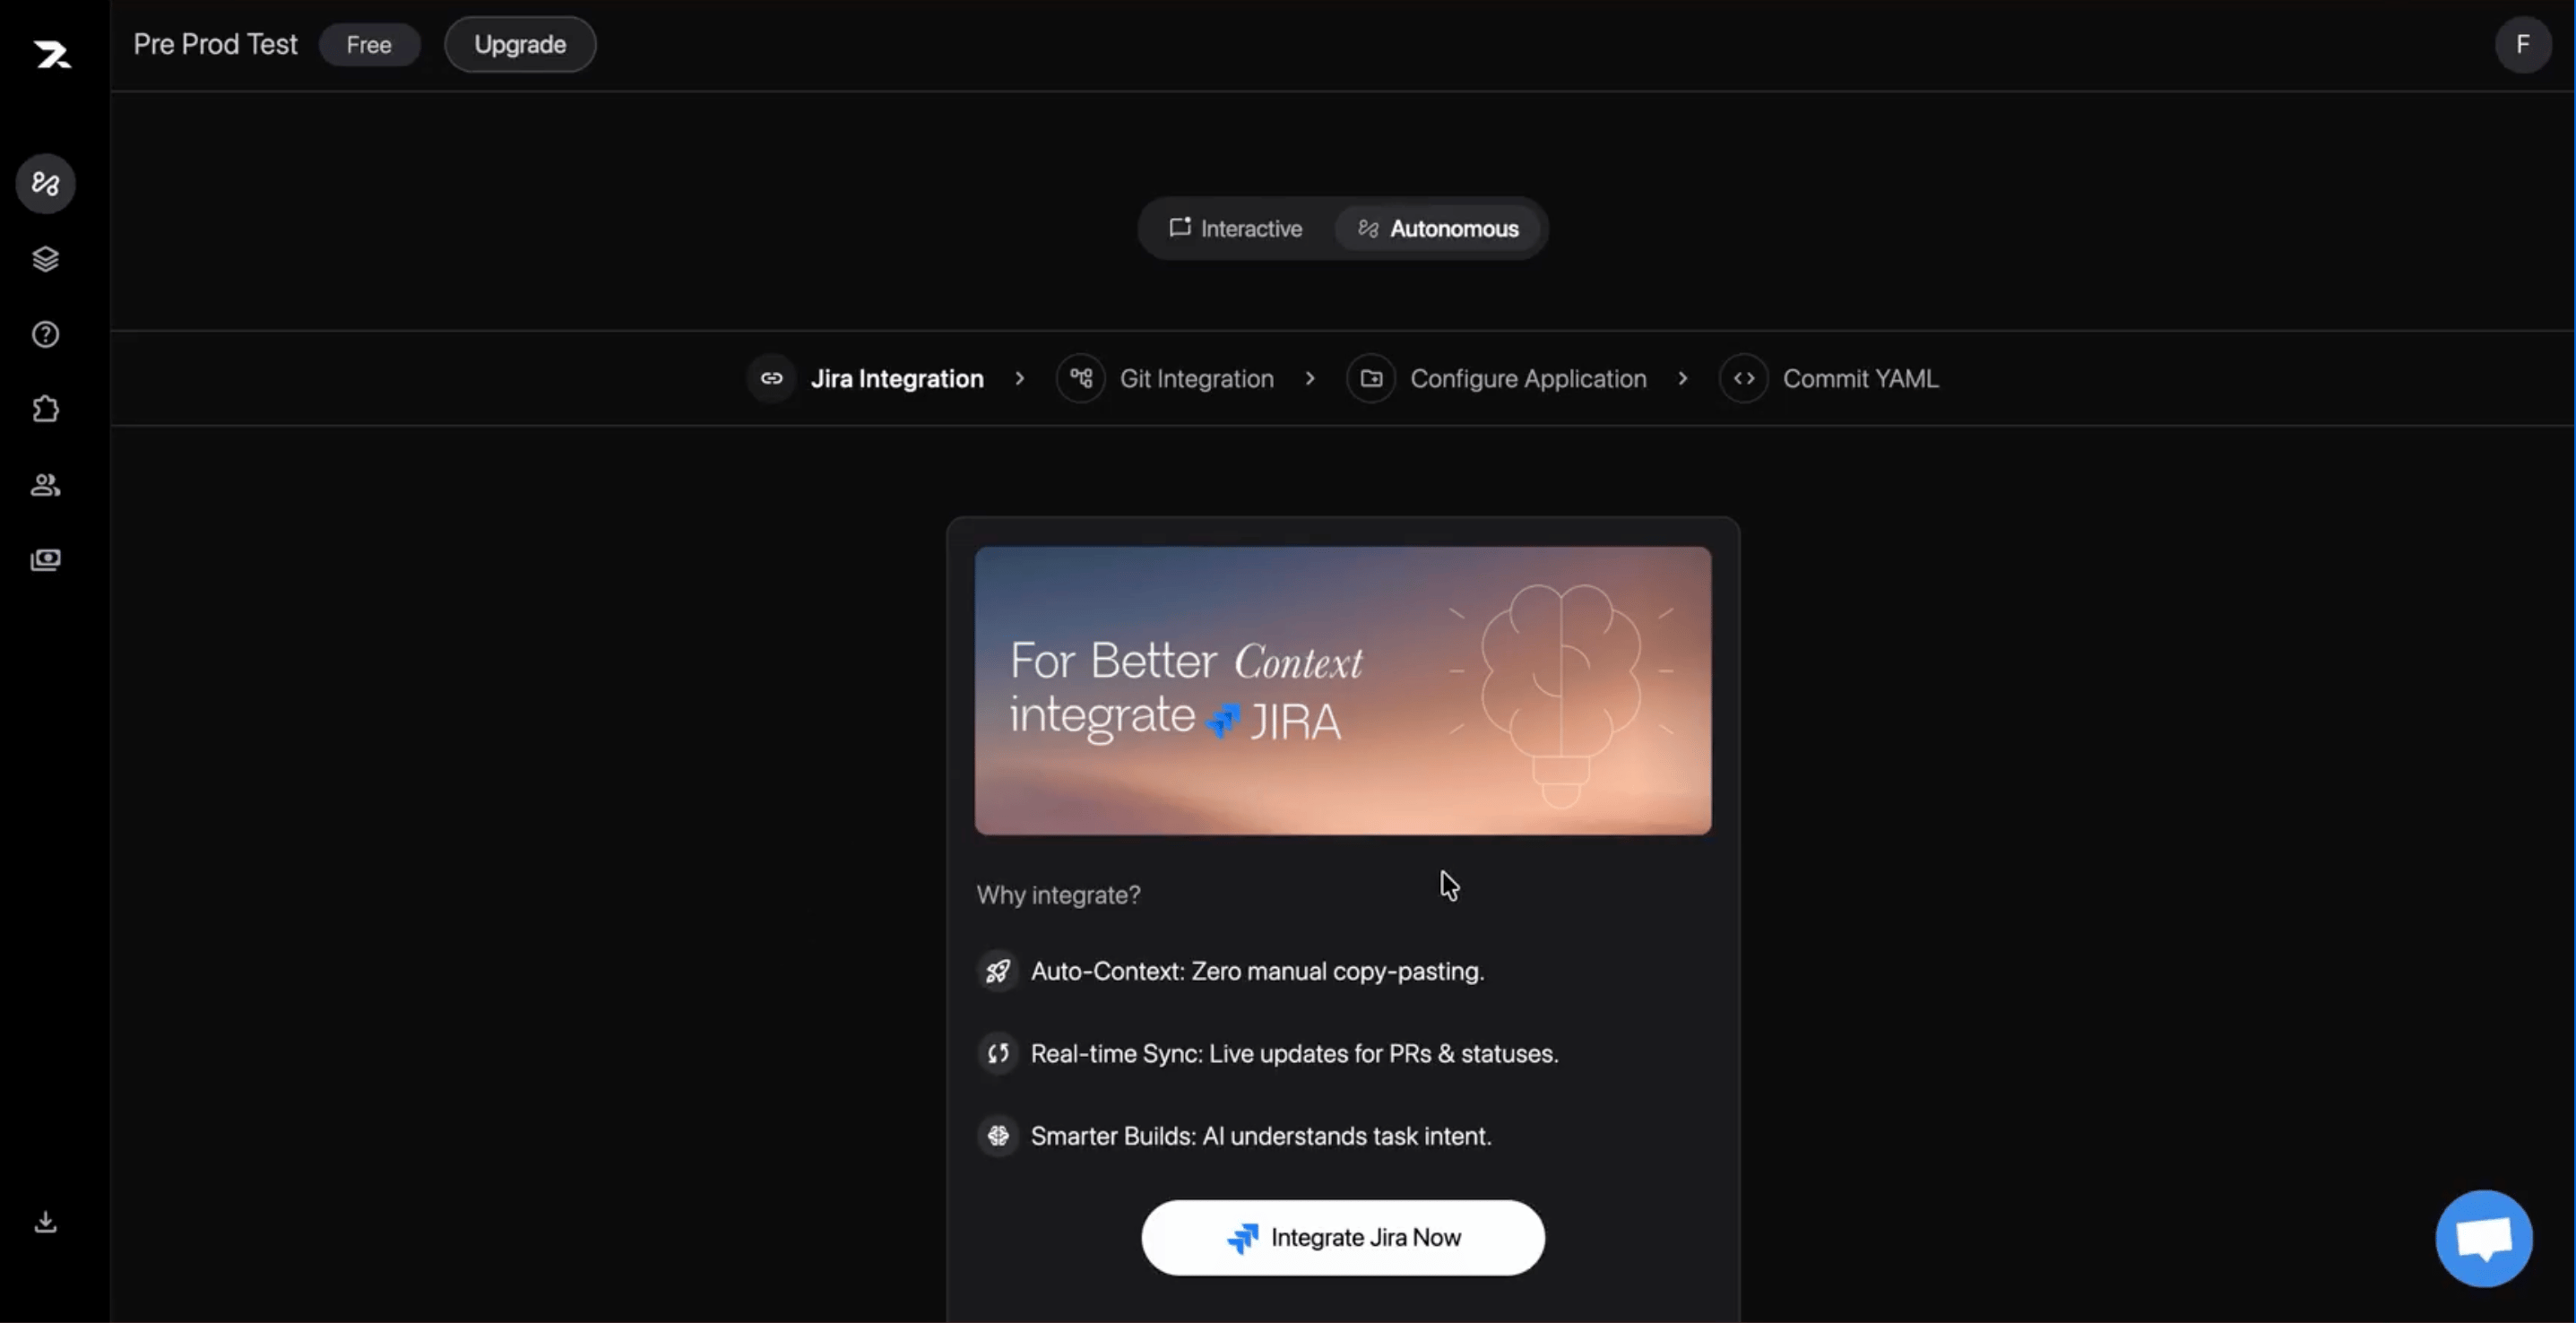
The Autopilot setup screen showing Jira Integration as the first setup step.
2

Authorize Your Jira Site

Install the Revolte app from the Atlassian Marketplace, review the requested permissions, and select the Jira site your team uses.
3

Confirm the Connection

Return to Revolte and confirm that Jira Integration shows a green checkmark and the connected site name.
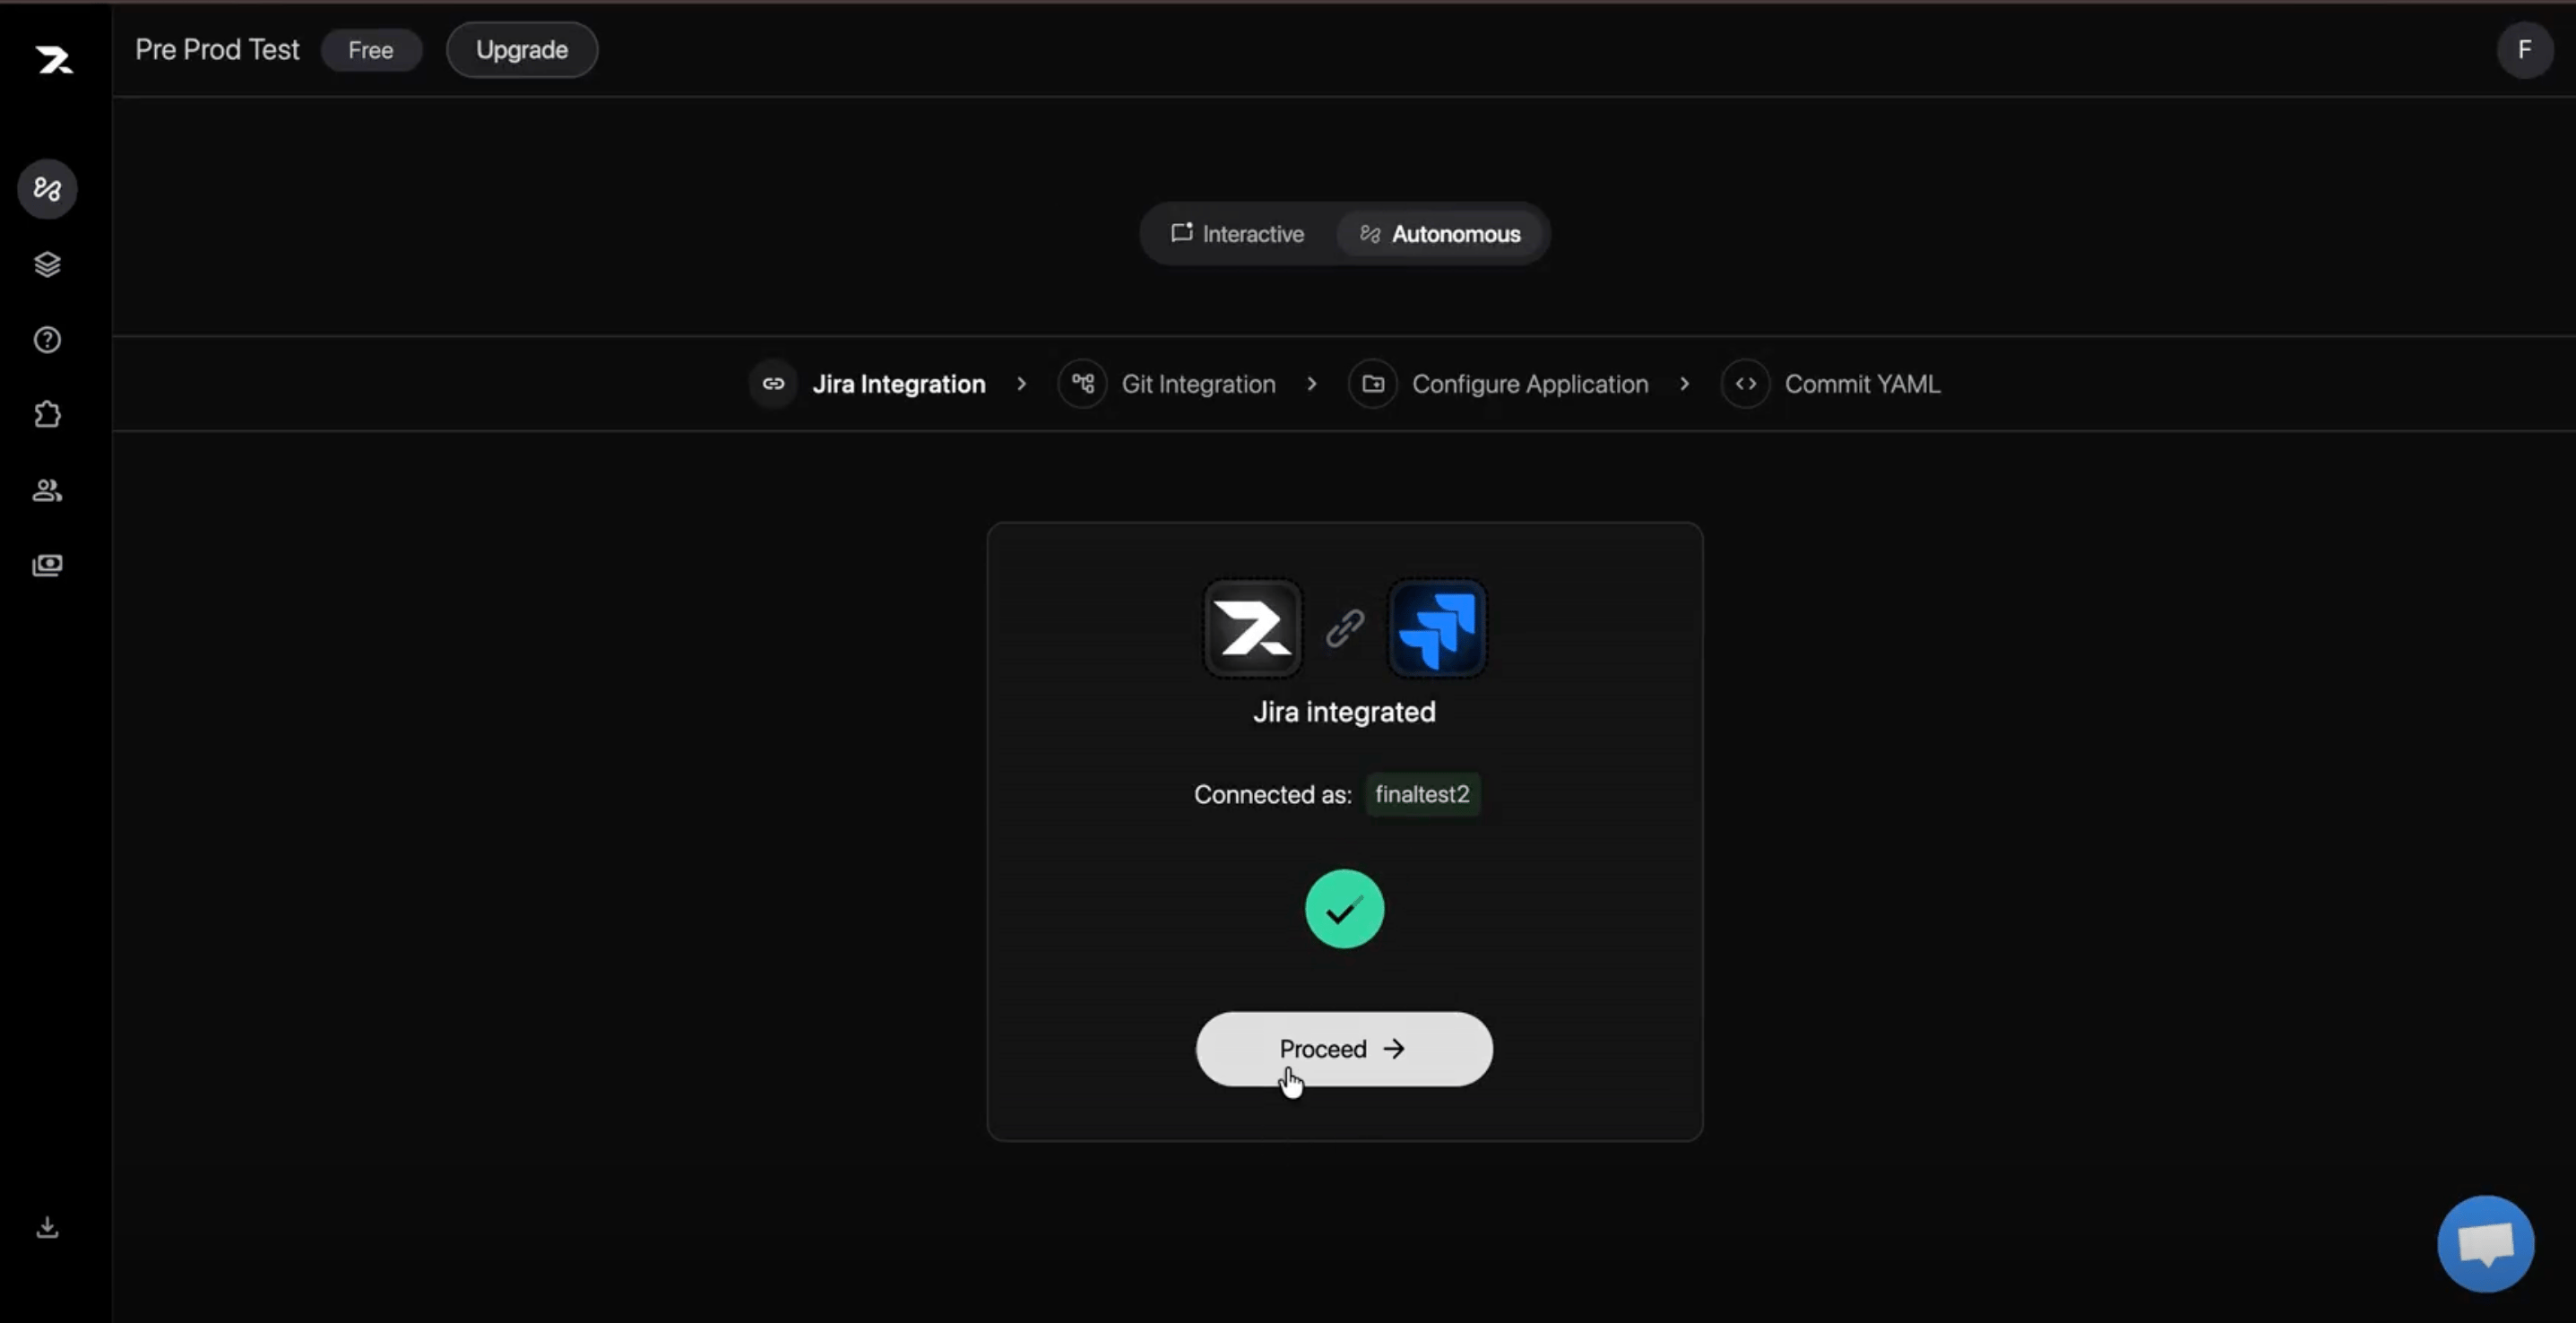
The Autopilot setup checklist showing Jira integrated successfully.
After setup, open a Jira ticket, choose the target application from the Revolte panel, and follow the triggered workflow in Revolte. For the full installation and ticket-trigger flow, see Connect Jira.