

1
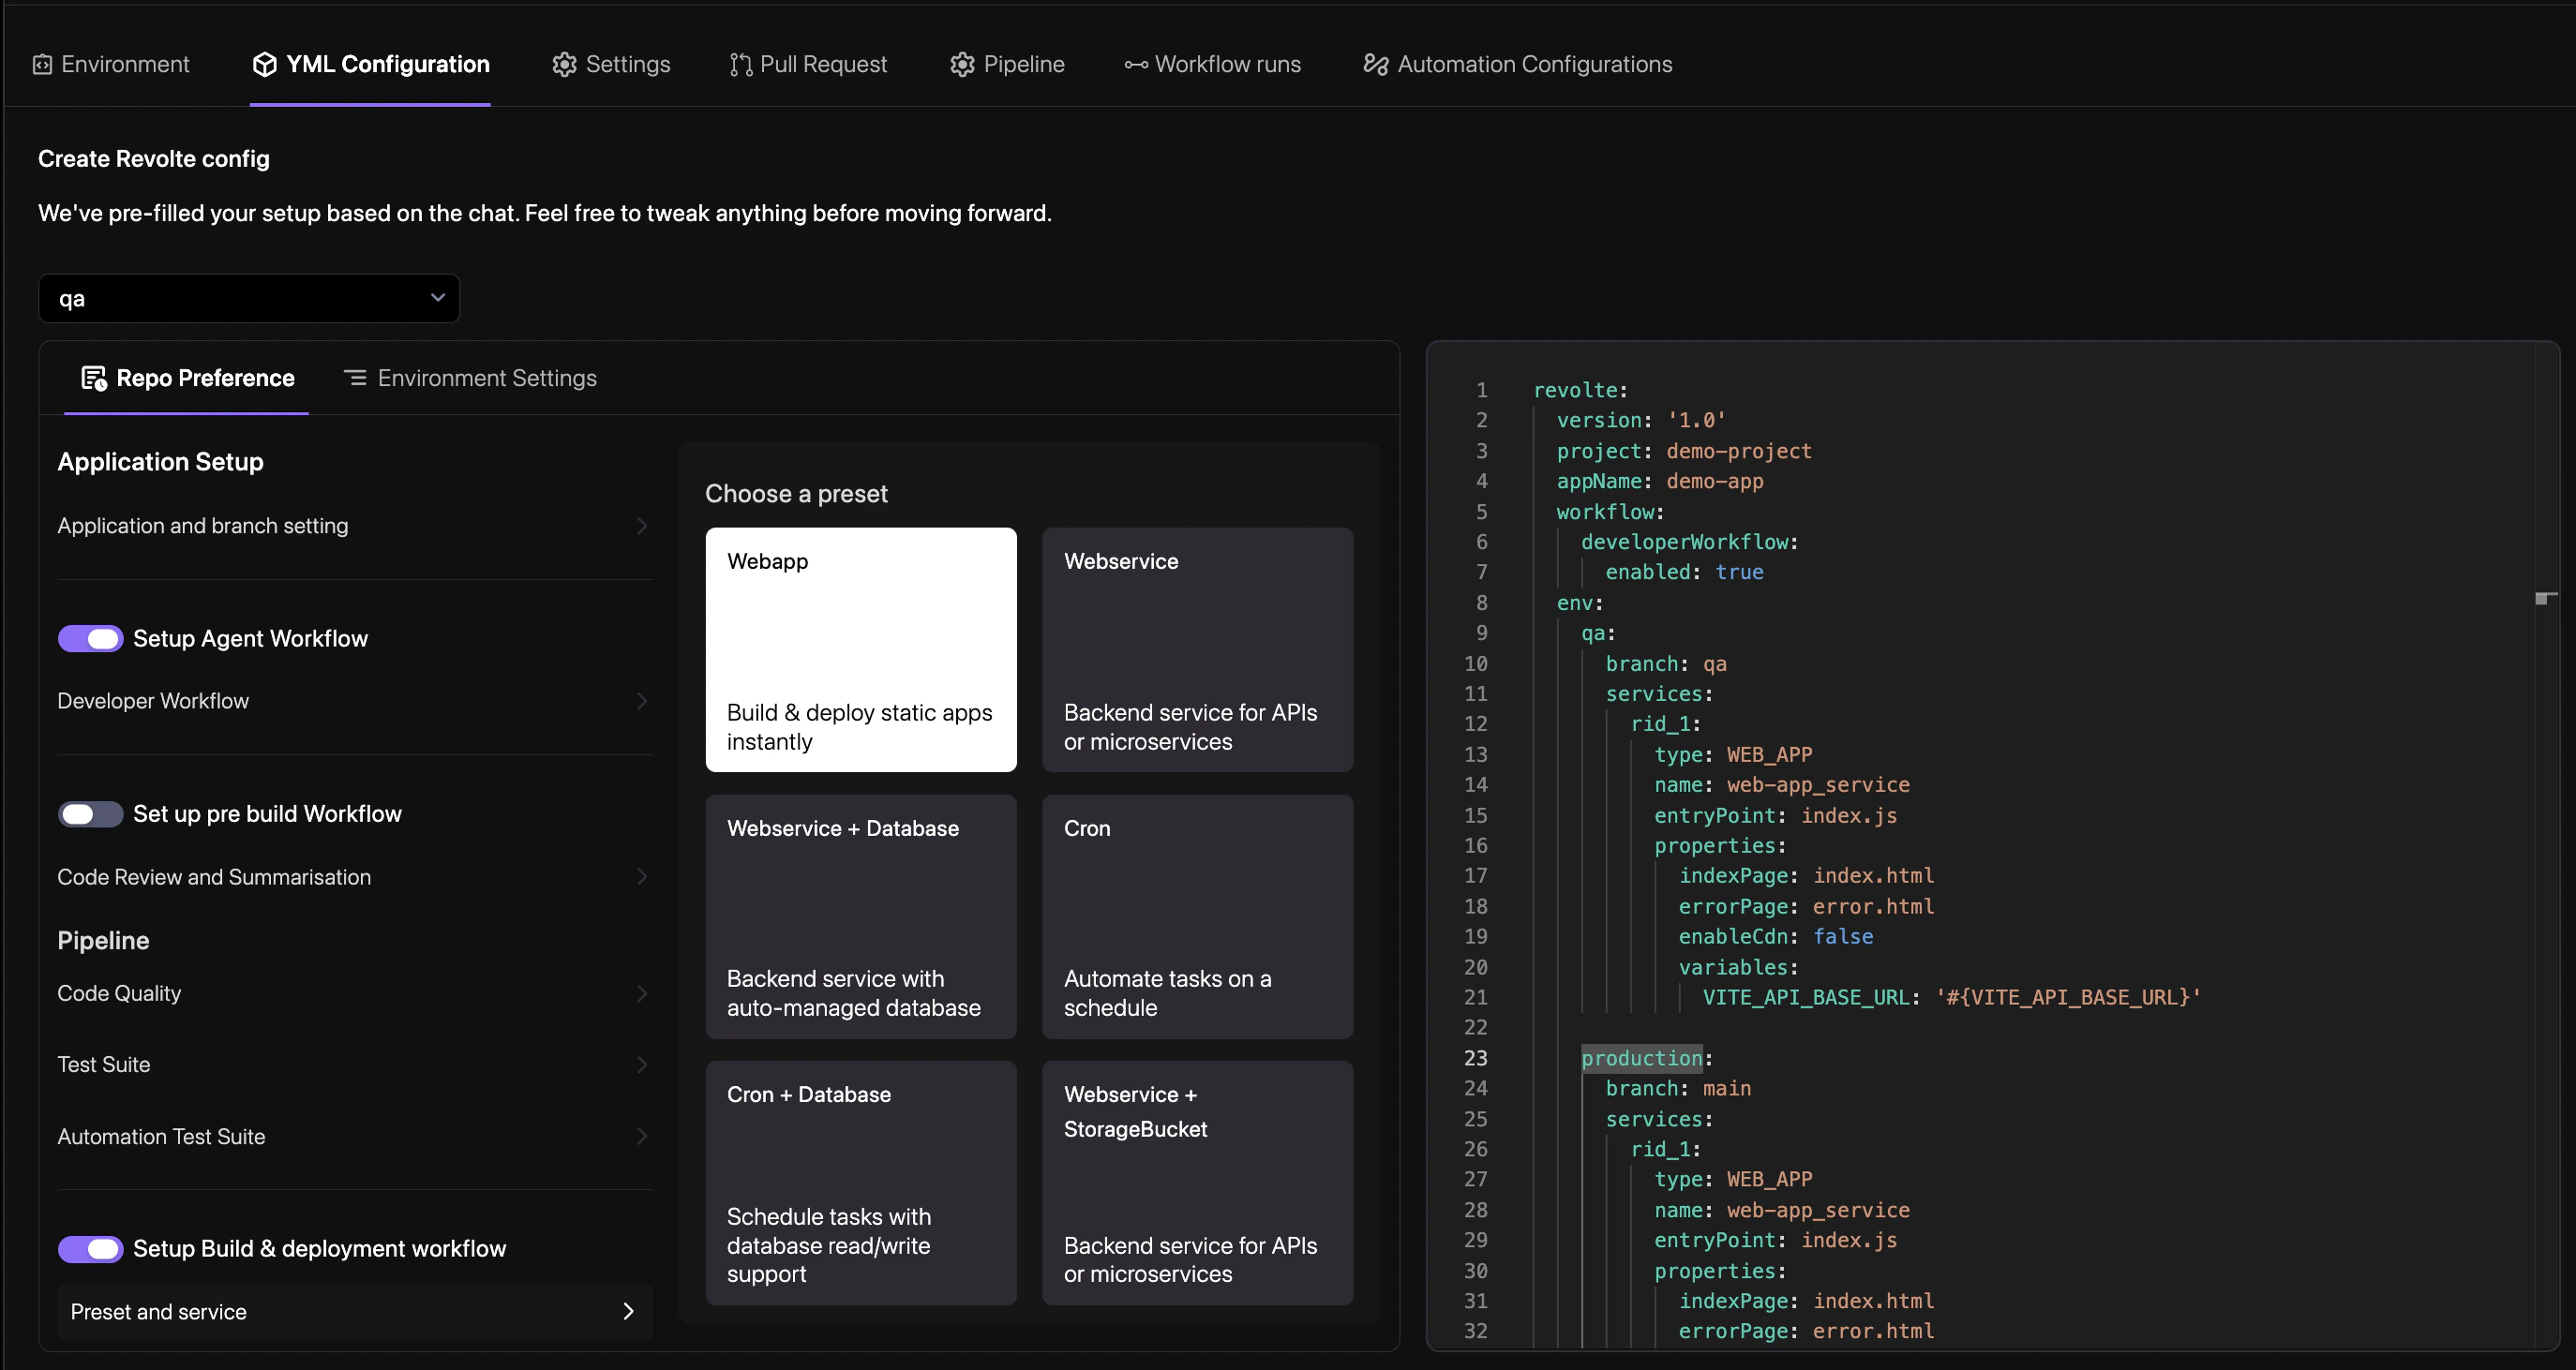
Choose a Preset
2
Repo Preference
The Repo Preference tab is identical across all service presets. See Repository Preference for a full walkthrough of each setting.
3
Web App — Environment Settings
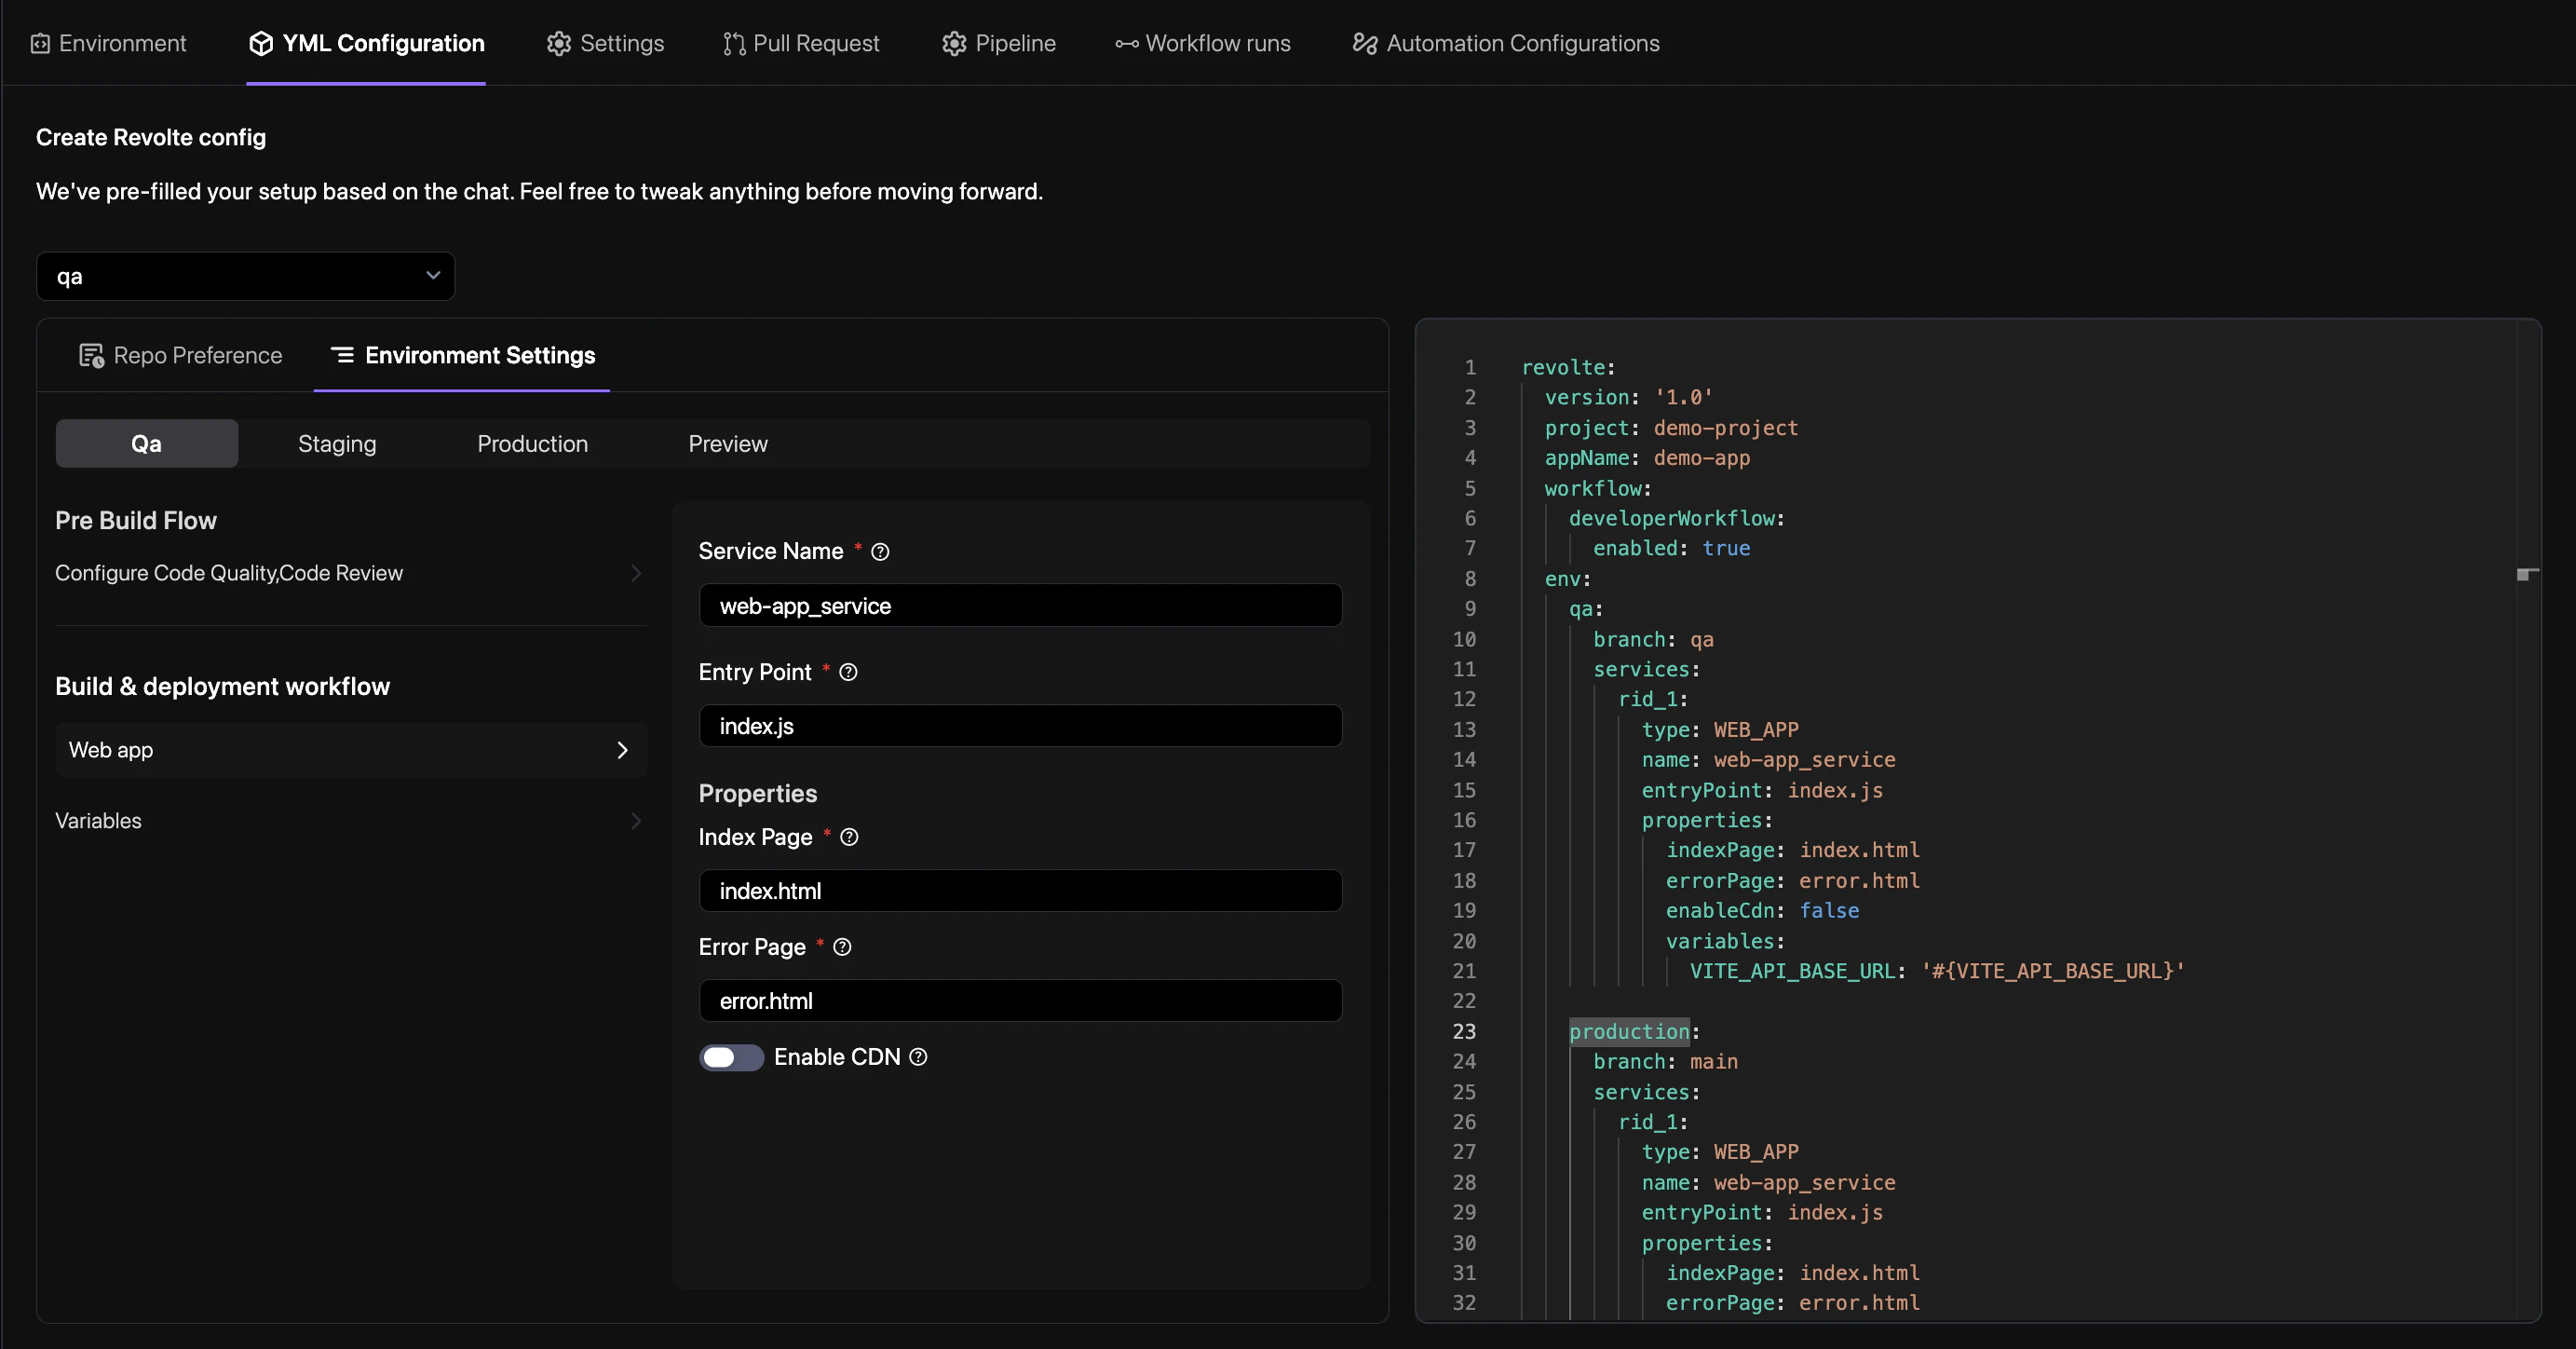
- Service Name — Enter a unique identifier for this service (e.g.,
frontend_app). - Entry Point — The main file that starts the service (e.g.,
index.js). - Properties
- Index Page — The default page served for the root path (e.g.,
index.html). - Error Page — The page served for 404 or other errors (e.g.,
index.htmlfor SPAs). - Enable CDN — Toggle to serve assets via Revolte’s global edge network for faster delivery.
- Index Page — The default page served for the root path (e.g.,
4
Variables & Secrets
Configure environment variables and encrypted secrets for your web application. See Variables & Secrets for a detailed guide on managing environment-specific configurations.
5
Commit
At the bottom of the panel, fill in the Commit Details:
- File Name — The configuration file to create or update in your repository (e.g.,
revolte.yml). - Commit Message — A short description of what you configured (e.g.,
Add web app). - Choose Branch — The branch where the configuration file will be committed.
Tip: For Single Page Applications (SPAs), set the Error Page to index.html to ensure your frontend router handles all paths correctly.