> ## Documentation Index
> Fetch the complete documentation index at: https://docs.revolte.ai/llms.txt
> Use this file to discover all available pages before exploring further.
# Sync Configuration Changes
> Every change you make in the Revolte UI—whether in **Repo Preferences** or **Environment Settings**—must be committed back to your repository to take effect.
## The commit process
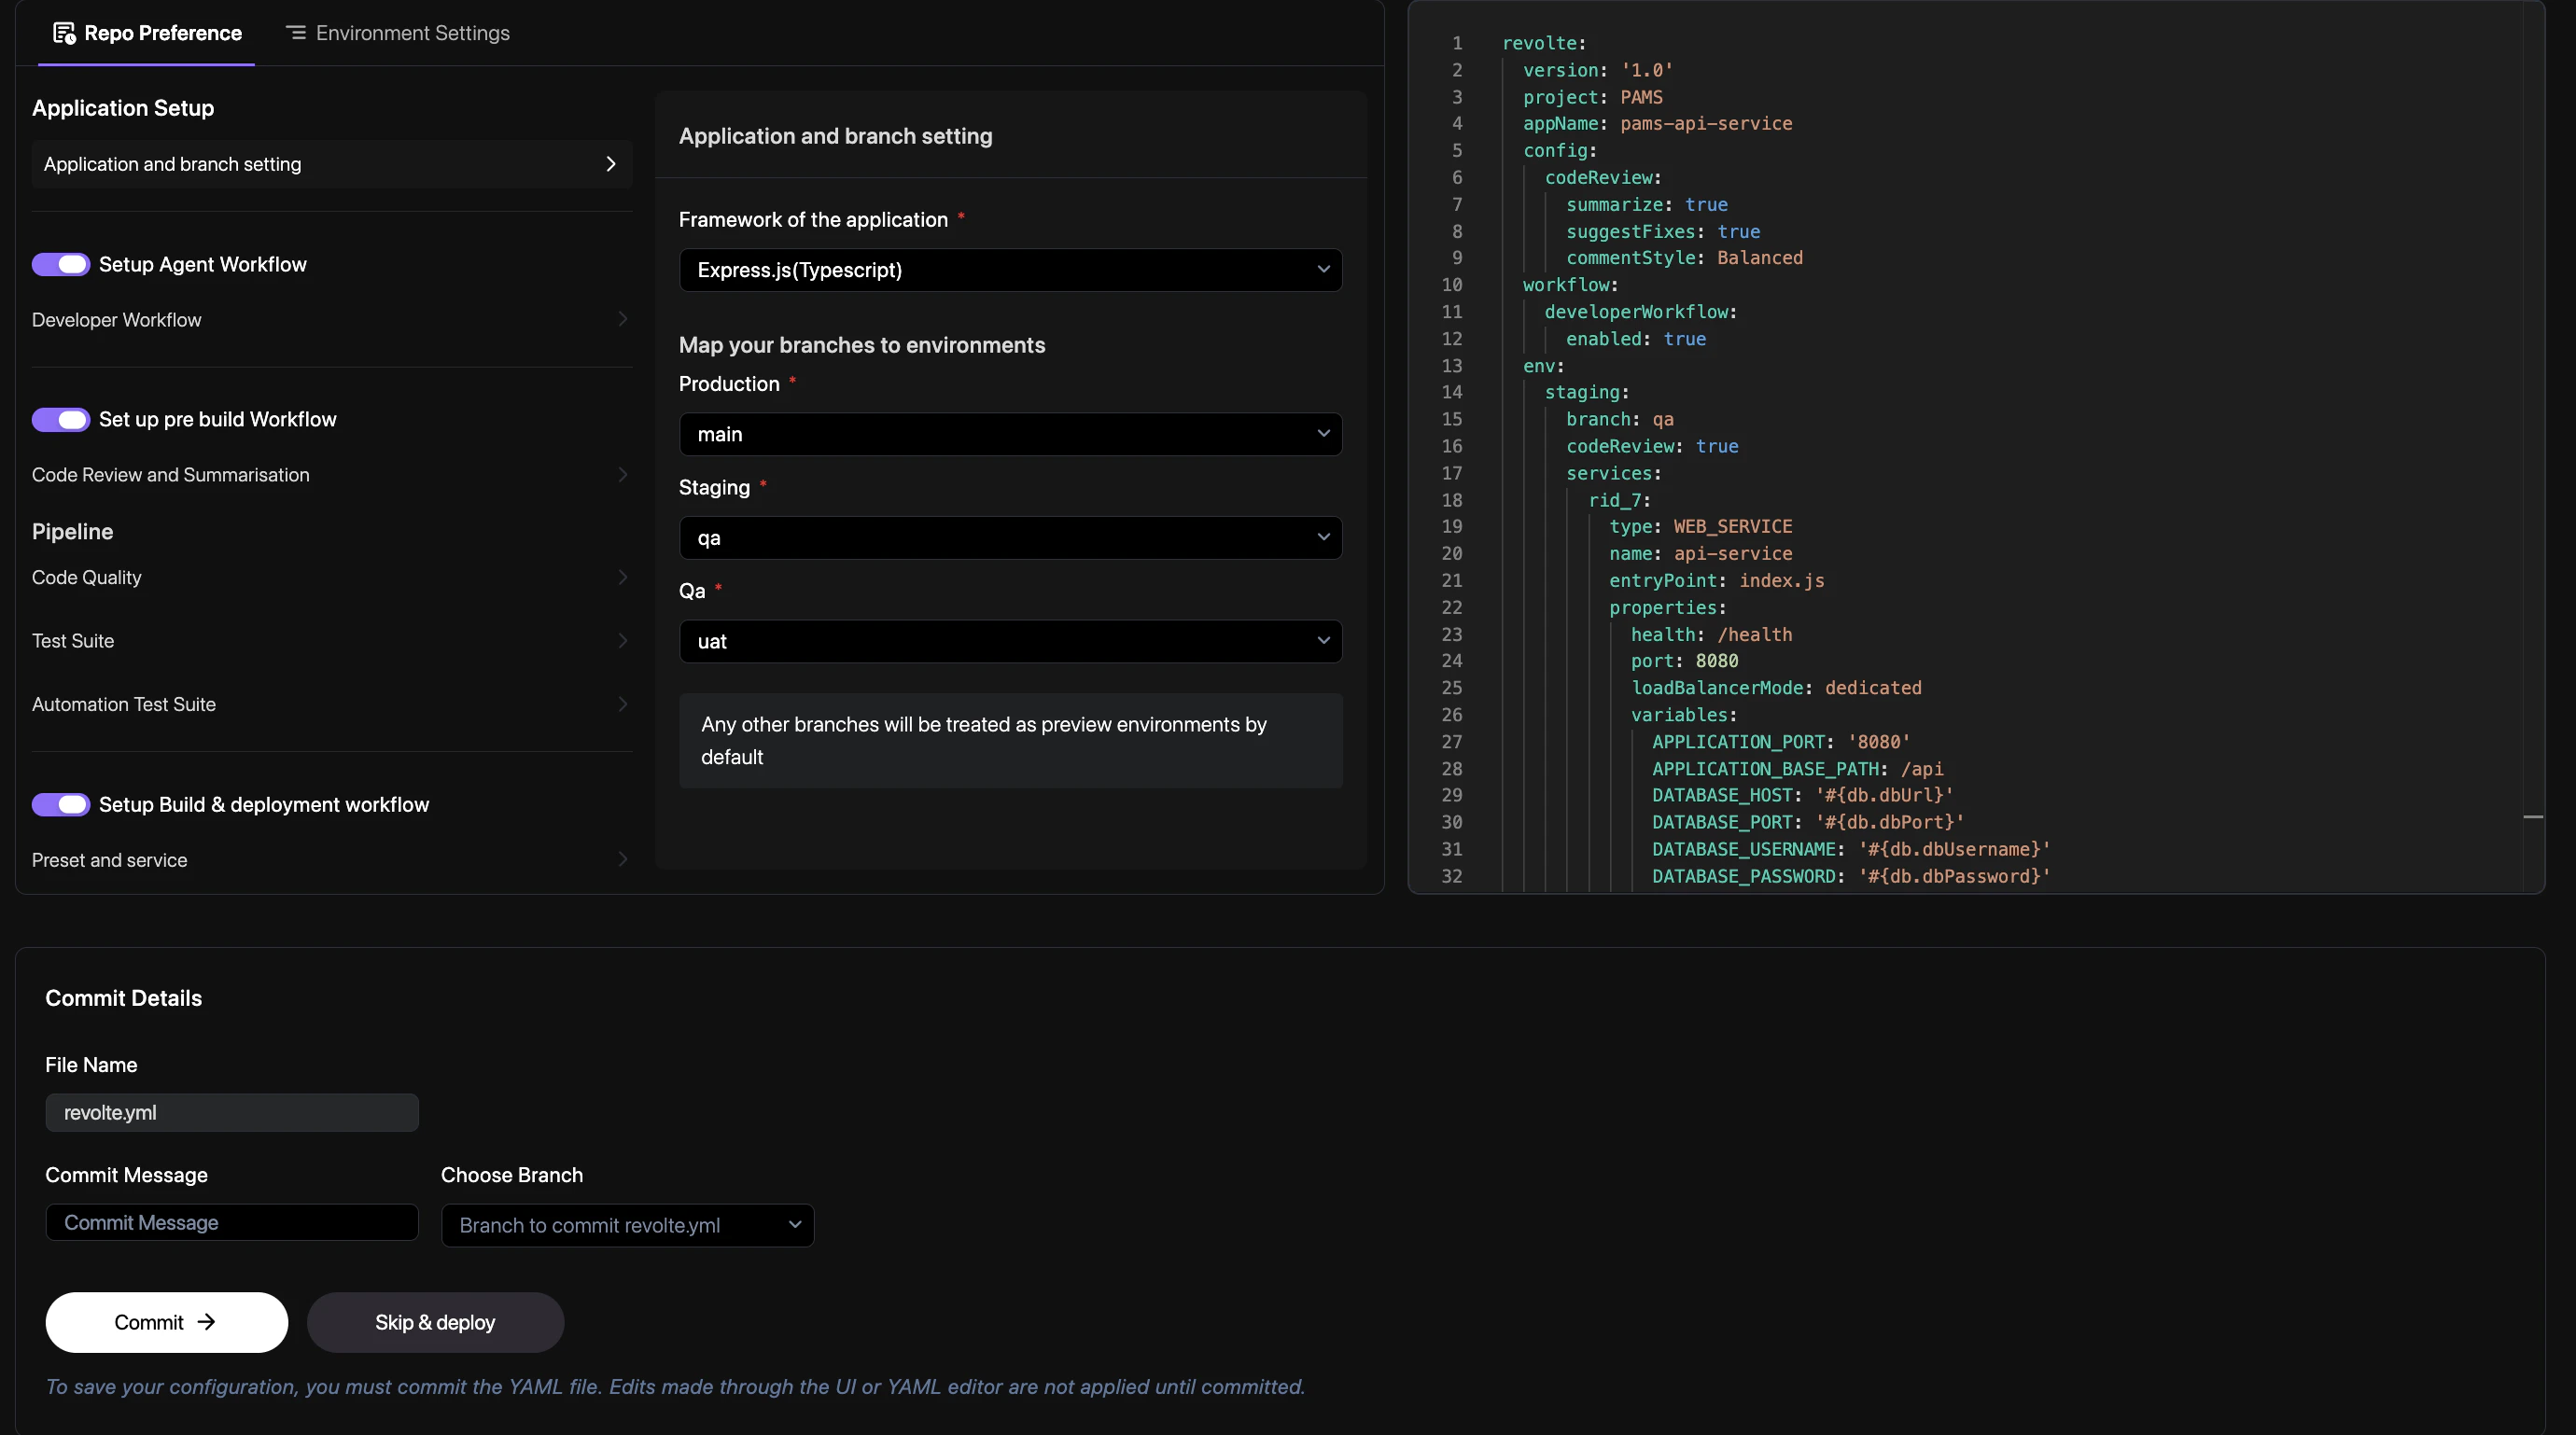
To apply your changes, you must complete the **Commit Details** workflow. This ensures that every modification is recorded in your Git history.
 ### Steps to commit
1. **Review YAML**: Review the updated `revolte.yml` configuration in the editor on the right.
2. **Enter Commit Message**: Type a description of your changes in the **Commit Message** field.
3. **Choose Branch**: Select the target branch from the **Choose Branch** dropdown menu.
4. **Finalize**: Click the **Commit** button to save your changes to the repository.
**Important:** Edits made through the UI or YAML editor are not applied until they are committed.
You can also choose **Skip & deploy** if you want to test changes without committing, but these
will not be persisted in your `revolte.yml`.
## Manual updates
If you prefer to edit your `revolte.yaml` directly in your code editor, simply commit and push your changes. Revolte will automatically detect the update and apply the new configuration.
### Steps to commit
1. **Review YAML**: Review the updated `revolte.yml` configuration in the editor on the right.
2. **Enter Commit Message**: Type a description of your changes in the **Commit Message** field.
3. **Choose Branch**: Select the target branch from the **Choose Branch** dropdown menu.
4. **Finalize**: Click the **Commit** button to save your changes to the repository.
**Important:** Edits made through the UI or YAML editor are not applied until they are committed.
You can also choose **Skip & deploy** if you want to test changes without committing, but these
will not be persisted in your `revolte.yml`.
## Manual updates
If you prefer to edit your `revolte.yaml` directly in your code editor, simply commit and push your changes. Revolte will automatically detect the update and apply the new configuration.