> ## Documentation Index
> Fetch the complete documentation index at: https://docs.revolte.ai/llms.txt
> Use this file to discover all available pages before exploring further.
# Create Your First Workflow
> Follow this guide to activate repository-connected automation for your project.
Launch your first AI-powered development workflow in minutes by connecting your Jira workspace and defining your automation rules.
**Prerequisite**: Ensure your repository is connected to a Revolte application. Learn how in the [Get Started](/quick-start#onboarding-walkthrough) guide.
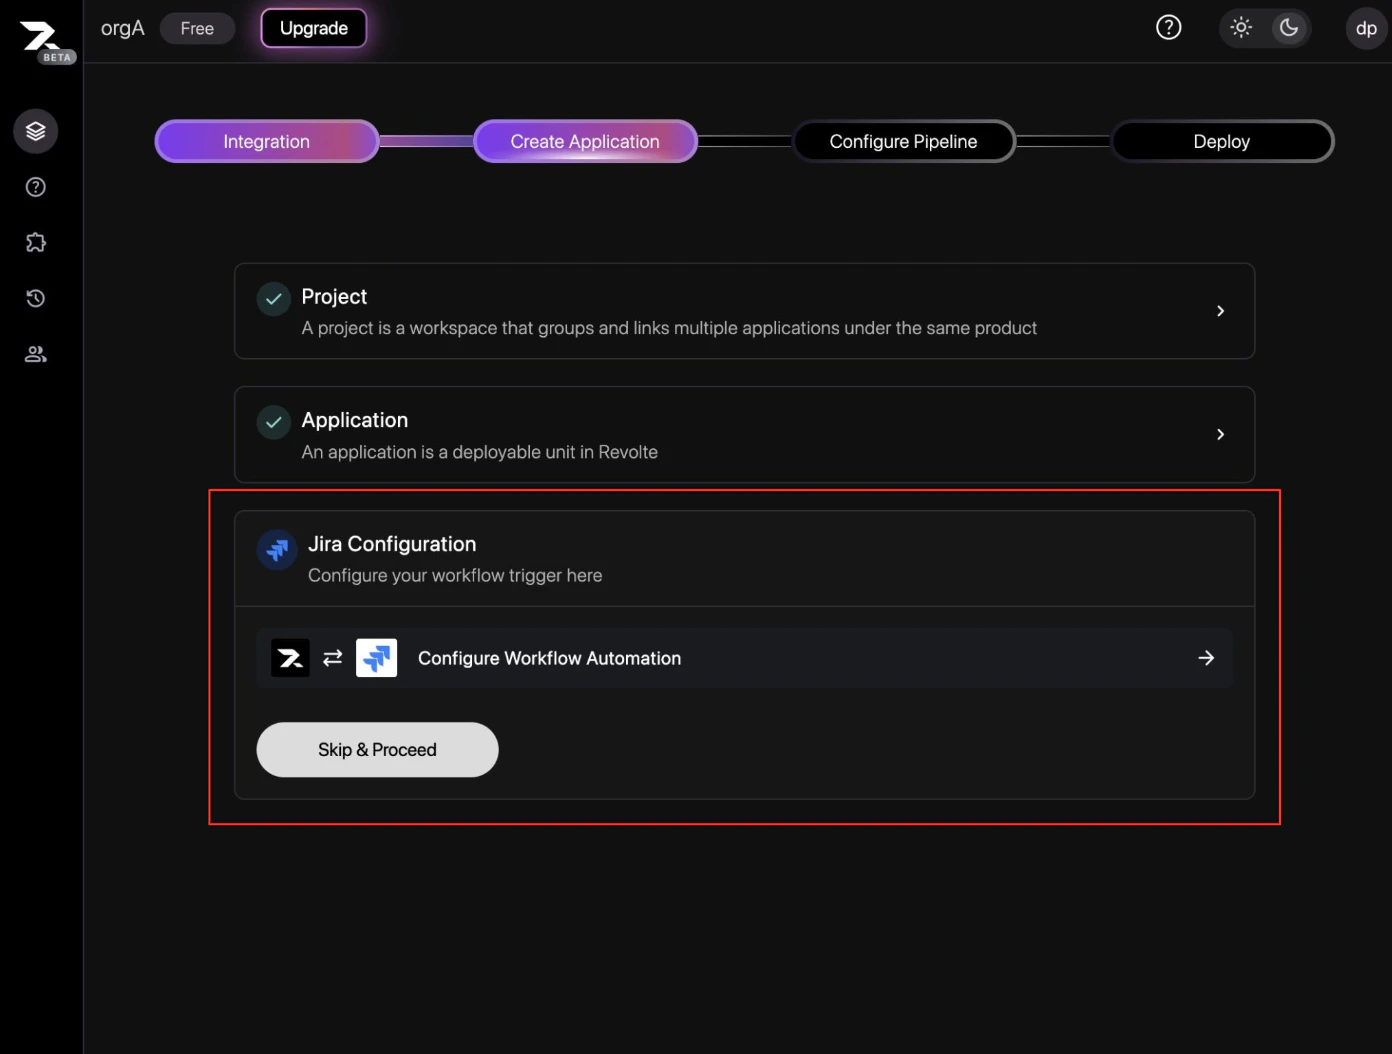
Navigate to your application [integration settings](/integrations/project-management/jira). Under **Jira Configuration**, select **Configure Workflow Automation** to begin the setup process.
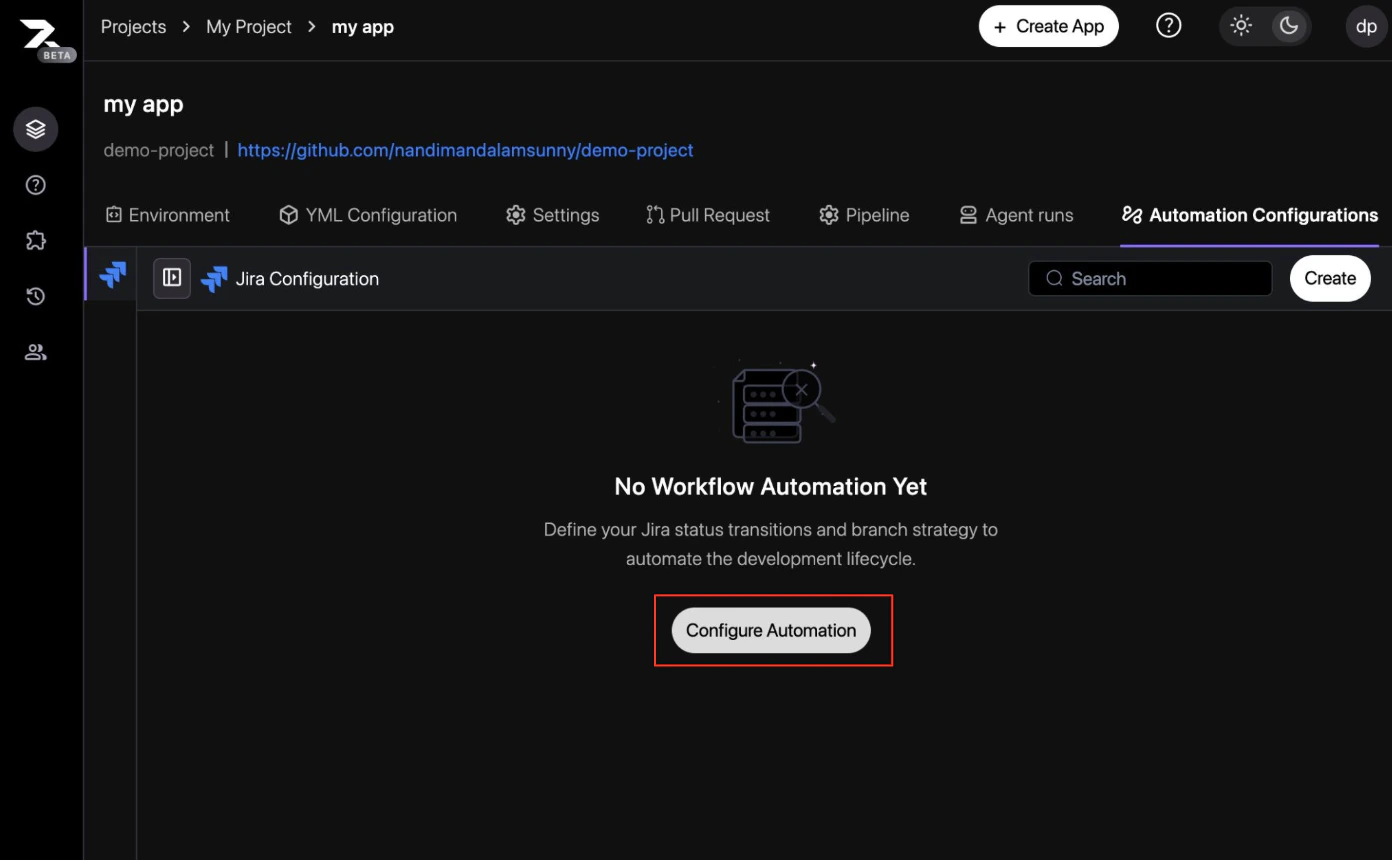
 Go to the **Automation Configurations** tab. If no workflows are active, you will see the initialization screen. Click **Configure Automation**.
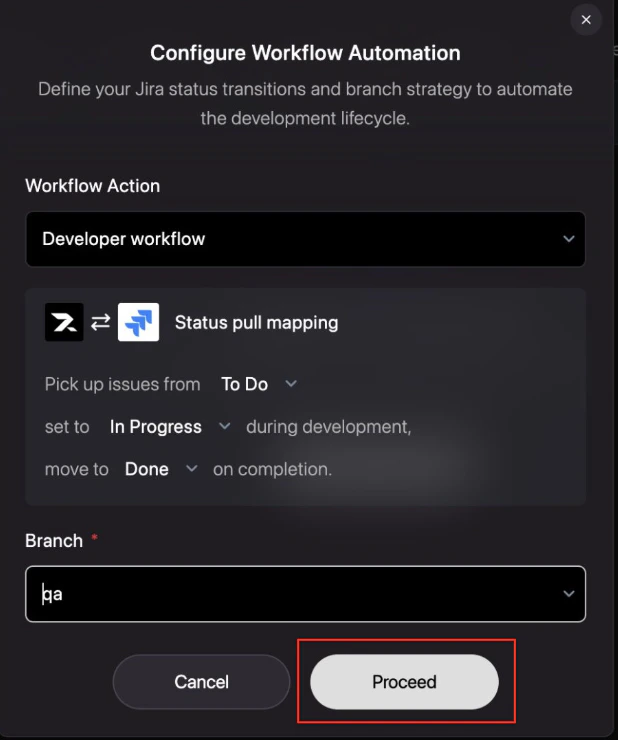
 Define how Revolte should interact with your Jira statuses.
* **Action**: Select `Developer workflow`.
* **Mapping**: Choose which statuses trigger development (e.g., *To Do* to *In Progress*) and completion (e.g., *Done*).
* **Target Branch**: Specify the branch where AI changes should be proposed (e.g., `qa` or `main`).
Define how Revolte should interact with your Jira statuses.
* **Action**: Select `Developer workflow`.
* **Mapping**: Choose which statuses trigger development (e.g., *To Do* to *In Progress*) and completion (e.g., *Done*).
* **Target Branch**: Specify the branch where AI changes should be proposed (e.g., `qa` or `main`).
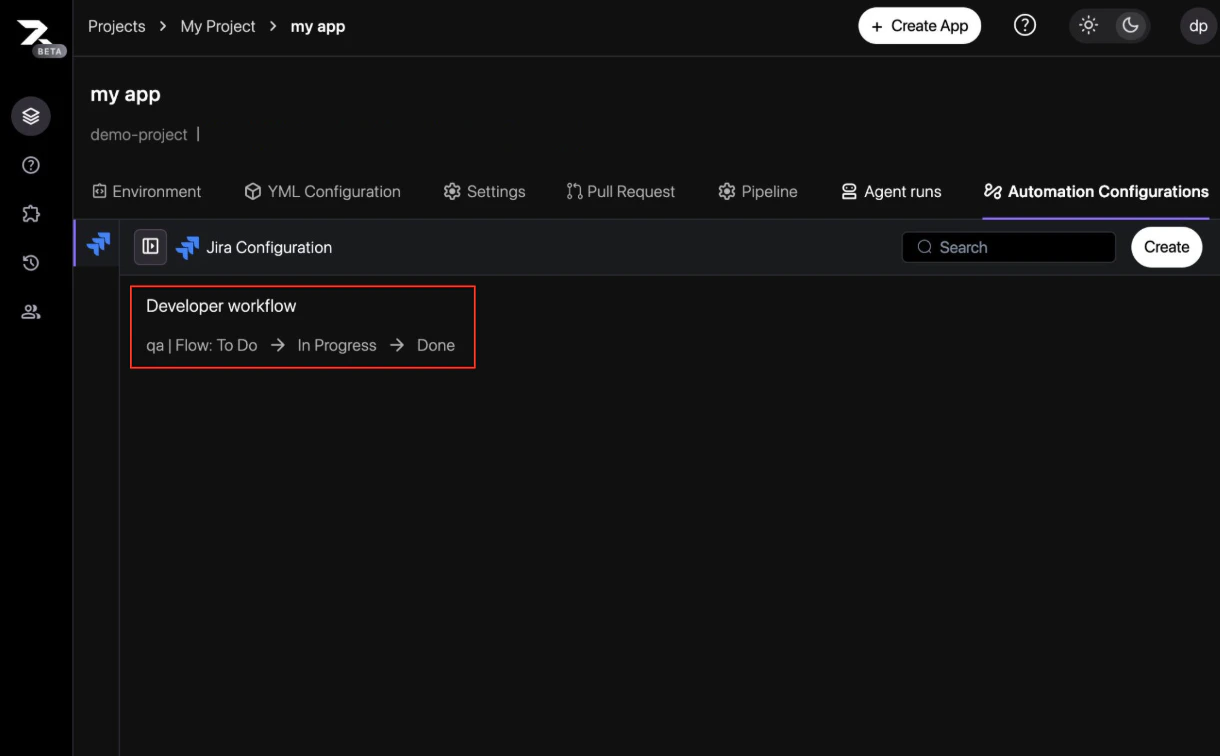
 Once saved, your new workflow will appear in the active configurations list, showing the branch mapping and status flow.
 To trigger the workflow for a specific task, open the ticket in Jira and locate the **Revolte** section in the right sidebar. Under **Select Application**, select your target application service from the dropdown menu.
See the [Jira Integration Guide](/integrations/project-management/jira#triggering-workflows-from-jira) for detailed integration steps.
To trigger the workflow for a specific task, open the ticket in Jira and locate the **Revolte** section in the right sidebar. Under **Select Application**, select your target application service from the dropdown menu.
See the [Jira Integration Guide](/integrations/project-management/jira#triggering-workflows-from-jira) for detailed integration steps.
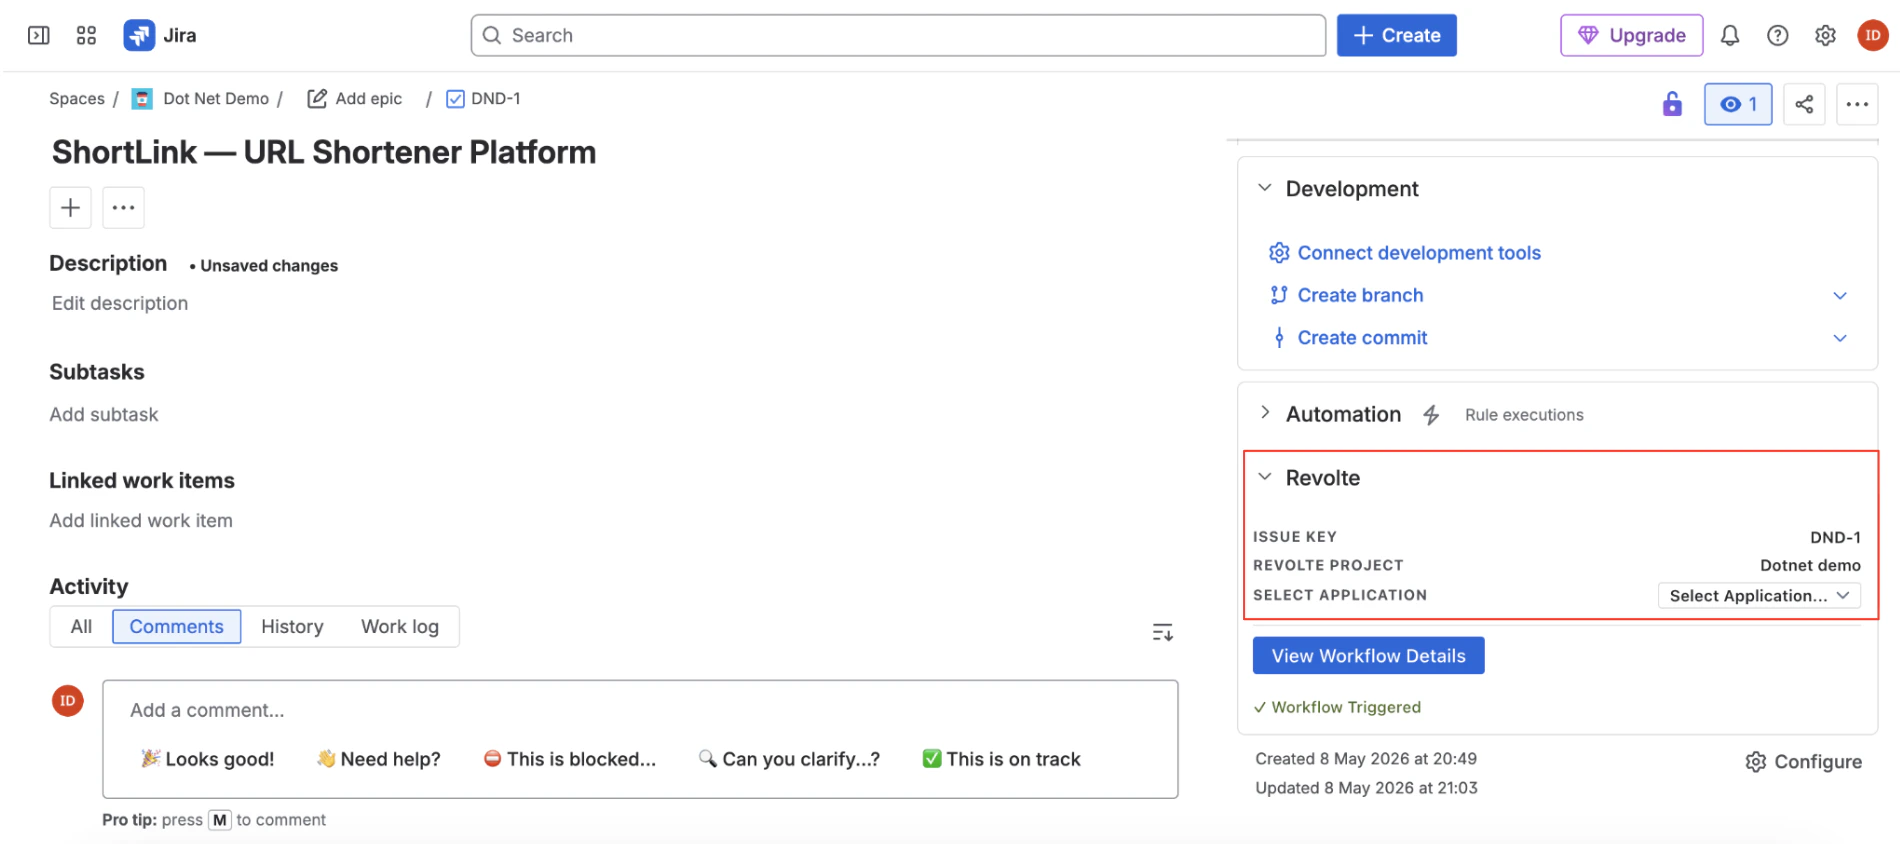 Selecting the application instantly triggers the AI agent workflow. The sidebar updates to display a **Workflow Triggered** success status. Click the **View Workflow Details** button to jump directly into the live agent execution dashboard.
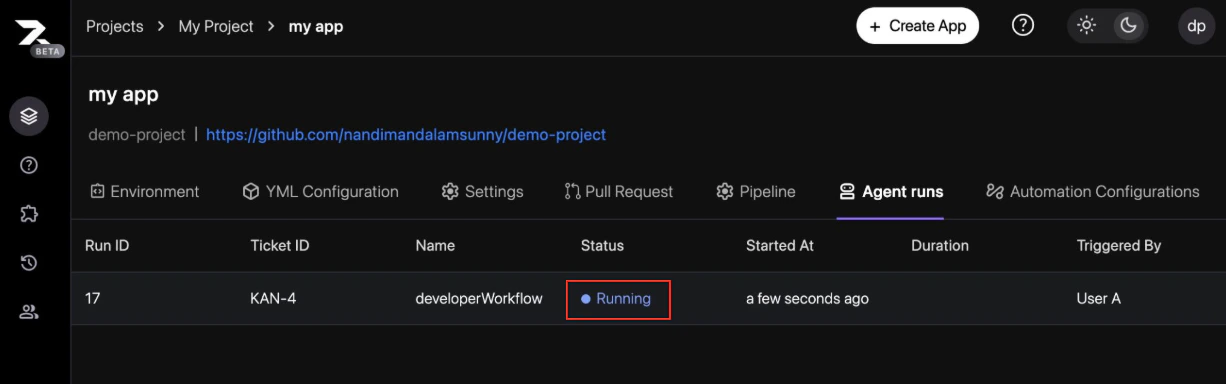
Switch back to the Revolte dashboard under **Agent runs** to see the real-time status of your workflow.
Selecting the application instantly triggers the AI agent workflow. The sidebar updates to display a **Workflow Triggered** success status. Click the **View Workflow Details** button to jump directly into the live agent execution dashboard.
Switch back to the Revolte dashboard under **Agent runs** to see the real-time status of your workflow.
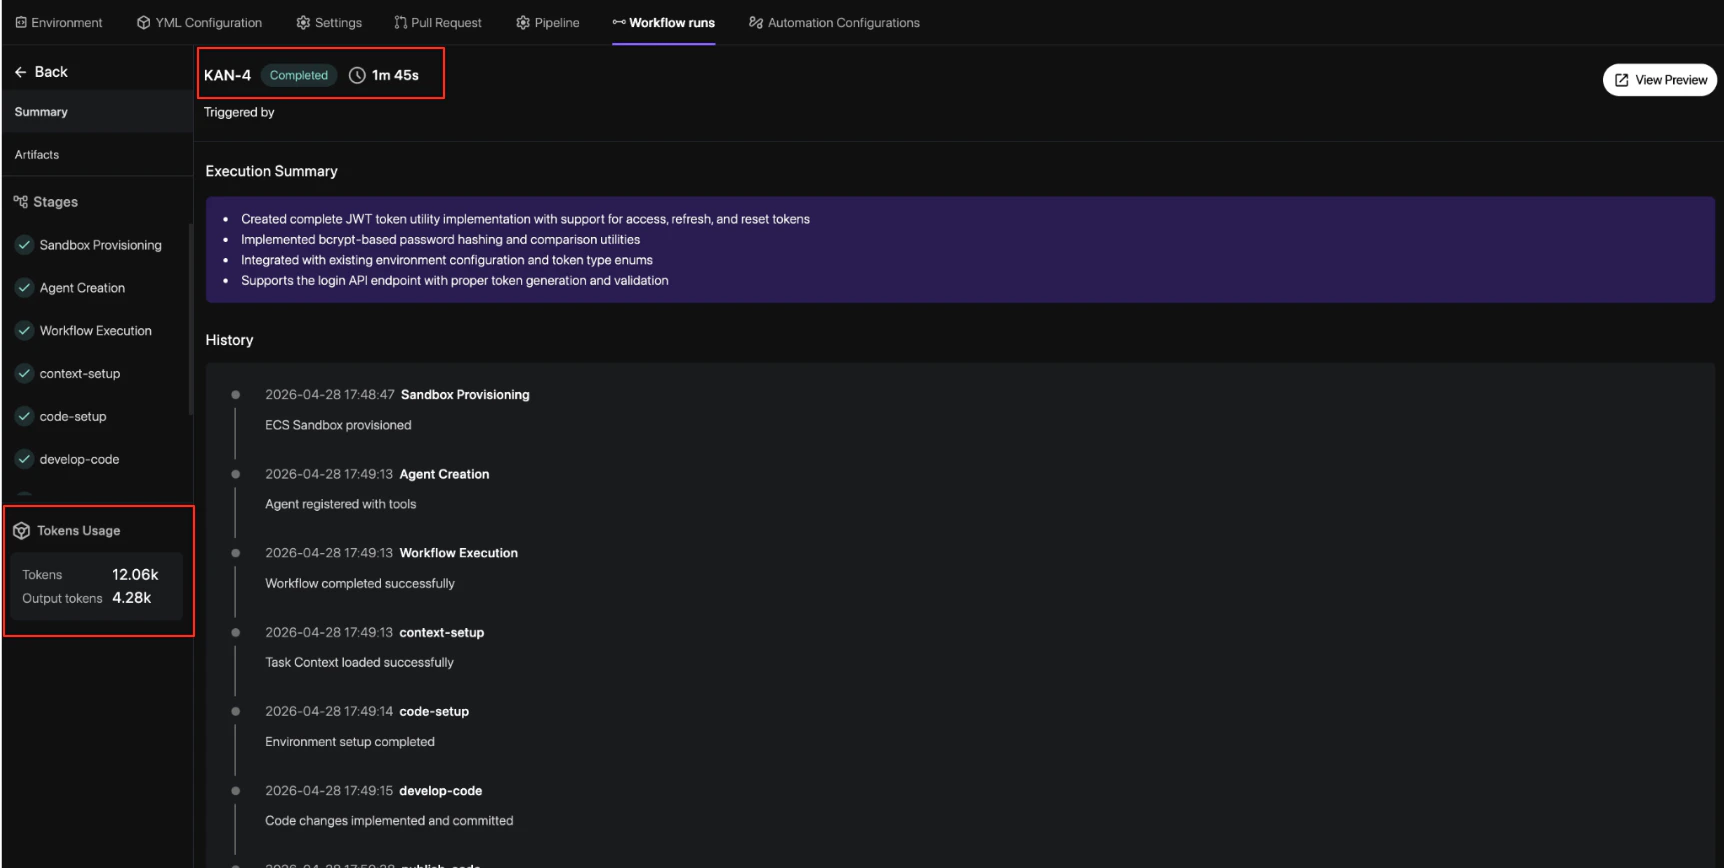
 Once complete, drill down into the run to see the execution stages, including Sandbox Provisioning, Code Setup, and Token Usage statistics.
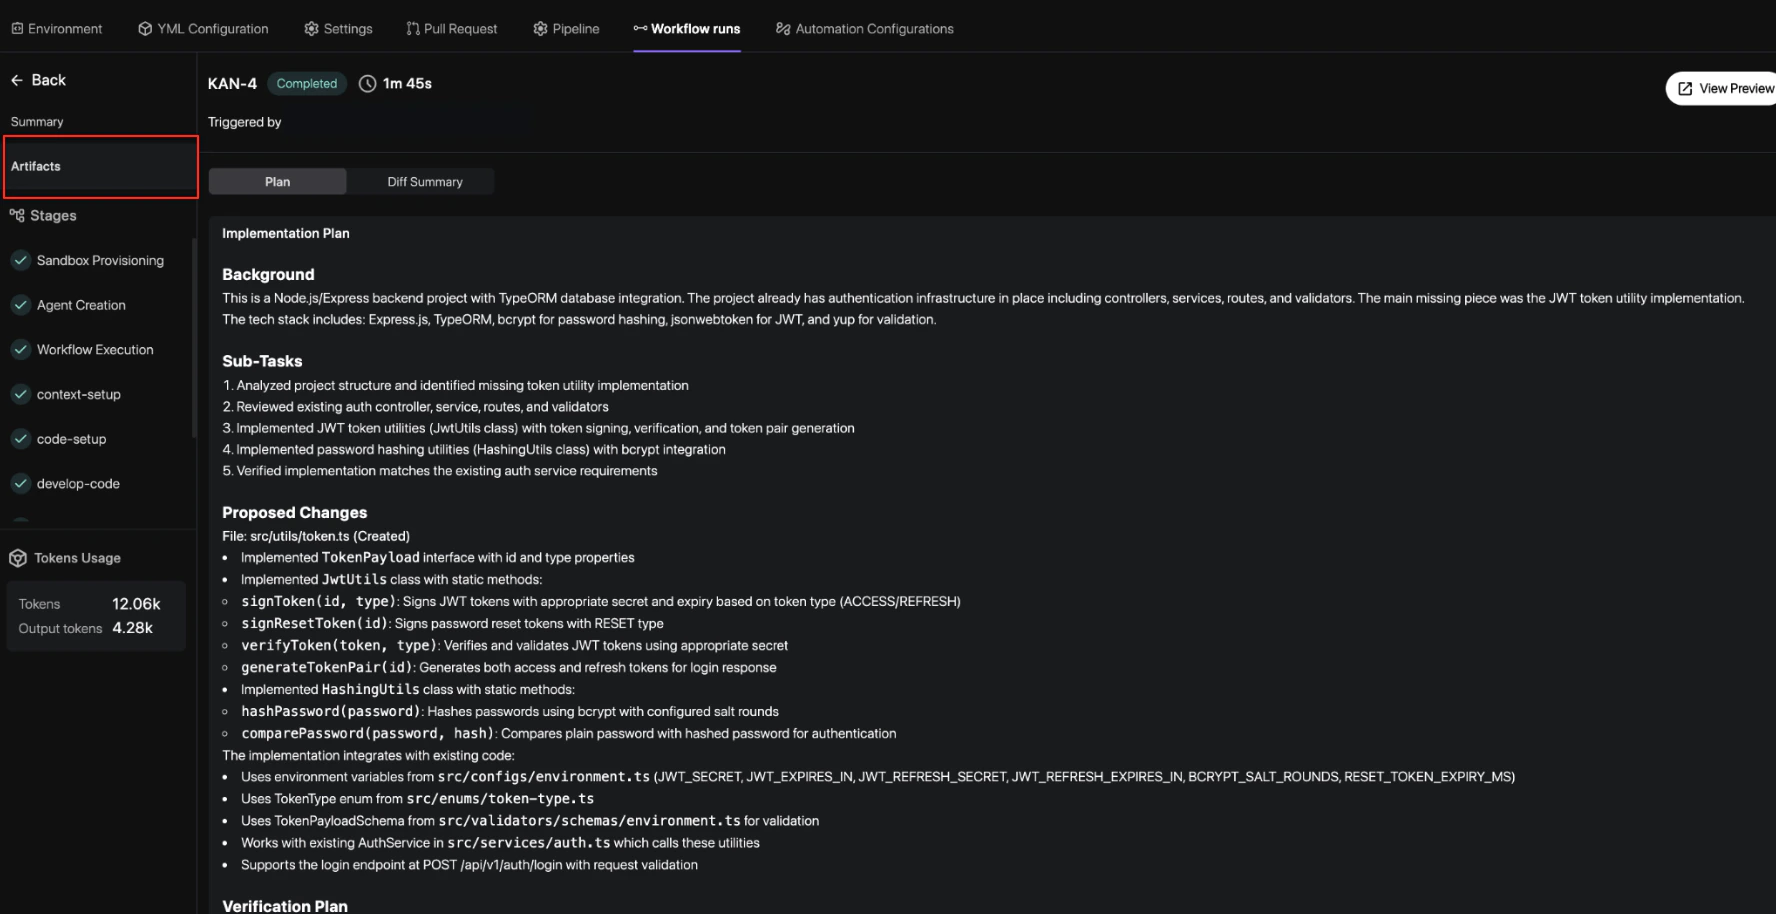
 Navigate to the **Artifacts** tab to review the AI-generated implementation plan, including sub-tasks and proposed file changes.
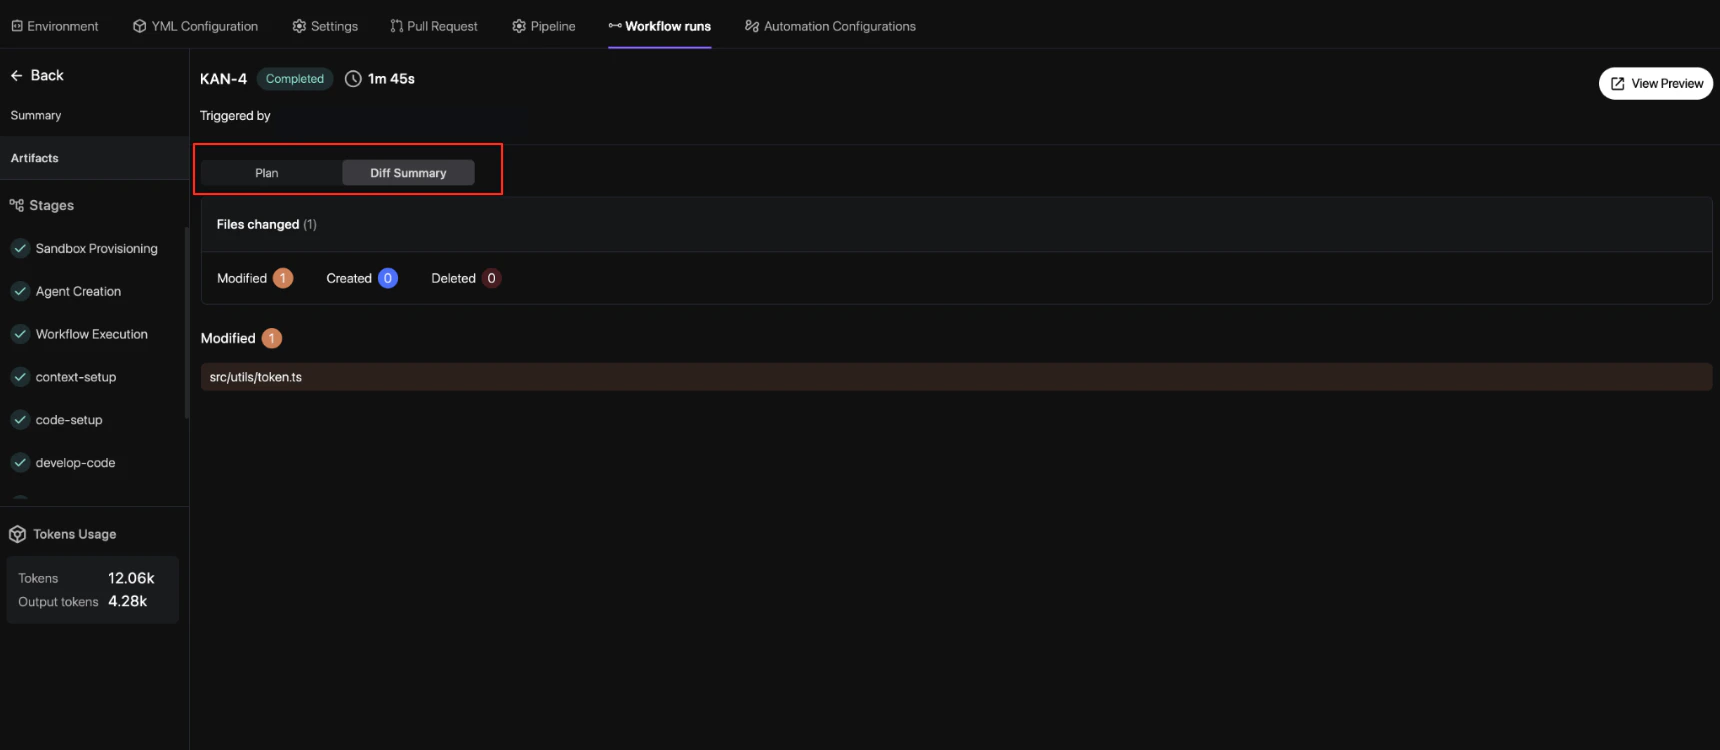
 Finally, use the **Diff Summary** tab to inspect every line of code modified or created by the agent before finalizing the delivery.
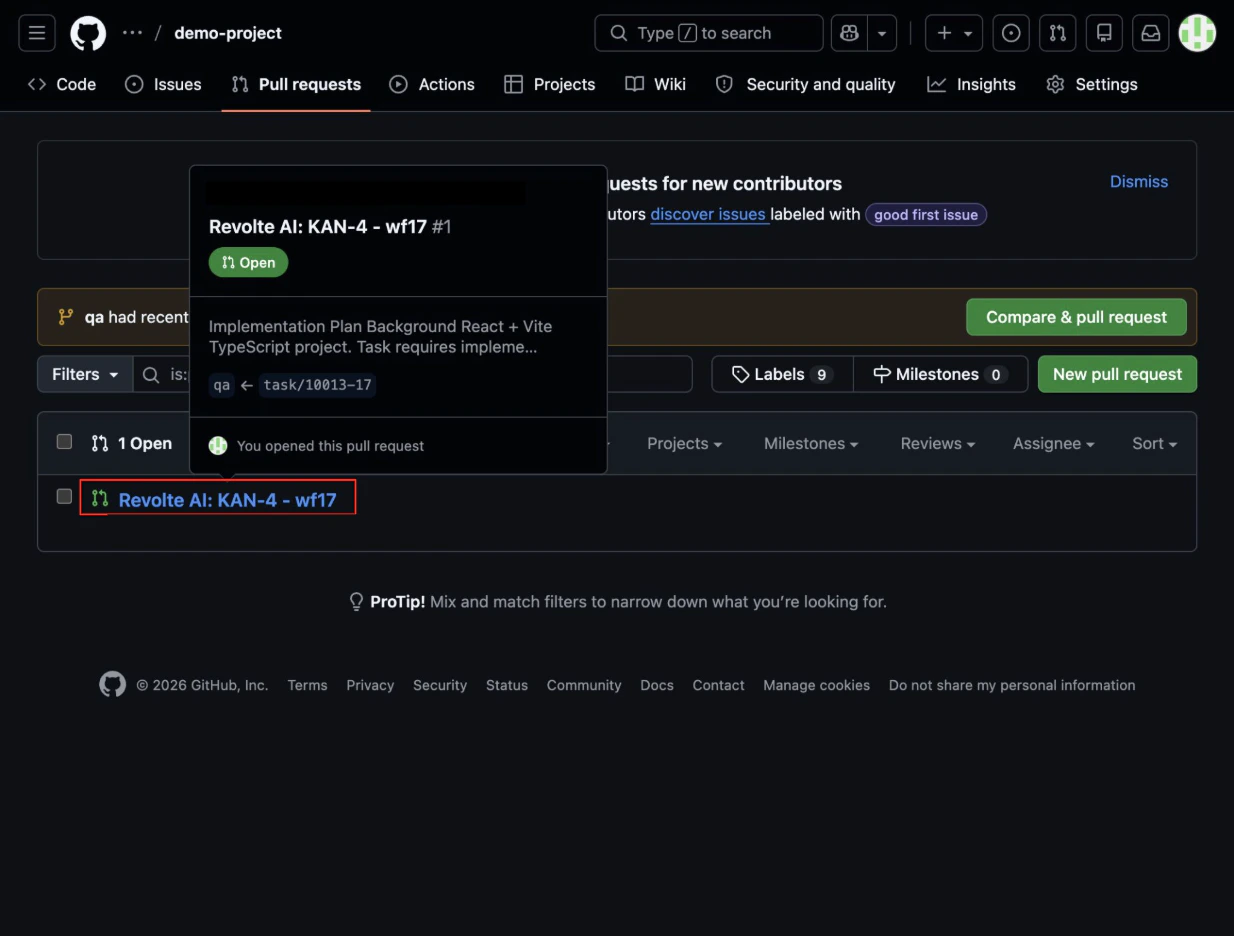
 Once the agent finishes, it automatically opens a Pull Request on GitHub (or your configured Git provider) so you can review and merge the proposed changes.
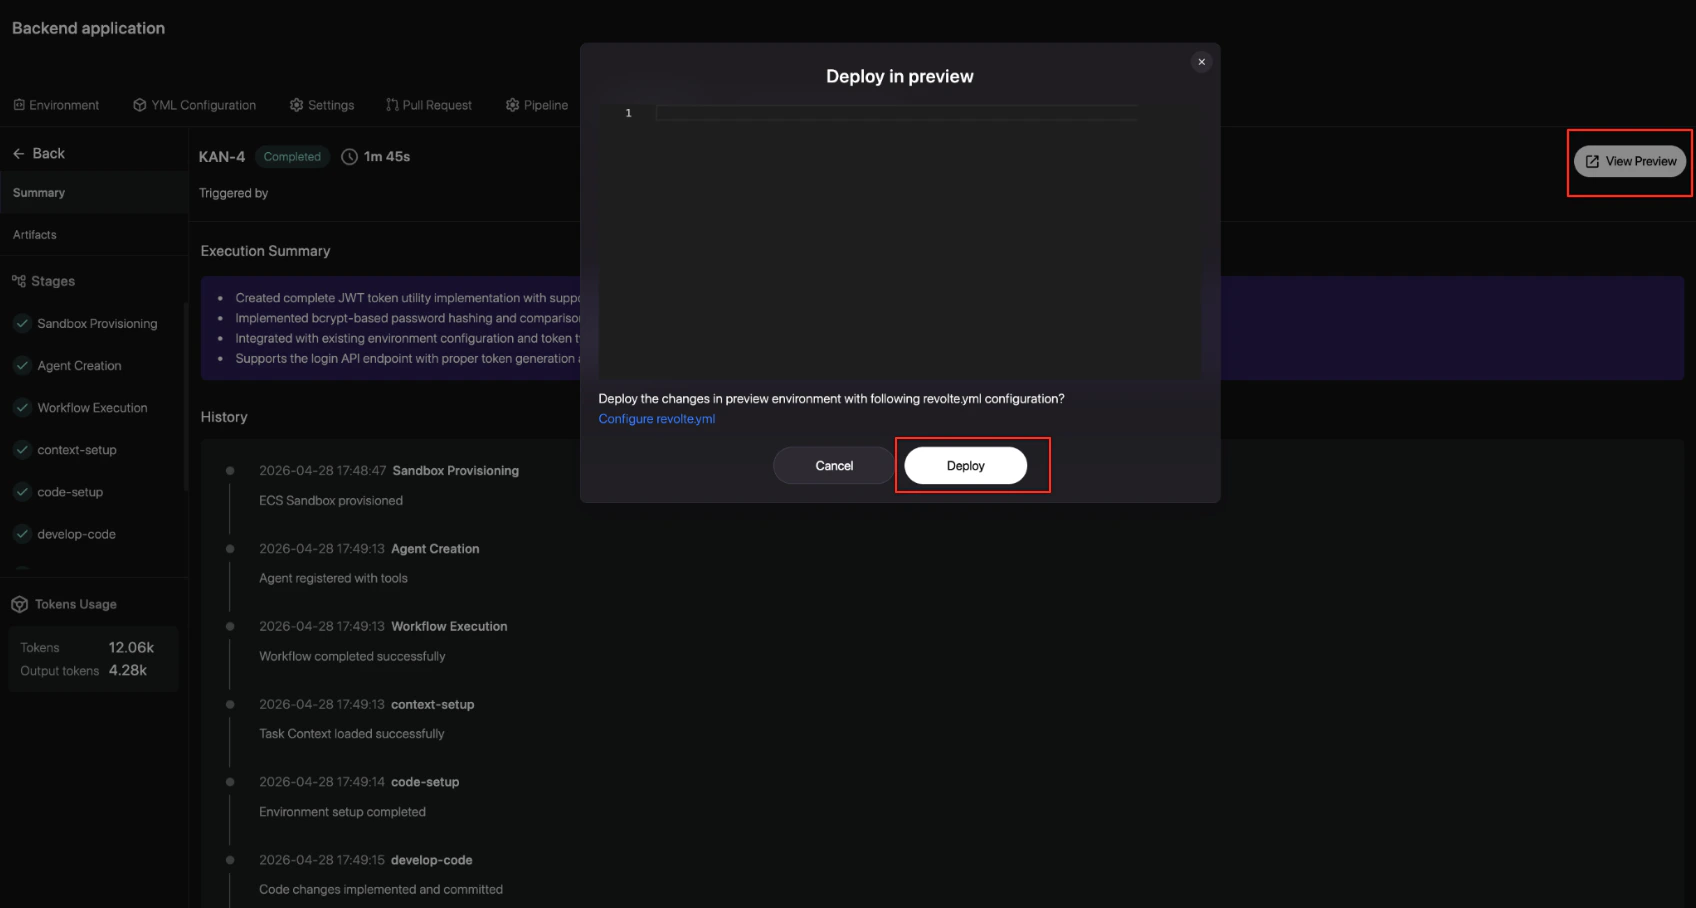
 After merging, you can deploy the changes to a preview environment. Click **View Preview** and confirm the deployment using your [`revolte.yml`](/yaml/overview) configuration.
 ## Next steps
* [Overview of Development Workflows](/ai-workflows/development-workflow/overview)
* [Quality Assurance Gates](/ai-workflows/quality-assurance) Coming Soon
* [Product Strategy Automation](/ai-workflows/product-strategy) Coming Soon
## Next steps
* [Overview of Development Workflows](/ai-workflows/development-workflow/overview)
* [Quality Assurance Gates](/ai-workflows/quality-assurance) Coming Soon
* [Product Strategy Automation](/ai-workflows/product-strategy) Coming Soon